23
Listen for the next triple beep and/or see the countdown clock reach
32
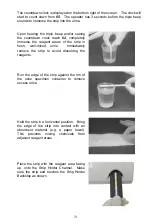
. Immerse
a new second strip in fresh, well-mixed urine. Repeat the strip testing steps
above. Lay the second urine-exposed strip on a paper towel, with reagent pads
up. Wait for the first strip to complete testing and the Strip Holder to move out.
Listen for the next triple beep and/or see the countdown clock reach
2
. Immerse
a new third strip in fresh, well-mixed urine. Repeat the strip testing steps above.
Lay the third strip on a paper towel with reagent pads up. Wait for the Strip Holder
to move out.
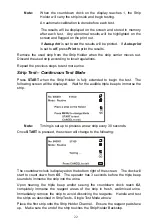
Note:
When the countdown clock reaches 1, the Strip Holder will carry the
first strip inside. The countdown clock also returns to 30. The
results will be displayed on the screen for several seconds and
stored in memory. If Auto-print is on, the results will be printed.
Remove the completed first strip after the Strip Holder moves out. Immediately
place the second strip on the Strip Holder before the countdown clock reaches
1
.
The Strip Holder will carry the new strip inside for analysis.
Note:
The operator has about 8 seconds to discard the used strip and
place the next strip on the Strip Holder.
After the first time the countdown clock reaches
1
, it will return to
30
instead of
65
.
A triple beep occurs every 30 seconds. This prompts the operator to immerse a
new strip.
Discard the used strip according to local regulations.
Repeat the above process for additional urine specimens.
Press
Cancel
to stop testing when all tests are done.
Normal Operation, Barcode reader installed
Plug the RS232C cable from the
Barcode reader
into the
Standard
RS232C Port
in the back of the analyzer. Use the cable supplied with the
Barcode reader
.
Refer to Appendix 5
Barcode reader
for specifications and compatibilities.
If both the optional
Barcode reader
and external data transmission capability are
used at the same time, use the serial splitter cable to connect both external
computer and
Barcode reader
to the analyzer
Standard
RS232C port
.
Ensure the analyzer parameters are configured properly as described in
Section 4
Analyzer Setup
,
with
Barcode Reader
set to
Yes
. Turn the power switch
located at the back panel of the analyzer on.
Strip Test – Single Test Mode with Barcode reader
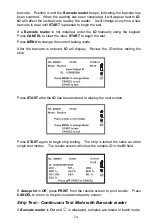
Press
START
from the Initial Screen.
A prompt to scan the Barcode ID with the reader will display. Holding the
Barcode reader
over the barcode on the specimen container, press the Scan
button on the
Barcode reader
. A red illuminated line will appear over the
barcode to be read. Move the
Barcode reader
to align the red line over the


