


①
②
③
④
- 7 -
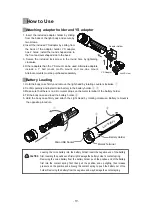
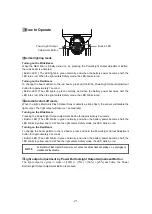
1.アダプターホルダーをライト本体後方より奥
まで差し込み、六角レンチ(小)で2カ所のネジ
を締めて取り付けてください。
2.YSアダプターをアダプターホルダーの後方より
差し込みます。YSアダプターには2カ所の穴が
ありますが、正円側を前方に、楕円側を後方にし
て取り付けてください。
3.六角レンチ(大)で固定ネジを締め込み固定します。
4.YSタイプの各種アームの展開が可能です。
※同様にして、オプションのウルトラアダプター、
GoProアダプター、Loc-Lineアダプターを取り付けることができます。
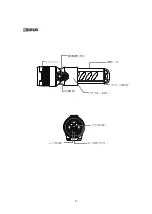
使用方法
アダプターホルダーとYSアダプターの取り付け
アダプター
ホルダー
YSアダプター
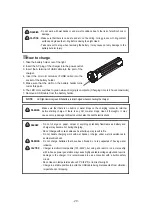
バッテリーホルダー
マイナス側
プラス側
Li-ionバ
ッテ
リー
金属端子
マイクロUSBソケット
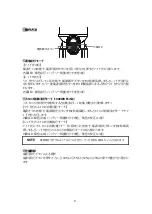
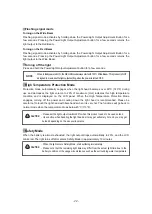
バッテリーホルダーへのLi-ionバッテリーの装填は、必ずマイナス側から行ってく
ださい。マイナス側をあとから押し込むと接点スプリングを破損されてしまうおそ
れがあります。また、取り外しの際は必ずプラス側から行ってください。マイナス側
を先に引き出すと同じく接点スプリングを破損されてしまうおそれがあります。
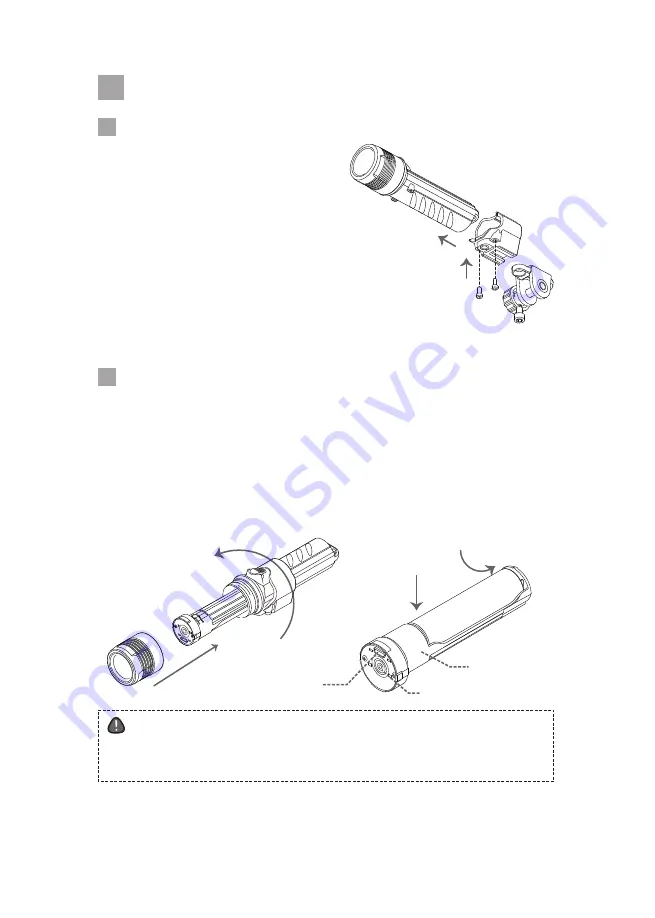
1.本体ケースをしっかりと持ち、ライトヘッドを反時計まわりに回転させ取り外します。①
2.バッテリーホルダーのプラス/マイナスを確認し、Li-ionバッテリーの極性を合わせ、マ
イナス側より押し込んで装填します。②③
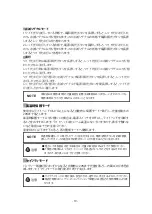
3.バッテリーホルダーの金属端子部に汚れ、水滴などが付着していないか確認します。
4.マイクロUSBソケットが下になる向きで、バッテリーホルダーをスライドさせて本体ケー
スに装填します。
(向きが正しくないと奥まで挿入できません)④
5.本体ケースをしっかりと持ち、ライトヘッドを時計まわりに回転させて取り付けます。
※バッテリーの取り外しは逆の手順で行います。
バッテリー装填手順
注意
-
+
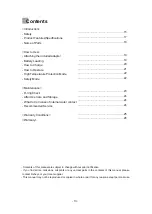
Summary of Contents for FIX NEO Mini 1000 WR FS
Page 1: ...NEO Mini 1000WR FS user manual...
Page 2: ...2 O 3 5 6 7 7 8 9 10 10 11 12 13 28...
Page 3: ...3 FIX NEO Mini...
Page 4: ...4 100m O...
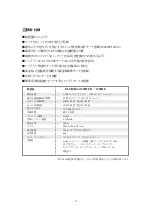
Page 6: ...6 LED LED LED...
Page 7: ...7 1 2 2 YS YS 2 3 4 YS GoPro Loc Line YS YS Li ion USB Li ion 1 2 Li ion 3 4 USB 5...
Page 8: ...8 O O O O LED 1 2 AC 3 USB A 4 USB B USB 5 LED 6 LED 4 7 USB 100 240V 30 USB NOTE...
Page 9: ...9 1000WR FS LED 1 1 LED 1 1 LED NOTE 1 2 LED 2 LED 100 75 50 25...
Page 10: ...10 OFF ON 100 NOTE 4 NOTE 60 20 OFF 45 25 20 LCD 10 1 2...
Page 11: ...11 O O O O O O O O O O O O O O O O FIX NEO Mini O O 1 2 O...
Page 12: ...12 1 10 20 2 3 4 O O 1 5 6 O 1 2 O FIX NOTE Tel 03 5988 0191...
Page 13: ...13 1 2 3 4 5 6 7 8...
Page 26: ...26 Memo...
Page 27: ...27 Memo...


