background image


F1300N.2 Rotary Table Operating Manual 


© 2022 Fisnar 

- 4 - 

F1300N.2 Rev 01 

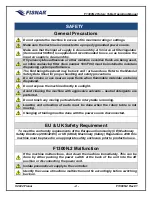
General Precautions 


Do not operate the machine in excess of its maximum ratings / settings. 


Make sure the machine is connected to a properly grounded power source. 


Make sure that the input air supply is clean and dry. A 5 micron air filter/regulator 

(item number 560567) is supplied and recommended to use, so as to ensure the 

input air supply is clean and dry. 


If Cyanoacrylates adhesives or other moisture sensitive fluids are being used, 

an inline coalescing filter (item number 560779C) must be installed to maintain 

dispensing system performance. 


The fluid being dispensed may be toxic and / or hazardous. Refer to the Material 

Safety Data Sheet for proper handling and safety precautions. 


Do not smoke or use near an open flame when flammable materials are being 

dispensed. 


Do not expose the machine directly to sunlight. 


Avoid cleaning the machine with aggressive solvents – neutral detergents are 

preferred. 


Do not touch any moving parts while the rotary table is running. 


Loading and unloading of parts  must be done when the rotary table is not 

moving. 


Changing of tooling must be done with the power source disconnected. 


EU & UK Safety Requirement 

To meet the conformity requirements of the European Community (CE) Machinery 

Safety Directive (2006/42/EC) or UK (UKCA) Machinery (Safety) Regulations 2008 this 

machine must be placed in an appropriate safety enclosure prior to production use.


F1300N.2 Malfunction 


If the machine malfunctions, shut down the machine immediately. This can be 

done by either pushing  the power switch  at the back of the unit  into the off 

position or disconnecting the power cord. 


Isolate pneumatic air supply to the controller. 


Identify the cause of machine malfunction and fix accordingly before switching 

back on. 


      SAFETY


Summary of Contents for F1300N.2

Page 1: ...F1300N 2 Rotary Table Operating Manual info fisnar com www fisnar com ...

Page 2: ...Setup 28 Operation Modes 31 Standard Mode 31 Pulse Mode 34 Index Mode 37 Warning Messages 40 Emergency Stop 40 Door Open 41 Reset Machine 42 Home Machine 43 Alarm In 44 Machine Not In Start Position 45 Cycle Count Limit 46 External Dispenser Actuation 47 EXT Connector 48 Safety Connector 49 Internal Safety Relay 50 I O Connector 51 Schematic 51 Output Signal Logic 52 Input Signal Logic 52 Output S...

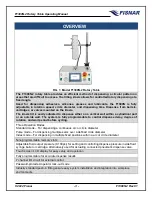
Page 3: ...lly programmable to control dispense delay degree of rotation and wait period before cycling Three Operation Modes Standard mode For dispensing a continuous arc or circle diameter Pulse mode For dispensing multiples arcs over a defined circle diameter Index mode For dispensing in multiple fixed positions within a arc or circle diameter Nine programmable memory slots Adjustable fluid output pressur...

Page 4: ...ammable materials are being dispensed Do not expose the machine directly to sunlight Avoid cleaning the machine with aggressive solvents neutral detergents are preferred Do not touch any moving parts while the rotary table is running Loading and unloading of parts must be done when the rotary table is not moving Changing of tooling must be done with the power source disconnected EU UK Safety Requi...

Page 5: ...rical noise is present Fire Prevention Refer to the following instructions to avoid any fire or explosion Assess your surroundings and the location of the nearest fire extinguisher and Emergency Exit Do not smoke or use near an open flame when flammable materials are being dispensed Immediately disconnect power if any sparking or smoke appears Do not expose the machine directly to sunlight Mainten...

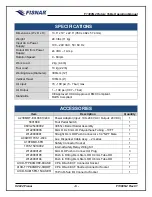
Page 6: ...ect Air Plug 3 W124000185 Push In Fitting 6mm Stem OD X 4mm Tube OD 1 W124000194 Push In Fitting 8mm Stem OD X 6mm Tube OD 1 A10D TYPE9MHP2 9CASE 9 Pin D Sub EXT Connector Socket 1 A10D TYPE9MHP2 SHORT 9 Pin D Sub EXT Shorted Connector Socket 1 A10D SUB15FR 15CASER 15 Pin D Sub I O Connector Socket 1 SPECIFICATIONS Dimensions W x D x H 13 8 x 19 x 22 6 350 x 482 x 574 mm Weight 24 3 lbs 11 kg Inpu...

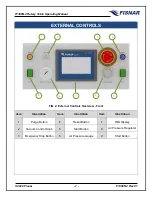
Page 7: ...TROLS FIG 2 External Controls Overview Front Item Illustration Item Illustration Item Illustration 1 Purge Button 4 Reset Button 7 HMI Display 2 Vacuum Control Knob 5 Start Button 8 Air Pressure Regulator 3 Emergency Stop Button 6 Air Pressure Gauge 9 Start Button 1 2 3 4 9 7 5 6 8 ...

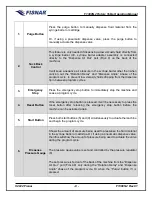
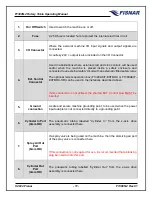
Page 8: ...3 Emergency Stop Press the emergency stop button to immediately stop the machine and cease a program cycle 4 Reset Button If the emergency stop button is pressed it will be necessary to press the reset button after releasing the emergency stop button before the machine can be actuated again 5 Start Button Press both start buttons 5 and 9 simultaneously to actuate the machine and begin the program ...

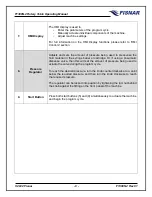
Page 9: ...he fluid material in the syringe barrel or cartridge Or if using a pneumatic dispense valve then this will set the amount of pressure being used to actuate the valve during the program cycle To reach the desired pressure turn the knob counterclockwise to a point below the required pressure and then turn the knob clockwise to reach the required pressure The regulator can be locked into position by ...

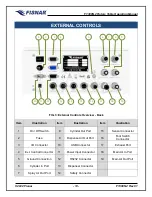
Page 10: ...ylinder Out Port 15 Sensor Connector 2 Fuse 9 Dispense Air Out Port 16 Foot Switch Connector 3 I O Connector 10 USB Connector 17 Exhaust Port 4 Ext Control Connector 11 Power Input Connector 18 Main Air In Port 5 Ground Connection 12 RS232 Connector 19 Main Air Out Port 6 Cylinder In Port 13 Dispenser Connector 7 Spray Air Out Port 14 Safety Connector 1 2 3 4 5 6 7 8 9 14 15 16 13 17 11 10 12 18 1...

Page 11: ...e operation box F1300AKIT EXTBOX or F1300AKIT EXTBOX SR can be used in the instances described above If this connection is not utilized the shorted EXT Control plug MUST be inserted 5 Ground connection A safe and secure machine grounding point to be used when the power input adapter is not connected directly to a grounding point 6 Cylinder In Port 4mm OD The pneumatic tubing labelled Cylinder In f...

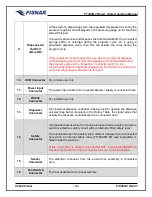
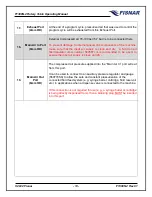
Page 12: ...nector For internal use only 11 Power Input Connector The power input cable from the external power supply is connected here 12 RS232 Connector For internal use only 13 Dispenser Connector If an external dispense controller is being used to operate the dispense valve syringe barrel mounted on the Rotary Table the signal wires that actuate the dispense controller are to be connected here 14 Safety ...

Page 13: ... regulator item number 560567 is recommended to be used to ensure the input air supply is clean and dry 19 Main Air Out Port 6mm OD The compressed air pressure supplied into the Main Air In port will exit from this port It can be used to connect to an auxiliary pressure regulator and gauge 560779SK to allow the safe and constant pressurization of the connected fluid feed system e g syringe barrel ...

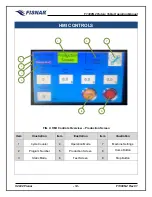
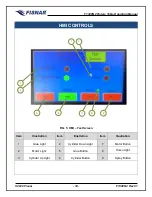
Page 14: ...I CONTROLS FIG 4 HMI Controls Overview Production Screen Item Illustration Item Illustration Item Illustration 1 Cycle Counter 4 Operation Mode 7 Machine Settings 2 Program Number 5 Production Screen 8 Home Button 3 Static Mode 6 Test Screen 9 Stop Button 1 3 2 4 5 6 7 8 9 ...

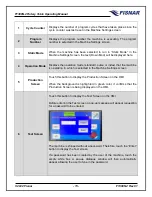
Page 15: ...se or index that the machine is operating in which is selected in the Machine Settings screen 5 Production Screen Touch this button to display the Production Screen on the HMI When the background is highlighted in green color it confirms that the Production Screen is being displayed on the HMI 6 Test Screen Touch this button to display the Test Screen on the HMI Before entering the Test screen a p...

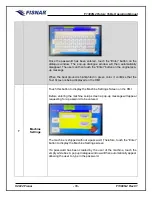
Page 16: ...s that the Test Screen is being displayed on the HMI 7 Machine Settings Touch this button to display the Machine Settings Screen on the HMI Before entering the machine setup screen a pop up message will appear requesting for a password to be entered The machine is shipped without a password Therefore touch the Enter button to display the Machine Settings screen If a password has been created by th...

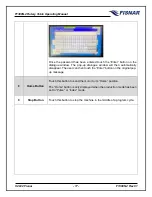
Page 17: ...ogue window will then automatically disappear The user can then touch the Enter button on the original pop up message 8 Home Button Touch this button to send the motor to its Home position The Home button is only displayed when the production mode has been set to Pulse or Index mode 9 Stop Button Touch this button to stop the machine in the middle of a program cycle ...

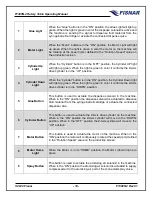
Page 18: ...N 2 Rev 01 HMI CONTROLS FIG 5 HMI Test Screen Item Illustration Item Illustration Item Illustration 1 Glue Light 4 Cylinder Down Light 7 Motor Button 2 Motor Light 5 Glue Button 8 Home Light 3 Cylinder Up Light 6 Cylinder Button 9 Spray Button 3 1 2 4 7 9 6 5 8 ...

Page 19: ...t up green When the light is green in color it confirms the Z Axis drive cylinder is in the DOWN position 5 Glue Button This button is used to actuate the dispense solenoid in the machine When in the ON position the dispense solenoid is actuated to dispense fluid material from the syringe barrel cartridge or actuate the connected dispense valve 6 Cylinder Button This button is used to actuate the ...

Page 20: ...top Condition 8 Change Test Password 15 Cycle Count Limit 2 Firmware Version 9 Change Setup Password 16 Current Cycle Count 3 Total ON Time 10 Operation Mode 17 Reset Count 4 Total Cycles 11 Static Mode 18 Screen Lock 5 Motor Acc Time 12 Spray Mode 19 Back 6 Motor Rotation 13 Language 7 Auto Cycle Delay 14 Program Select 1 4 9 11 12 10 2 3 5 6 7 8 13 14 15 16 19 17 18 ...

Page 21: ...me Displays the total number of minutes the machine has been switched on for This counter is not resettable 4 Total Cycles Displays the total number of completed cycles made by the machine This counter is not resettable 5 Motor Acc Time Sets the time it takes for the motor to reach the RPM value set in the production screen The time is set in milliseconds The higher the value the longer the time o...

Page 22: ...ve cylinder remaining in the DOWN position when the program cycle has been completed 12 Spray Mode This is to be activated when a pneumatic spray valve is connected directly to the machine When activated the pre spray and post spray time parameter values will be displayed on the Production screen Note Spray Mode can only be used when the Operation Mode of the machine is set to Standard Mode 13 Lan...

Page 23: ...7 Reset Count Touch and hold down the Reset Count button for 2 seconds to reset the Current Cycle Count value to zero 18 Screen Lock When Screen Lock is activated it will lock all machine parameters on the Production screen and prevent the operator from accessing the Test screen 19 Back Touch the Back button to exit the Machine Setting screen and return back to the Production screen on the HMI ...

Page 24: ...s not required to conform to these standards 2 Fix the Vertical Rod assembly 1 onto the main worktable of the machine using the 4 off M5 socket head screws provided in the accessories bag 3 Slide the Horizontal Rod assembly 2 down and onto the Vertical Rod Assembly 1 Position initially at the top of the Vertical Rod Assembly 1 Use the clamping lever 3 to lock in position by rotating clockwise 4 Sl...

Page 25: ...eing used 8 Connect the shorted EXT Control plug provided in the accessories bag into the EXT Control port on the back of the machine This step can be ignored if a remote operation box is being used 9 Connect air hose from compressed air 70 100 psi 5 7 bar to the Main Air In port on the back of the machine 10 If the Spray Air Out Dispense Air Out or Main Air Out ports on the back of the machine ar...

Page 26: ... and out of the drive cylinder which in effect controls the movement speed The below procedure can be followed should it be necessary to adjust the speed of Z Axis drive cylinder 1 Unscrew the locking nut on the Cylinder In and Cylinder Out flow regulator push in fitting by turning it counter clockwise 2 Rotate the adjustment screw on the Cylinder In flow regulator push in fitting Clockwise reduce...

Page 27: ... to the UP home position 5 Continue to repeat steps 2 and 4 until the correct speed has been obtained Note Setting the travel speeds too high may effect dispense accuracy and general machine performance due to vibration and oscillation occurring after the Z Axis drive cylinder has finished moving 6 Screw the locking nut on the Cylinder In and Cylinder Out flow regulator push in fitting by turning ...

Page 28: ...perated in Standard Mode 1 Mount the syringe barrel holder provided in the accessories bag onto the mounting plate of the Z Axis Drive assembly using the 2 off M4 countersunk socket screws provided Select the appropriate mounting holes that offer maximum work piece clearance but still allows the dispense tip to reach all dispense areas on the workpiece For improved positional repeatability when ch...

Page 29: ...regulator clockwise on the front of the machine until fluid is dispensed at a steady rate from the dispense tip Note A low viscosity fluid will require a low pressure value A high viscosity fluid will require a high pressure value Release the Purge button on the front panel of the machine once the anticipated fluid flow rate from the dispense tip has been achieved 7 If a low viscosity fluid is ins...

Page 30: ...n the dispense tip is correctly positioned tighten the clamping levers 13 Touch the Cylinder button on the HMI so it changes to OFF The Z Axis drive assembly will move upwards to the UP home position 14 Touch the Production Screen button on the HMI to enter into the Production Screen 15 Enter the required values into the parameter value cells by touching the displayed parameter value cell white co...

Page 31: ...button until the button displays the text Standard Mode Then touch the back button to exit the Machine Settings screen and return back to the Production screen 2 Touch the parameter value cell e g to input the required parameter value Dispense Angle Sets the angle degrees duration that the motor will rotate for whilst dispensing fluid material Tail Angle Sets the angle degrees duration that the mo...

Page 32: ...pense Delay Sets the time seconds after the motor starts rotating that fluid material will not be dispensed This parameter can be used when dispensing micro beads of low viscosity fluid materials and there is a need to eliminate a buildup of material at the start of the dispensing sequence onto the workpiece Rotation Speed Sets the speed rpm that the motor will rotate at during the Dispense Delay ...

Page 33: ...eously push the two green start buttons on the front panel of the machine Press the green start button on the external start stop box Supply a momentary external machine actuation input signal through the I O connector 5 The Z Axis drive cylinder will move to the DOWN position Note This step will be ignored if STATIC MODE has been activated in the Machine Settings screen 6 The dispensing cycle wil...

Page 34: ...the operation mode button until the button displays the text Pulse Mode Then touch the back button to exit the Machine Settings screen and return back to the Production screen 2 Touch the parameter value cell e g to input the required parameter value Pulse Count Sets the number of times that the Pulse Angle and Gap Angle will be repeated one after the other during the program cycle Pulse Angle Set...

Page 35: ...ary position before fluid is dispensed onto the workpiece When dispensing a high viscosity fluid material and there is a need to wait for the fluid to be dispensed out of the dispense tip and make contact with the workpiece Dispense Delay Sets the time seconds after the motor starts rotating that fluid material will not be dispensed This parameter can be used when dispensing micro beads of low vis...

Page 36: ...eously push the two green start buttons on the front panel of the machine Press the green start button on the external start stop box Supply a momentary external machine actuation input signal through the I O connector 5 The Z Axis drive cylinder will move to the DOWN position Note This step will be ignored if STATIC MODE has been activated in the Machine Settings screen 6 The dispensing cycle wil...

Page 37: ... Then touch the back button to exit the Machine Settings screen and return back to the Production screen 2 Touch the parameter value cell e g to input the required parameter value Index Angle Sets the angle degrees duration that the motor will rotate for at the end of the program cycle when the Z Axis drive cylinder reaches the UP position after completing the Dispense Time No fluid material is di...

Page 38: ...e seconds that the Z Axis drive cylinder will remain in the DOWN position at the end of the Dispense Time before moving to the UP position No fluid material is dispensed during the tail time Rotation Speed Sets the speed rpm that the motor will rotate at during the index angle A timing diagram is shown below of how all the parameters work together within a program cycle ...

Page 39: ...eously push the two green start buttons on the front panel of the machine Press the green start button on the external start stop box Supply a momentary external machine actuation input signal through the I O connector 5 The Z Axis drive cylinder will move to the DOWN position Note This step will be ignored if STATIC MODE has been activated in the Machine Settings screen 6 The dispensing cycle wil...

Page 40: ...d in the event that the Emergency Stop button on the front panel of the machine is pressed or the external E Stop circuit on the EXT connector changes to an open state The pop up message will automatically disappear when the Emergency Stop button on the front panel of the machine is released or the external E Stop circuit on the EXT connector changes to a closed state ...

Page 41: ...splayed in the event that the Door Circuit on the EXT connector controlling the safety light curtain or door switch has been broken and changes to an open circuit The pop up message will automatically disappear when the Door Circuit on the EXT connector controlling the safety light curtain or door switch has been closed and changes to a closed circuit ...

Page 42: ... STOP button on the HMI display screen is touched or when the Emergency Stop button on the front of the machine is released the pop up message is displayed requesting for the machine to be reset When the RESET button on the front panel of the machine or the reset button connected to the EXT connector is pressed the pop up message will disapper ...

Page 43: ...f the machine or the reset button connected to the EXT connector is pressed The pop up message will dissappear when The HOME MACHINE button on the HMI display screen is touched The two green start buttons on the front panel of the machine are pushed The green start button on the external start stop box is pushed A momentary external machine actuation Start input signal through the I O connector is...

Page 44: ...Rev 01 WARNING MESSAGES FIG 17 Alarm In Alarm In The pop up message is automatically displayed when the Alarm in circuit on the I O connector is activated The pop up message will automatically disappear when the Alarm in circuit on the I O connector is deactivated ...

Page 45: ...art Position The pop up message is displayed in the event that the Z Axis drive cylidnder is not in the correct start position when a program cycle is initiated When the MACHINE NOT IN START POSITION button on the HMI display screen is touched the Z Axis drive cylinder will move to the correct start position and pop up message will dissapear ...

Page 46: ...ion the pop up message is automatically displayed when the cycle count limit value is reached The pop up message will dissappear when The two green start buttons on the front panel of the machine are pushed The green start button on the external start stop box is pushed A momentary external machine actuation Start input signal through the I O connector is received ...

Page 47: ... Actuation Output A dry contact closure 0 Volt between Normally Open Pin 1 and Common Pin 2 will trigger a dispense signal to be initiated on an external dispense controller PLEASE READ Do not apply a voltage between the input pin 1 and the common pin 2 Doing so will damage the control board and void all warranty conditions ...

Page 48: ... GND 2 Start Signal 3 Door Switch COM 4 Door Switch NC 5 Reset 6 Emergency Stop In 7 Emergency Stop Out 8 24V DC 9 Purge Signal FIG 21 Ext Connector PLEASE READ When the Ext Connector is not connected to an external start stop box the SHORTED EXT connector included within the accessories must be fitted ...

Page 49: ...Pin Description 1 Brown TX 24V DC 2 Blue TX 0V DC 3 Brown RX 24V DC 4 Blue RX 0V DC 5 Black RX OSSD1 6 White RX OSSD2 PLEASE READ This connector is only to be used when connecting an external Safety Light Curtain or Door Switch to a Safety Relay sold separately fitted inside the machine Safety Connector included ...

Page 50: ... relay F1300AKIT SR sold seperately to be internally fitted and wired using the wiring kit supplied as part of the machine accessories This negates the need for additional external junction boxes to be used The provided wiring kit is used to create the correct communication connection between the safety relay and control board To create a successful connection please ensure the provided jumper wir...

Page 51: ... Power ve 0V DC 3 Alarm IN 4 Alarm IN GND 5 Alarm OUT 6 Alarm OUT GND 7 Start Signal Initialize IN 8 Start Signal Initialize IN GND 9 Machine Busy OUT 10 Machine Busy OUT GND 11 End of Cycle OUT 12 End of Cycle OUT GND 13 Internal Ground GND 14 Machine Ready OUT 15 Machine Ready OUT GND FIG 23 Input Output Schematic ...

Page 52: ...all a diode as shown to prevent damage to the output photocoupler FIG 25 Installation of Diode INPUT SIGNALS Input Type Photocoupler Input Power Pin 3 and 7 are an externally driven dry contact voltage free contact closure circuit I E Switch or Relay Input Function To activate an input signal pull the input pin pin 3 7 down to a GND pin pin 4 8 Input signals utilize the machine internal power supp...

Page 53: ...nal will remain on until the above stated conditions do not occur whereby the signal will then be automatically switched off Pin 9 Machine Busy Output When the machine is actuating a program cycle the signal will be activated When the machine is not actuating a program cycle the signal will not be activated Pin 11 End of Cycle Output When the machine has completed a program cycle the signal will b...

Page 54: ... to a GND pin the Alarm In signal will be activated resulting in the Alarm Out signal Pin 5 being activated automatically Pin 7 Start Signal Initialize IN Input When connected to a GND pin the CC Initialize signal will be activated resulting in the machine program cycle being actuated I O TIMING DIAGRAM FIG 27 I O Timing Diagram ...

Page 55: ...F1300N 2 Rotary Table Operating Manual 2022 Fisnar 55 F1300N 2 Rev 01 SPARE PARTS LIST ...

Page 56: ...0603 20400009 Solenoid Valve Dispense Spray 11 1705 10230001 Solenoid Valve Fixing Plate 12 A13AC F1300N 1DVB Driver Card 13 A22ROT AL 63 35 Din Rail Safety Relay 14 1705 10240003 Chassis Plate 15 A10COT JUMP YR Jumper Plug 16 A13AC F1300N 1TRC Control Board 17 A08RSW SW5009BAR On Off Switch 18 A22FUSE 2 5 250R Fuse 19 1705 15400006 Vacuum Control Knob 20 1705 15400007 Pressure Gauge 21 1402 10400...

Page 57: ...F1300N 2 Rotary Table Operating Manual 2022 Fisnar 57 F1300N 2 Rev 01 MACHINE DRAWING ...

Page 58: ...F1300N 2 Rotary Table Operating Manual 2022 Fisnar 58 F1300N 2 Rev 01 Z AXIS TOOLING PLATE DRAWING ...

Page 59: ...F1300N 2 Rotary Table Operating Manual 2022 Fisnar 59 F1300N 2 Rev 01 TURNTABLE DRAWING ...

Page 60: ...rly Tilt or deviation of Z Axis Cylinder x Pneumatic fittings and tubings x Appearance x Stability x Motor performance x Drive cylinder x Mechanical fixings x Electrical connections x Machine accuracy repeatability x Machine overhaul x CHECK POINT CHECK ACTION CORRECTIVE ACTION Tilt or deviation of Z Axis Cylinder The dispense tip is in the incorrect dispense position on the workpiece Loosen the a...

Page 61: ...quickly or too slowly Inspect position sensors are operating correctly Inspect and adjust pneumatic flow regulators on push in fitting of drive cylinder to achieve correct speed Mechanical Fixings Loose bolts and or mechanical fixings of axis positioning module Tighten accordingly Electrical Connections Loose connectors No I O signal Tighten electrical connectors on back of machine Inspect electri...

Page 62: ...tation 450 is one full rotation plus 90 over lapping of fluid material Tail Angle The tail angle can be used to over travel past the point at the end of the dispense angle in a continuous motion This can drag or pull thicker material to stop a stringing affect at the end of the dispense cycle and create a smooth finished joint between the start and end of the dispense bead Rotation Delay An increa...

Page 63: ...F1300N 2 Rotary Table Operating Manual 2022 Fisnar 63 F1300N 2 Rev 01 NOTES ...

Page 64: ... of the equipment to the factory during the warranty period of the equipment In no event shall any liability or obligation of Manufacturer arising from this warranty exceed the purchase price of the equipment This warranty is valid only when 5 micron filtered air is used The manufacturer s written liability as stated herein cannot be altered or enlarged except by a written statement signed by an o...

Reviews: