10
Get Started Assembling
Your New Exercise Bike
A s s e m b l y I n s t r u c t i o n s
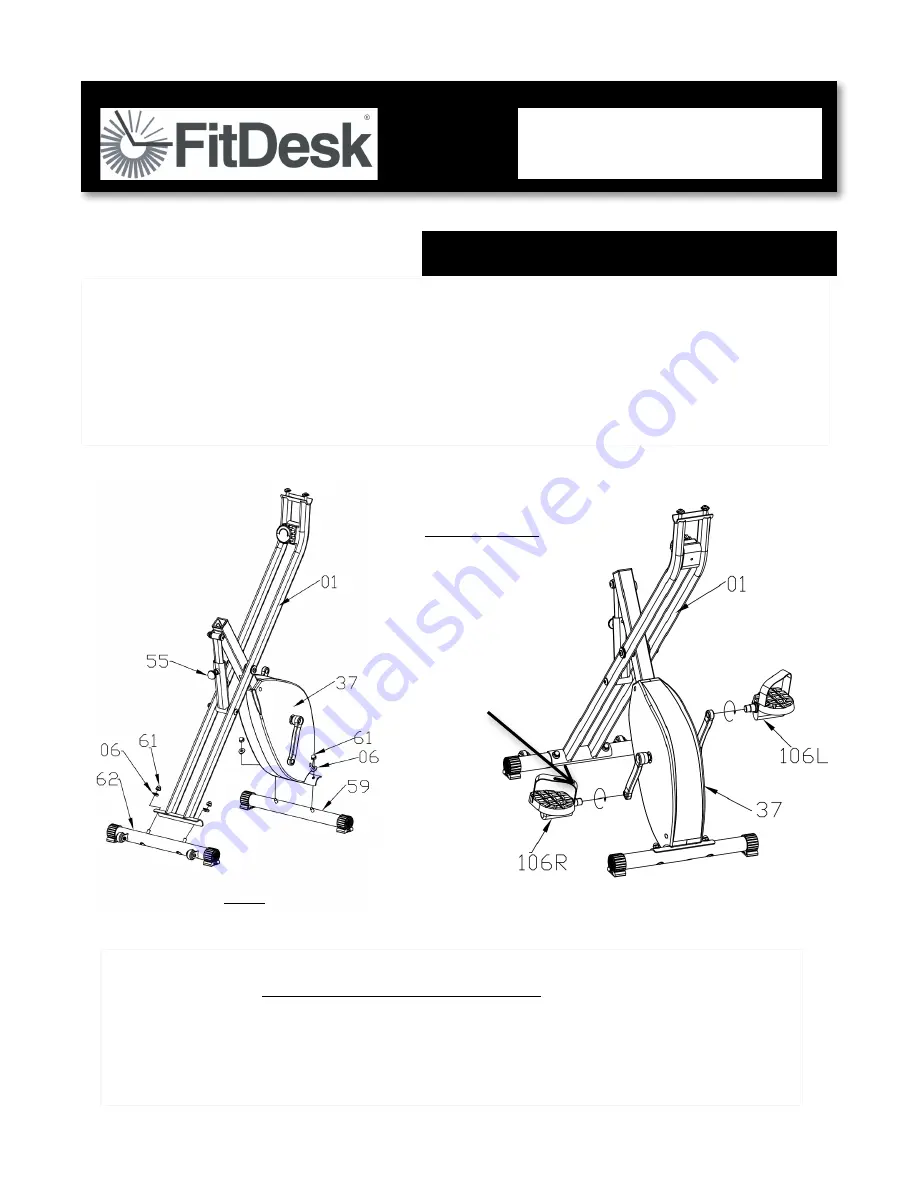
Step #1 Install Stabilizers
Remove Main Frame (01) and all components and place on a clean durable surface. Note: most
mounting hardware is pre-installed for easy matching during assembly. Tools are provided
•
Unlock Main Frame (01) to “Open” position by pulling Frame Lock Pin (55) while pushing
lightly with foot on stabilizer, then release.
•
Install front (59) and rear (62) stabilizers to Main Frame (01) with hex cap nuts (61) and
curved washer (06), tighten securely. Rear Stabilizer has transport wheels.
STEP#1
STEP#2
MOUNTING HARDWARE IS LOCATED
ON PARTS THEY ARE TO BE
INSTALLED ON FOR EASY IDENTITY
Step #2 Install Pedals
•
Note:Left Pedal installs counter clockwise.
Install by rotating to LEFT. Use
care that Pedal Shaft is Perpendicular to Crank Shaft.Use5/8” or 15mm wrench
or supplied wrench to tighten. Check pedals often for tightness when new.
•
Note:
Crank arms should be checked for tightness using 14mm socket after
first couple hours of use.
Important!
Make
Pedals
Extra
Tight !
Note: Pedals must be made extra tight. USE 5/8” or 15mm Wrench
TIP: Tap end of wrench with Hammer till EXTRA Tight. Use thread lock on pedal
threads.
Summary of Contents for FDX 2.0 - 003
Page 7: ...7...


