background image

5

VirtuFit iBiking Folding Bike

ENG

AssEMBLY INstRUctIoN

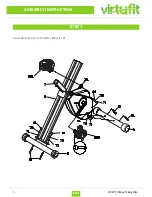
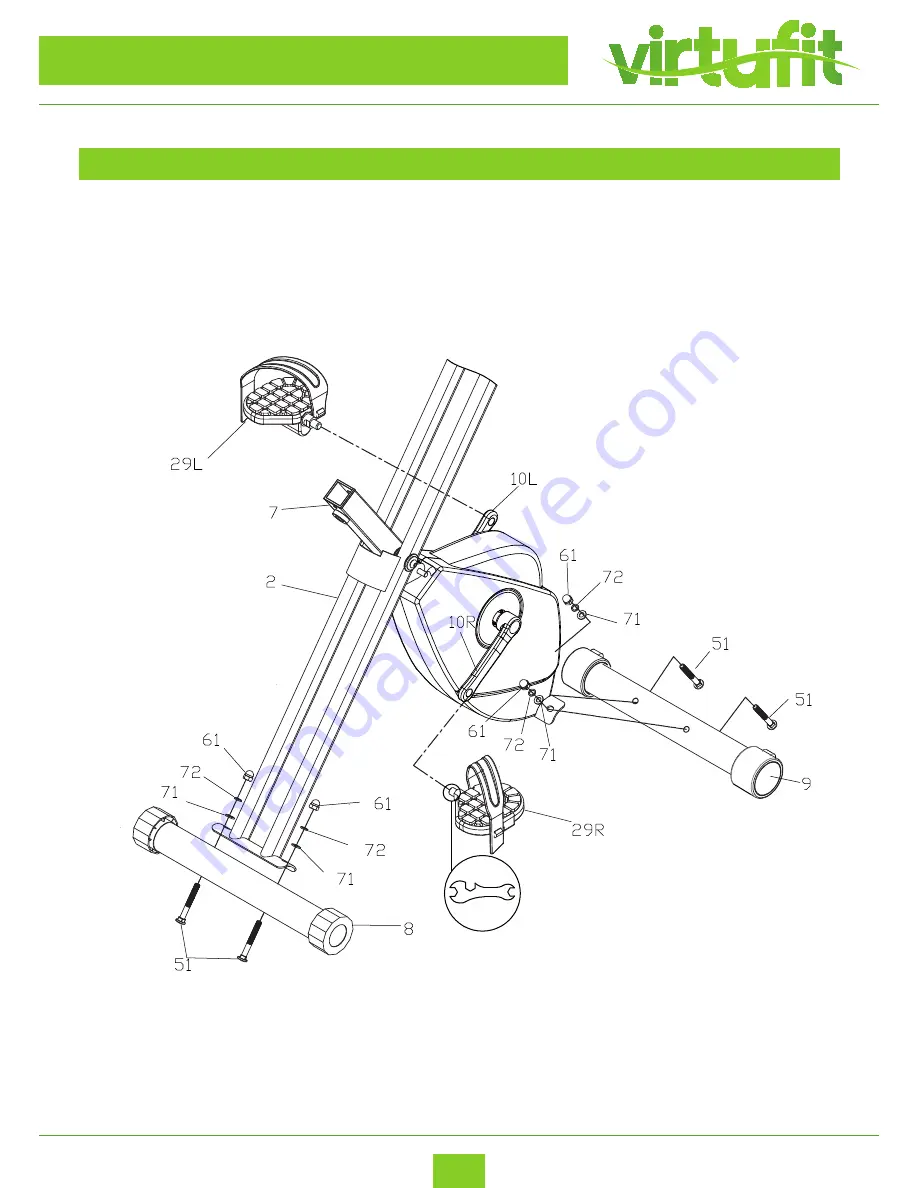
stEP 1

Assemble Rear & Front Stabilizer, Pedal (L / R).

Summary of Contents for Virtufit iBiking Folding Bike

Page 1: ...l ENG T 31 0 74 7600219 E service fitnessbenelux nl W www fitnessbenelux nl Twekkelerweg 263 7553 LZ Hengelo The Netherlands Fitness Benelux Benelux Uw partner in fitness For questions or missing parts please contact Fitness Benelux ...

Page 2: ...lding Bike CONTENTS SAFETY INSTRUCTIONS 3 CHECKLIST 4 ASSEMBLY 5 7 EXPLODED VIEW 8 PARTS LIST 9 10 RESISTANCE ADJUSTMENT 11 LEVELLING THE BIKE 11 HOW TO FOLD 12 HOW TO ADJUST 13 CONTROL PANEL OPERATION 14 16 APP INSTRUCTION 17 ...

Page 3: ...only with a damp cloth do not use solvent cleaners If you are in any doubt do not use your product but contact CUSTOMER SUPPORT by any of the means listed on the opposite page Before use always ensure that your product is positioned on a solid flat surface If necessary use a rubber mat underneath to reduce the possibility of slipping in use Always wear appropriate clothing and footwear such as tra...

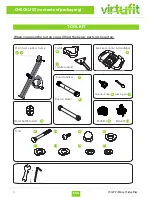
Page 4: ...er 75 75 water bottle holder X4 X4 X2 X2 X4 X4 X4 X4 75 water bottle holder X4 X4 X2 X2 X4 XX 4 4 X4 X4 75 water bottle holder X4 X4 X2 X2 X4 X4 X4 X4 75 water bottle holder X4 X4 X2 X2 X4 X4 X4 X4 75 water bottle holder X4 X4 X2 X2 X4 X4 X4 X4 75 water bottle holder X4 X4 X2 X2 X4 X4 X4 X4 75 water bottle holder X4 X4 X2 X2 X4 X4 X4 X4 75 water bottle holder X4 X4 X2 X2 X4 X4 X4 X4 75 water bottl...

Page 5: ...5 VirtuFit iBiking Folding Bike ENG AssEMBLY INstRUctIoN stEP 1 Assemble Rear Front Stabilizer Pedal L R ...

Page 6: ...6 VirtuFit iBiking Folding Bike ENG stEP 2 Assemble Saddle AssEMBLY INstRUctIoN ...

Page 7: ...7 VirtuFit iBiking Folding Bike ENG stEP 3 Assemble Handlebar Exercise Monitor AssEMBLY INstRUctIoN complete ...

Page 8: ...8 VirtuFit iBiking Folding Bike ENG ExPLodEd dRAWING 08 ...

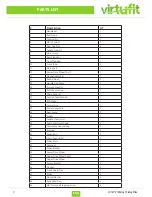
Page 9: ...Monitor 1 17 Pulse Sensor Pad 2 18 Chain Cover U 1 19 Tension Control knob 1 20 EVA Sticker 1 21 Control Line 1 22 Pulse Sensor Wire 2 23 Gear piece 2 24 Saddle 1 25 Saddle Stem Insert 1 26 Seat Adjustment Knob 1 27 Adjustable Hex and Cap 2 28 End Cap 2 29 Pedal R L 2 30 Chain Cover R L 2 31 Pulley Brush 2 32 Flywheel 1 33 Pulley Bracket 1 34 Lower Drive Wheel 1 35 Upper Drive Wheel Shaft 1 36 Upp...

Page 10: ...2 53 M6 15 mm Screw 8 54 M4 20 Self tapping Screw 4 55 M10 Nut 2 56 M6 Curved Washer 2 57 M6 Flat Washer 2 58 Flat Washer 1 59 Sensor Wire 1 60 M8 Flat Washer 3 61 M8 Dome Nut 4 62 M8 Nylon LockNut 3 63 Flat Washer 2 64 Outer Brush 4 65 Inner Brush 2 66 Lock Ring 1 67 Bearing 1 68 Flat Washer 1 69 M10 Nylon LockNut 1 70 Pulley 2 71 M8 Curved Washer 4 72 M8 Spring Washer 4 73 M6 Spring Washer 4 74 ...

Page 11: ... resistance by turning the Tension Controller Knob CLOCKWISE as required LEvELLING thE BIkE For security and stability your folding bike has a factory welded frame and once fully assembled correctly should not need further alignment However in the interest of safety please always ensure that your folding bike is positioned on a solid flat surface If necessary use a rubber mat underneath to reduce ...

Page 12: ...LdING INstRUctIoN WhEN UNFoLdEd Using the Locking Pin 3 to fold and unfold the bike When in use the Locking Pin 3 is in Position A WhEN FoLdEd Using the Locking Pin 3 to fold and unfold the bike When folded the Locking Pin 3 is in Positon B ...

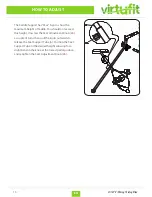
Page 13: ...dle You should not exceed this height Unscrew the Seat Adjustment Knob 26 a couple of turns then pull the knob outwards to release the Seat Support Tube 6 Position the Seat Support Tube to the desired height allowing for a slight bend in the knee at the lowest pedal position and retighten the Seat Adjustment Knob 26 ...

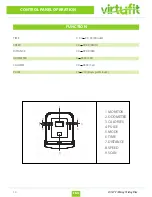
Page 14: ...ute SPEED 0 0 999 9 KM H 0 0 E C N A T S I D 999 9 KM 0 R E T E M O D O 9999 KM 0 0 S E I R O L A C 9999 Cal 0 3 E S L U P 230 Beats per Minute TIME DISTANCE SPEED SCAN ODOMETER CALORIES PULSE 1 2 3 4 5 6 7 8 9 1 MONITOR 2 ODOMETER 3 CALORIES 4 PULSE 5 MODE 6 TIME 7 DISTANCE 8 SPEED 9 SCAN ...

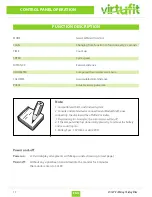
Page 15: ...orie burn CALORIES Accumulated total distance PULSE Actual exercise pulse rate Note 1 Compatible with iOS and Android system 2 Console and mobile device connection via Bluetooth 4 0 once 4 If the computer displays abnormally please try to remove the battery and re install again 5 Battery Spec 1 5V UM 3 or AA 4 PCS Power on LCD will display all segments with Beep sound as Drawing A next page Withou...

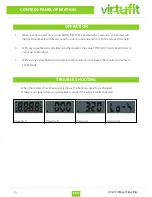
Page 16: ... SCAN mode as Drawing B 2 With any signal been transmitted into the monitor the value of TMR DST and CAL will start to count up as Drawing C 3 Without any signal been transmitted into the monitor for 4 minutes the monitor will enter to SLEEP mode When the display show Drawing D it means the batteries need to be changed If there is no signal when you pedal please check if the cable is well connecte...

Page 17: ...nd iBiking instruction manuals Fit Hi Way and iBiking APP download NOTE Download the APP in Google play or App Store Fit Hi Way iBiking The manuals will be updated from time to time the consumer can get the newest version by scanning the QR code 1 Once console is connected to device via Bluetooth the 2 Please exit Fit Hi Way or iBiking Bluetooth from the smart device then the console will power on...

Page 18: ...00219 E service fitnessbenelux nl W www fitnessbenelux nl Twekkelerweg 263 7553 LZ Hengelo The Netherlands Fitness Benelux Benelux Uw partner in fitness For questions or missing parts please contact Fitness Benelux ...

Reviews: