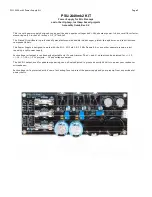
PSU-2448mk2 Power Supply Kit
7.
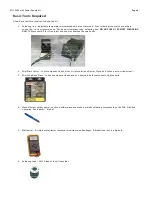
Magnifying glass – to see what you’re doing!
8.
Clean and well-lighted work area – Lots of good lighting, clean work area. You want to be able to leave your work-in-
progress without packing everything away.
Extra Tools (Nice to have, but not required)
1.
Vacuum desoldering pump – if you make a mistake, you need to pull out the component from the PCB
2.
Component lead bender – bend component leads like resistors uniformly and evenly
3.
PanaVise – to hold PCB while you’re working on it
4.
Tweezers – to pick tiny things
5.
Masking tape – to hold components on the PCB while working
6.
Wire-stripper – for cutting wires and stripping its insulation
PSU-2448mk2 Assembly Guide
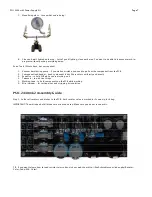
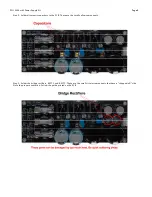
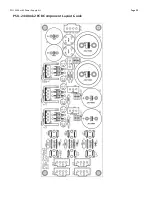
Step 1. Solder all resistors and diodes to the PCB. Each resistor value is marked in it’s own zip lock bag.
IMPORTANT: The white band of all diodes are oriented on top. Make sure you do not reverse this.
TIP: If you want to learn how to read resistor color codes, visit our website at http://fivefishstudios.com/index.php/Resistor-
Color-Code-E96-1.html
Page 7


