background image

9

NLD

4.  Watertoevoer openen.
5.  Afdichtingen op dichtheid controleren.

3. Onderhoud

Bewaar de handleiding dichtbij het expansievat. Flamco verleent slechts 5 jaar garantie, als het 

jaarlijks onderhoud van Airfix expansievat, door een erkend instrallateur wordt uitgevoerd. Het 

onderhoud dient te worden gedocumenteerd door de installateur op de desbetreffende pagina 

aan het einde van de handleiding.  

 
Ook als er water via de veiligheidsklep ontsnapt, moet als volgt onderhoud worden uitgevoerd: 
Uitwendige staat controleren op beschadiging en corrosie.  

Voordruk controleren en zo nodig correctie naar de vereiste waarde, en wel als volgt: 
Watertoevoer 

(K)

 of AirfixControl 

(D)

 sluiten en de Airfix D aan waterzijde aftappen.

Voordruk instellen:

Zie inbedrijfstelling.

Watertoevoer naar de Airfix D openen:


Zie inbedrijfstelling.

4. Demontage

1.  Watertoevoer 

(K)

 of AirfixControl 

(D)

 sluiten en de Airfix D aan waterzijde aftappen.

2.  Afdekkap 

(L)

 en dopje 

(M)

 verwijderen.

3.  Airfix D via ventiel 

(S)

 drukloos 

(P)

 maken.

4.  Airfix D 

(A)

 losschroeven.

Let op:

Een volle Airfix D kan zwaar zijn!

Let op:

Het water uit de Airfix D kan heet zijn!

Milieu

De Airfix D met inachtneming van de ter plaatse geldende voorschriften afvoeren. 

Summary of Contents for Airfix D

Page 1: ...and operating instructions 4 DEU Montage und Bedienungsanleitung 6 NLD Montage en gebruikshandleiding 8 FRA Installation et mode d emploi 10 ITA Istruzioni d installazione e d impo 12 POL Instrukcja m...

Page 2: ...nd Ritakuja1 01740 Vantaa 358 10 320 99 90 info flamco fi FR Flamco s a r l BP 77173 95056 CERGY PONTOISE cedex 33 1 34 21 91 91 info flamco fr HU Flamco Kft H 2040 Buda rs Gy r u 2 H 2058 Buda rs Pf...

Page 3: ......

Page 4: ...and operating instructions 4 DEU Montage und Bedienungsanleitung 6 NLD Montage en gebruikshandleiding 8 FRA Installation et mode d emploi 10 ITA Istruzioni d installazione e d impo 12 POL Instrukcja m...

Page 5: ...N2 40 kg 70 C A M L B F D H...

Page 6: ...ow through function as required for DVGW or KIWA approval Maximum torque for connecting the flow through device is 100 Nm The installation must be carried out by approved personnel only Observe local...

Page 7: ...for damage or corrosion Check the gas pre charge and if necessary set to the correct pressure as follows Shut off the water supply K or AirfixControl D and drain the Airfix D Set the pre pressure See...

Page 8: ...f gt das Gef nicht ber die f r eine DVGW oder KIWA Zertifizierung erforderliche Durchstr mung Das maximal zul ssige Drehmo ment zum Verschrauben des T St cks betr gt 100 Nm Das Airfix D mu von einem a...

Page 9: ...berpr fung des u eren Zustandes auf Besch digungen und Korrosion berpr fung des Gasvordruckes und nach Bedarf Korrektur auf den erforderlichen Wert wie folgt Airfix D ber bauseitige Armatur oder Airfi...

Page 10: ...v met behulp van stikstoffles b vullen 3 Dopje M en afdekkap L weer aanbrengen 4 Watertoevoer openen 5 Afdichtingen op dichtheid controleren 1 Algemeen Airfix D expansievaten zijn drukapparaten in de...

Page 11: ...dige staat controleren op beschadiging en corrosie Voordruk controleren en zo nodig correctie naar de vereiste waarde en wel als volgt Watertoevoer K of AirfixControl D sluiten en de Airfix D aan wate...

Page 12: ...mbinaison avec un Airfix TD B Sans Airfix TD il n y a pas de circulation forc e conform ment la certification DVGW ou KIWA Le couple maximal pour le serrage de la pi ce T est 100 Nm L Airfix D doit tr...

Page 13: ...men de l tat ext rieur du vase recherche d ventuels d g ts et traces de corrosion V rif er la pression de gonflage et au besoin la corriger la valeur requise de la mani re suivante Fermer l alimentati...

Page 14: ...conforme ai requisiti dei marchi DVGW o KIWA La coppia di serraggio del raccordo a T non deve superare 100 Nm Il montaggio del vaso d espansione Airfix D deve essere effettuato da un installatore pro...

Page 15: ...senti danni o corrosione Controllare la pressione di precarico e se necessario impostarla al valore corretto come segue Chiudere il rubinetto d intercettazione K o AirfixControl D e scaricare l acqua...

Page 16: ...zynie nie b dzie mia o funkcji przep ywowej co jest wymagane w celu uzyskania aprobaty DVGW lub KIWA Warto maksymalnego momentu do pod czenia urz dzenia przep ywowego wynosi 100 Nm Monta u urz dzenia...

Page 17: ...ono uszkodze lub korozji Kontrola ci nienia wst pnego gazu i w razie potrzeby korekta w celu uzyskania wymaganej warto ci w spos b nast puj cy Doprowadzanie wody K lub urz dzenie AirfixControl D zamkn...

Page 18: ...ix D Airfix D Airfix D Airfix D Airfix D 2 Airfix Airfix TD B Airfix TD DVGW KIWA 100 Airfix D Airfix D 8 25 F MB 2 MB 3 G Airfix D 35 H F AirfixControl D 1 Airfix TD B 2 Airfix D AirfixControl J 3 Ai...

Page 19: ...17 RUS S 3 4 5 3 Flamco 5 Airfix K AirfixControl D Airfix D Airfix D 4 1 K ArfixControl D Airfix D 2 L M 3 P S 4 A Airfix...

Page 20: ...re bar Capacity of water heater Litres Initial installation Date Installer Name Stamp ENG Installation and maintenance 1st Service Date Installer Name Stamp 2nd Service Date Installer Name Stamp 3th S...

Page 21: ...telldruck bar Inhalt Warmwasserbereiter Liter Erstinstallation Datum Installationsfirma Name Stempel 1 Wartung Datum Installationsfirma Name Stempel 2 Wartung Datum Installationsfirma Name Stempel 3 W...

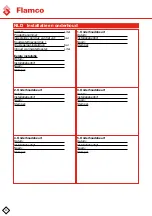
Page 22: ...rmwatertoestel Liter Eerste installatie Datum Installatiebedrijf Naam Stempel 1 Onderhoudsbeurt Datum Installatiebedrijf Naam Stempel 2 Onderhoudsbeurt Datum Installatiebedrijf Naam Stempel 3 Onderhou...

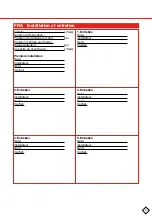
Page 23: ...bar Capacit du chauffe eau Litre s Premi re installation Date Installateur Nom Cachet 1 Entretien Date Installateur Nom Cachet 2 Entretien Date Installateur Nom Cachet 3 Entretien Date Installateur No...

Page 24: ...ndung oder Interpretation der technischen Daten bernimmt Flamco B V keine Haftung Technische nderungen vorbehalten Copyright Flamco B V Bunschoten the Netherlands No part of this publication may be re...

Reviews: