FlameStop FDCIE Panels With AS4428.3-2010 Fascia
Installation and Operation Manual
Page 24
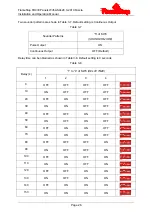
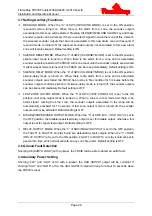
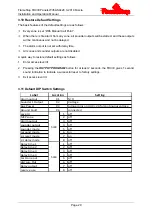
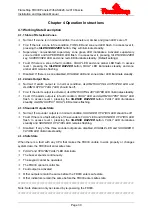
3.5.2 Setting Associated Sounders to a Zone
Programming steps of zone association output setting are shown below.
1
Enter access level III.
2
Set the “4” of SW2 (
SOUNDER OUTPUT
) on control board to ON position.
3 Pressing
the
OUTPUT PROGRAM
button,
OUTPUT PROGRAM
LED illuminates steadily and
the amber LED of zone 1 flashes to show zone 1 is to be selected for setting up associated
sounders. The
FAULT
LED will indicate according to the FDCIE fault condition. Other
indicators, except for the above mentioned LEDs, will be turned off.
4 Pressing
the
SCROLL
button toggles between zones 1 to 16.
5 Press
the
OUTPUT PROGRAM
button again to set up its associated Sounder Outputs. The
SOUNDER X FLT/DIS
LED flashes, showing Sounder Output 1 has been selected for setup.
6 Pressing
the
SCROLL
button to select sounder output 1, 2 or 3.
7 Pressing
the
DISABLE/ENABLE
or
TEST
button can respectively switch on or off their
indicator.
The
DISABLE/ENABLE
LED and
TEST
LED are used for setting up the output state
of the selected Sounder Output to be an Immediate, Delayed or No Output, refer Chapter
3-5-4, Table 3-6.
8 Set the “5” of SW3 (
SOUNDER MODE
) ON or OFF to change the sound pattern of the
selected Sounder Output to be continuous or pulse, refer Chapter 3-5-4, Table 3-7.
9 The Dip switches “1” to “4” of SW3 (
DELAY TIME
) are used for setting the delay time of the
selected Sounder Output from 0-150 seconds, refer Chapter 3-5-4, Table 3-8.
10 Pressing the
ENTER
button saves the current settings for SOUNDER X and the FDCIE will
sound for 1 second to indicate the successful setup. Set the “5” of SW3 (
SOUNDER MODE
)
and “1” to “4” of SW3 (DELAY TIME) to OFF position. Repeat steps
6 to 10 to program
another Sounder Output for this zone.
11 Press the
CANCEL
button to exit the programming of this zone and return to the zone
selection (step 4). Repeat steps 4 to 10 to program other zones.
12 At the zone selection step, pressing the
CANCEL
button again will exit programming mode
.
And OUTPUT PROGRAM
LED will turn off.
13 Set the “4” of SW2 (
SOUNDER OUTPUT
) to OFF position.
14 Exit access level III.

