background image

Summary of Contents for Bounder turbo diesel 2001

Page 1: ...ng recording or by any information storage or retrieval system without written permission from Fleetwood Enterprises Inc Manufacturing subsidiaries of Fleetwood Enterprises me build the following motor homes Pace Arrow Pace An ow Vision Southwind Southwind Storm Bounder Bounder Diesel Discovery Flair Tioga Jamboree American Eagle American Dream American Heritage American Tradition Expedition ...

Page 2: ...This page intentionally blank ...

Page 3: ...e as determined by the mileage shown on the odometer whichever occnrs first 2 For structural defects 3 years structural defects are limited to the following roof structure sub floor structure exterior walls interior walls and ceilings Written notice of defects must be given to the selling dealer or manufactnrer not later than ten 10 days after the expiration of the warranty period The owner is res...

Page 4: ...ice of a claim where the dealer was unable or unwilling to resolve the problem the Fleetwood Service Center will repair or replace any parts necessary to correct defects in material or workmanship or will take other appropriate action as may be required This warranty does not cover 1 The automotive chassis system including the chassis and drive train tires and batteries which are covered by the se...

Page 5: ...use towing charges bus fares vehicle rental incidental charges such as telephone calls or hotel bills or other incidental or consequential damages Some states do not allow the exclusion or limitation of incidental or consequential damages so the above limitation or exclusion may not apply to you This warranty gives you specific legal rights and yon may also have other rights which vary from state ...

Page 6: ...rato ry irritation and may aggra vate respiratory conditions or allergies Ventilation will reduce indoor formaldehyde levels Weyerhauser Corporation Ventilation is important for making the interior of your motor home comfortable Please read the section about ventilation and prolonged occupancy in the Living With Your Motor Home chapter in this Owner s Manllal WARNING This product contains com pone...

Page 7: ... uncontrolled gas flow which can cause fire or explosion A properly filled con tainer will contain approximately ao percent of its volume as liquid LP gas The following label has been placed in the vehicle near the range IF YOU SMELL GAS 1 Extinguish any open flames pilot lights and all smoking materials 2 Do not touch electrical switches 3 Shut off the gas supply at the container valve s or gas s...

Page 8: ...ance s will avoid dan gers of asphyxiation It is especially important that cooking appliances not be used for comfort heating as the dan ger of asphyxiation is greater when the appliance is used for long periods of time WARNING Portable fuel burning equip ment including wood and charcoal grillS and stoves shall not be used inside this recreational vehicle The use of this equipment inside the recre...

Page 9: ...EPTS fOR SAfE OpERATioN of YOUR MOTOR HOME 01 9 02 DRivER S CONTROls 02 1 o ON T E ROAd 0 1 MorOR HOME LOAdiNG O 1 RESpoNsibiliry FOR PROPER LOAdiNG O 1 SOME DEfiNirioNS FiRST O 1 TowiNG A VEHiclE OR TRAilER O CARGO CARRyiNG CAPAciry ANd LOAd DisTRibuTioN 0 5 CARGO CARRyiNG CAPAciry LAbEi 0 6 How TO WEiGH YOUR LOAdEd MOTOR HOME WirHOUT A TRAilER OR OTHER TowEd LOAd O 7 How TO WEiGH YOUR LOAdEd MOr...

Page 10: ...oN O 19 ENGiNE OpERATioN 0 20 TRANSMissioN OPERATioN 0 22 GEAR SELECTOR 0 22 CHECk TRANS 0 2 JAcobs EXTARdER COMPREssioN BRAkE 0 2 AiR BRAkES 0 26 SYSTEM COMPONENTS 0 27 USiNG AiR BRAkES 0 29 STOppiNG DiSTANCE 0 29 BRAkiNG ON DOWNGRAdES 0 29 PARkiNG BRAkE O O USiNG THE ENGiNE TO SLOlV THE MOTOR HOME O 1 AiR SUSPENSioN SysTEM O 1 MANEUVERiNG iN TRAffic 0 2 REAR ViEW VidEO MONiTOR O H Body UNdERCOAT...

Page 11: ...REENS 04 WiNdows 04 EMERqENCY Exir WiNdo V s 04 4 REMOTE MiRROR CONTROl 04 4 SUN ViSORS 04 5 WiNdow SHAdES If EQuiPPEd 04 5 DAy NiqllT SHAdES If Ef wiPPEd 04 5 MiNi BliNds If EQuippEd 04 6 STORAGE 04 6 EXTERiOR COMpARTMENTS 04 6 INTERioR STORAqE 04 7 SlidE OuT ROOMS If EQUippEd 04 7 INTERiOR ANd FURNisHiNGS 04 8 DiNETTE CONVERSioN 04 8 FoldiNq DOORS PRivACY CURTAiN DividERs 04 9 INTERiOR LiqHTiNq ...

Page 12: ... PUMP FilrER 05 5 Low POiNT DRAiNS 05 4 TRoubiEsHOoriN j THE FRESH WATER SYSTEM 05A LEAks 05 4 SANiriziNq THE FRESH WATER SYSTEM 05 5 EXTERioR SHOWER O5 5 DRiNkiNq WATER FilrER SYSTEM IF Er wippEd 05 6 WASTE WATER SYSTEM 05 6 ToilET 05 6 DRAiNiN j THE HoldiNq TANks 05 7 BlAck TANk flusH SYSTEM 05 9 HoldiN j TANk CARE 05 10 EXTREME Cold WEATHER USA jE 05 12 06 ElECTRicAl SYSTEMS 06 1 CHAssis 12 Yoh...

Page 13: ...iONAL DiESEl GENERATOR FUEL Supply If EQuippEd 06 9 GENERATOR OpERATiONS 06 9 GENERATOR OpERATiNq SAfETY PRECAUTioNS 06 10 ElECTRONic CliMATE CONTROl SySTEM 06 11 ElECTRicAl WiRiNG DiAGRAMS 06 11 MOTOR HOME FUSES ANd CiRCuiT BREAkERS 06 12 07 LP GAS SySTEM 07 1 LP GAS SAfETY PRECAUTioNS 07 2 SYSTEM COMpONENTS 07 4 HOSES 07 4 LP GAS REqUIATOR 07 4 USiNG LP GAS SYSTEM AT Low TEMPERATURES 07 5 FilliN...

Page 14: ... Vo r TElEvisiONS If EQuippEd 08 6 VidEo SWiTcHER 08 6 TV ANTENNA If EQuippEd 08 7 SATElliTE DiSH ANTENNA If EQuippEd 08 7 TELEPHONE JAck 08 7 TV ANd RAdio INTERfERENCE 08 8 MiSCELlANEous AppLiANCES 08 9 09 MAiNTENANCE 09 1 EXTERioR 09 1 STAiNS 09 2 WiNdows DOORS VENTS ANd Locks 09 RubbER Roof SYSTEM 09 ClEANiNG 09 CARE 09 4 SEAlANT RENEWAL 09 4 DOOR WiNdow Roof COMPONENT ANd MoldiNG RESEAliNG 09 ...

Page 15: ...uippEd 09 7 ENqiNE ACCESS 09 8 EXTERioR SEAlANTs 09 9 GENERATOR FilTERS 09 9 LAMps ANd Bulbs 09 10 MAiNTENANCE CHEcklisT 09 10 TRAilER HircH CONNECTOR WiRiNG 09 11 MAiNTENANCE CHART 09 1 2 10 STORAGE 10 1 STORAGE CHEcklisTs 10 1 SHORT TERM STORAqE LESS THAN 60 dAYS 10 1 LONq TERM STORAqE OVER 60 dAYS 1O WiNTERiZATioN 10 5 WATER SYSTEM WiNTERiziNq 10 5 REACTivATiNG THE MOTOR HOME AfrER STORAGE 10 8...

Page 16: ...This page intentionally blank ...

Page 17: ...and regular maintenance in order to deliver maximum value and performance The dealer will give you basic operating and maintenance instructions However supplement this by reading all instructional material s furnished with the motor home in the Owner s Information Package and the motor home Chassis Operator s Owller s Guide Mallual This information outlines important areas of operation and mainten...

Page 18: ...ble that recent product changes may not be included in this manual Subsequent refinements may be evident in the actual product Specifications may change without notice Product information illustrations and photography included in this Owner s Manual were as accurate as possible at the time of publication and are representative of function and mayor may not be specific in their depiction of actual ...

Page 19: ...the RV industry Please refer to the warranty in the front of this manual It explains your rights and obligations as well as the rights and obligations of the dealer and manufacturer Please read this section carefully You will be better informed in case you have a warranty related problem and your dealer will be better able to get you on the road again If you have any questions about the warranty 0...

Page 20: ...problems before delivery Fleetwood and its subsidiaries will not be responsible for front end alignment after this predelivelY inspection is done You should return your motor home to the selling dealer for warranty service If this is not possible you may contact any other authorized Fleetwood motor home dealer The service department at any of the locations listed at the back of this manual can hel...

Page 21: ...lude the brand name and serial number of your motor home The serial number is located on the identification tag next to the entry door and on your warranty card 4 If you wish to call for assistance please use this toll free telephone number 800 322 8216 There may be times when your motor home will need repairs or parts while you are on the road If your motor home is repaired by a non authorized re...

Page 22: ...equipment and systems This Owner s Manual and the Chassis Operator s Manual are in the package Since this manual does not cover every possible detail of equipment and options installed on or in your motor home there are booklets and instructional material in the package that will help you safely operate maintain and troubleshoot those items Be sure you read all this information and understand the ...

Page 23: ... MFD BY DATE OF VEH MFD VEHICLE IDENTIFICATION NUMBER GVWR KGS LBS BAR CODE FRONT GAWR KGS LBS WITH RIMS This tag is located on the left top of the instrument pane TIRES AT KPA COLO SINGLE I PSI INTERMEOIATE KGS LBS GAWR WITH RIMS TIRES AT KPA COLD DUAL PSI GAWR REAR KGS LBS WITH RIMS TIRES AT KPA COLD SINGLE PSI GAWR COMBINED INTERMEDIATE AND REAR KGS LBS This vehicle conforms to all applicable U...

Page 24: ...rn steering suspension parts or road hazards such as hitting a curb pothole railroad track etc Improper alignment can cause tires to roll at an angle and wear unevenly It may also cause the vehicle to pull to the right or left Out of balance tires will not roll smoothly and will cause annoying vibrations and uneven tread wear such as cupping or flat spots If you see uneven tire tread wear or if th...

Page 25: ...al car or huck you may be accustomed to driving Keep this in mind as you become familiar with driving your motor home New motor home owners should take special care to learn the driving and handling characteristics of your vehicle in safe and familiar surroundings The distribution of the weight of your motor home is designed so it will handle safely while being driven Whell loading the motor home ...

Page 26: ...termined by the manufacturer of the chassis on which your motor home is built Check the Chassis Operator s Owner s Guide Manual provided by the motor home chassis manufacturer for the limits on the weight you can tow If the Chassis Operator s Owner s Guide Manual does not provide information on towing weight limits do not tow a load of more than 1000 pounds unless the towed unit has a properly ins...

Page 27: ...sonal touch to their motor home But there is a difference between changing how your motor home looks versus how it handles or responds to driver inputs If you expect to make any type of alteration to your motor home consult a professional who understands the COlTect way to do the alteration and how the alteration will change or affect the stability handling vehicle response and overall performance...

Page 28: ... or an experienced professional should check all fluid levels and change fluids and filters when needed Tire condition and proper inflation pressure is critical to safe operation Keep your vehicle properly maintained to help avoid a vehicle crash Warning Devices Your motor home is equipped with warning devices Check them before a trip for proper operation A disabled warning device cannot warn you ...

Page 29: ...RIVER S CONTROLS 2 3 4 5 1 7 1 Exhaust Brake Control 2 Transmission Shifter Control 3 Level Indicator 4 Mirror Remote Controls 5 Air Dump Control 6 Clearance Light Switch 7 Cup Holder BOUNdER DiEsEL ...

Page 30: ...DnivEn s CONTROls C l 0 t II 1011 r rno I 0 o C l o 0 0 to 0 0 r co co 0 0 III EEl III BOUNdER DiESEl ...

Page 31: ...out of both the dash and floor outlets FLOOR Air comes out of the floor outlets with some air directed to the windshield to prevent fogging DEF Air comes out of the windshield outlets to defrost the windshield Set the fan switch to HI and the temperature lever to the far right for maximum defrosting Air Conditioning AlC On Off Button Turns air conditioning compressor on and off When air conditioni...

Page 32: ...This page intentionally blank ...

Page 33: ...ing and weighing we need to explain some common weight terms We will use abbreviations and you should refer back to these terms if you do not understand what the abbreviation means GVWR Gross Vehicle Weight Rating is the maximum permissible weight of this fully loaded motor home The GVWR is equal to or greater than the sum of the Unloaded Vehicle Weight plus the Cargo Carrying Capacity GCWR Gross ...

Page 34: ... of the following UVW full fresh potable water weight including water heater full LP gas weight and SCWR SCWR Sleeping Capacity Weight Rating is the manufacturer s designated number of sleeping positions multiplied by 154 pounds 70 kilograms Hitch Rating means the maximum allowable weight of a towed trailer or towed vehicle The GCWR of the motor home must never be exceeded even if the towed traile...

Page 35: ...operates with the brakes on your motor home The supplemental brakes will NOT allow you to tow more than the listed GCWR for your motor home Ifyou canllot stop you will crash You must not exceed the tire capacities or the weight factors listed below if you expect to tow something behind your motor home either with or without a dolly The factors are GCWR Gross Combined Weight Rating GTW Gross Towed ...

Page 36: ...nging the trailer hitch will not increase the tow capaciry ofthe motor home Consult the Chassis Operator s Owner s Guide Manual and U S state and Canadiall provincial laws for towing weight limits andfor guidelines for installing supplemental braking systems that operate with your motor home s brakes The way your motor home handles and responds will be affected by the way the towed unit is loaded ...

Page 37: ... between the axles or front to rear and also between the wheels or side to side It is also important to place heavier items in under the floor storage or low in the motor home If you make the motor home top heavy or much too heavy on one side the motor home can be overturned and crash in a curve turn or in an emergency steering maneuver When the load is properly distributed your motor home will ha...

Page 38: ...ng capacities may differ Refer to Fleetwood and chassis manufacturer s manual s for complete information GAWR Gross Axle Weight Rating means the maximum permissible loaded weight a specific axle is designed to carry GTW Gross Towed Weight is the maximum loaded weight of a trailer or car this motor home with equipped hitch has been designated to tow GTW cannot be increased by changing the trailer h...

Page 39: ...l ive at a weigh station the attendant will guide you through the correct positioning of the motor home on the scales 1 Center the front wheels on the scale platform and take a reading This is the front Gross Axle Weight Reading 1 2 Center the entire motor home all axles on the scale and take a reading This is the Gross Vehicle Weight Reading 2 BOUNdER DiESEL ON TIll ROAd How TO WEIGH YOUR LOADED ...

Page 40: ...cation tag and Cargo Cal1 ying Capacity label Fill in the chart to aid in comparing weights If any readings are higher than the rating you will have to adjust or remove the load MOTOR HOME READINGS from labels GVWR MOTOR HOME Front GAWR FRONT AXLE RearGAWR REAR AXLE Hitch Rating TOWED VEHICLE GCWR COMBINED VEHICLES SCALE READINGS Reading 2 Reading 1 Reading 3 Reading 4 Add 2 and 4 BOUNdER DiESEL ...

Page 41: ...eight Reading 1 2 Center the entire motor home so that only the motor home is being weighed Leave the towed load hitched to the motor home but resting off of the scale This is the Gross Vehicle Weight Reading 2 D BOUNdER DiESEl How TO WEIGH YOUR LOADED MOTOR HOME WITH A TRAILER OR OTHER TOWED LOAD ...

Page 42: ...ts If any readings are higher than the rating you will have to adjust or remove the load If you exceed the specified weight ratings you will Cause ullsafe braking Cause unstable driving and handling characteristics Cause damage to the motor home drive traill or chassis Reduce your warranty protection Since you may load your motor home differently for different trips loading and weight patterns wil...

Page 43: ...ations of the chassis as designed by the chassis manufacturer Under normal circumstances and with proper tire and chassis maintenance you should receive thousands of miles of trouble free service Some motor homes accumulate relatively few miles and therefore the tire age from the date of manufacture not mileage may become the main tire life determining factor Motor home tires normally have a life ...

Page 44: ...n pressure for this coach is shown on the Federal Certification Tag located on the sidewall near the driver s seat TiRE INFLATION WARNING For safety and maximum tire life check and adjust tire pressure including the spare if equipped at the beginning of each trip and daily during the trip Pay special attention to inside rear duals Always check pressure when tires are cold and do not bleed air out ...

Page 45: ...weight carrying capacity as the original equipment Tires supplied by various manufacturers of the same size and rating may not have the same weight carrying capacity and maximum cold inflation pressures Consult your tire dealer The original equipment wheels and tires supplied on your motor home have weight carrying capacities to support Gross Axle Weight Ratings GAWR as stated on the Federal Certi...

Page 46: ...llP the brake The vehicle is equipped with Anti lock Brakes ABS which will help control braking Firmly hold the steering wheel while avoiding abrupt steering inputs and love slowly to a safe place Park on a fil ln level sluface Tul ll offthe ignition Set the parking brake Tul Il on the hazardflasher system Ensure yow passengers are safely located and children monitored Get professional roadside as...

Page 47: ...not slouching the lap belt is snug and low on the hips the shoulder belt is snug against the chest the knees are straightforward For your safety your vehicle has combination lap and shoulder belts for the driver and front seat passenger and lap belts with out retractors in all other designated seating positions Always drive and ride with your seatback upright and the lap belt snug and low across t...

Page 48: ...hicle receives an impact the lap and shoulder belt locks and prevents you from mov ing To fasten the belt pull the lap shoulder belt from the extrac tor so that the shoulder portion of the belt crosses your shoulder and chest Insert the belt tongue into the proper buckle until you hear a snap and feel it latch To tighten the lap portion of the belt pull up on the shoulder belt until it fits you sn...

Page 49: ... burn a small child Check seat covers and buckles before you place a child anywhere near them Children who are too large for child safety seats should always wear safety belts If the shoulder belt cannot be properly positioned so that it does not cross or rest in front of the child s face or neck move the child to one of the seats with a lap belt only and use the lap belt Lap belts and the lap por...

Page 50: ...l be different from driving your family car or truck Your motor home is large and heavy You may have to adjust or learn new driving techniques to safely operate your motor home Downhill driving puts extra strain on many drivetrain compo nents of your motor home The brakes are easily overloaded and overheated when used for downhill slowing Brake fade will occur if the brakes overheat When driving d...

Page 51: ...u anticipate overtaking and passing other vehicles remember that your motor home may not achieve the required speed as quickly as you expect BOUNdER DiESEL ON Till lOJ ld ENGINE A ND TRA NSMISSION CAUTION Engine overspeed en gine speed in excess of high idle no load RPM can damage the engine 1 NOTE Driving a diesel powered vehicle is different from driving a gasoline pow ered vehicle Engine over r...

Page 52: ...ted in chart NOTE Times listed are minimum times It will not harm block heater or engine to leave it plugged in longer than times stated ENGINE BLOCK HEATER USAGE Viscosity Time Battery Temperature Grade Oil Used Capacity Above 32 F 15W40 or Not Standard Above O C 20W40 needed 32 to 14 F 15W40 or 2 3 Hours Standard 0 to _10 C 20W40 14 to 10 F IOW30 8 Hours or Extra Capacity _10 to 23 C Overnight S...

Page 53: ... and other gauges often to make sure they are operating correctly The motor home will not move nntil the air brakes and sus pension systems are sufficiently full of air Normal brake system air pressure is 90 120 psi Normal Shut Down Procedure 1 Shift transmission into NEUTRAL 2 Pull out on the Parking Brake knob to engage the parking brake 3 Let engine idle for a minimum of 3 minutes for proper co...

Page 54: ...ntrol Unit ECU which processes signals from the shifter and in turn controls the transmission The push button shift selector has snap dome type switches Each pad R N D Up or Down arrow is a switch Just push on the pad for the desired operation A slight snap will be felt The digital display shows the chosen operation a beep tone will sound and the transmission will shift to the starting range as in...

Page 55: ...conomy It is not necessary to select the right moment to upshift or downshift during the changing road and traffic conditions The transmission does it for you However knowledge of the gear ranges and when to select them will make vehicle con trol and your job even easier R Reverse The vehicle must be completely stopped before shifting from Forward to Reverse or from Reverse to Forward The digital ...

Page 56: ...desirable to restrict the automatic shifting to a lower gear These positions also provide progressively greater engine braking for going down grades the lower the gear the greater the braking effect The push button selector utilizes Arrow Buttons Push the Up or Down arrow to the desired gear The digital display will display your choice I LOW Use this gear when pulling through mud and deep snow whe...

Page 57: ...ond to operator requests When the check trans light comes on and the ignition switch is turned off the transmission will remain in N neutral until the condition is corrected Important The Jacobs Extarder Compression Brake is a vehicle slowing device not a vehicle stopping device It is not a substitute for the vehicle service brakes Use of the Extarder Compression Brake for vehicle downhill control...

Page 58: ...n the automatic mode The ON OFF switch should be in the OFF position Operation of the Extarder compression brake is recommend ed only when you have good traction with the road surface Operation on wet roads should be undertaken with extreme care and at the driver s discretion Your motor home is equipped with air brakes Air brakes are more sensitive than hydraulic brakes Practice stopping in a safe...

Page 59: ...r s Guide Manual for additional information The Brake Pedal The harder you push down on the pedal the more air pressure is applied to the brakes When you let up on the pedal some of the brake pressure is released You will hear the air escape when you let up on the pedaL As this air is released the compressor must build the pressure back up Pressing and releasing the pedal repeatedly can let air ou...

Page 60: ...lfunction occurs in either brake system allowing an imbalance in system pressure the BRAKE light will glow when the brake pedal is depressed If the Brake light malfunctions and the air brake reservoir is completely empty the service brake will still function momentarily to stop the vehicle Air Pressure Warning Light Buzzer The light buzzer tells you the air brake system air pres sure is low This l...

Page 61: ...rease in stopping distance and anticipate your stops with this in mind Downhill driving puts extra strain on many drivetrain compo nents of your motor home The brakes are easily overloaded and overheated when used for downhill slowing Brake fade will occur if the brakes overheat When driving down long grades shift the transmission to a lower gear at the top of the grade Rule of thumb Use the same ...

Page 62: ...brakes will be applied suddenly This may cause loss of trac tion and vehicle control Refer to your Chassis Operator slO wner s GuidelManual for fur ther information on the functioning of the brake system PARKING BRAKE CAUTION If the low pressure buzzer or light ever comes on while the motor home is in motion exercise ex treme caution Stop and park the motor home as soon and as safely as possible b...

Page 63: ...suspension When the engine is started the suspension will begin to fill with air lifting the motor home body 4 6 inches A buzzer will sound until the air tanks are sufficiently full for proper operation Your motor home has four suspension air bags two for each axle The pressure in these bags is controlled by three air valves These valves are preset and determine the distance between the chassis an...

Page 64: ...rface area it is more easily affected by cross winds Allow extra distances for passing and stopping Driving on winding or mountain roads is not difficult if done with reasonable care Observe proper vehicle speeds when ascending or descending hills and always oper ate in the proper transmission range Downshift on hills to avoid overheating or undue engine loads Downshift when descending grades Engi...

Page 65: ...e curb in the direction of the roll to aid the parking brake When parking always shift the transmission to N and set the parking brake If you can t avoid operating parking or idling your vehicle off road Be aware that combustible materials could catch fire from the vehicle s hot exhaust system Avoid driving your vehicle through or over combustible materials such as leaves grass vegetation or stubb...

Page 66: ...ways allow more space for maneuvering until you are comfortable with the system Check the side mounted mirrors often while driving and especially during lane changes and when backing up The camera lens is exposed to road dirt and will get dirty When necessary clean the camera lens and monitor screen with a quality glass cleaner and nonabrasive cloth or towel REA R VIEW VIDEO MONITOR CAUTION The re...

Page 67: ... during use or hot weather Under certain conditions sudden release of this pressure when removing the fuel cap can cause fuel to spray from the fill opening creating a fire hazard To protect the fuel system from excessive pressure or vacuum or from sudden release of pressure replace lost or damaged fuel fill caps with caps of the same design which are available from your Fleetwood motor home deale...

Page 68: ...otor home to protect wiring and other components from possible heat damage caused by the exhaust system Do not remove these shields modify the exhaust system or add additional equipment such as wiring plumbing or other components which will be effected by exhaust system heat Engine temperature gauges typically have been calibrated to indicate a midrange reading as the normal operating temperature ...

Page 69: ...and do not operate it until it has been inspected and repaired Your motor home is equipped with a carbon monoxide CO detector alarm If the detector alarm sounds it is an indication that unaccept able levels of carbon monoxide gas are present This may occur in traffic concentrations or in campgrounds where other vehicles as well as your motor home are contributing to the carbon monoxide level in th...

Page 70: ... off LP gas appliances and the LP gas tank valve 4 Do not allow any person to ride in the towed vehicle CAUTION EMERGENCY TOWING CAUTION Do not allow your motor home to be towed without having the tow truck operator read this section and related sections of the Chassis Operator s Owner s Guide Manual CAUTION Do not tow the motor home from the rear Towing from the rear will cause serious overload i...

Page 71: ...market accessories not specifi cally designed for use on or in your motor home Please consult with your dealer before attempting to install or mount accessories on the sidewalls of your motor home Holes drilled in the sidewall may cause damage and may affect portions of your wananty coverage BOUNdEfl DiEsEl A TTACHING A CCESSORIES TO YOUR MOTOR HOME ...

Page 72: ...This page intentionally blank ...

Page 73: ...A dual position switch on the instrument panel controls the air dump system When the air bags are deflated the motor home will settle slightly from normal ride height and you may hear a sound of rushing air This is normal After the air bags are com pletely deflated the leveling system can be operated Be sure to set the air dump switch back to normal position after retracting the leveling system an...

Page 74: ...tch Switch Position Position Position Action OFF ON Step extends and retracts with the opening and closing of the door OFF OFF Step is inactive Will not move regardless of door movement ON ON Step extends and retracts with opening and closing of door ON OFF Step extends and retracts with opening and closing of door If step is extended when ignition is turned ON step will retract Front entry models...

Page 75: ...the window Open and adjust torque windows by turning the knob or crank located at the bottom of the window frame Any ventilating window may pennit water inside This water must be controlled and drained to the outside On your ventilating windows water is trapped by the frame During a heavy downpour water may be seen in the lower portion of the frame The sloping sill and weep slots allow the water t...

Page 76: ...ree Exit the motor home through the w indow When parked at a campsite be sure the exit window is not blocked by trees or other obstacles Storm windows should never be installed over emergency exit windows Emergency exit windows can be identified by the red handles and EXIT tag The driver s control panel also contains controls for the exterior rear view mirror adjustment and heater if equipped To a...

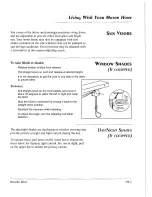
Page 77: ...e cord to one side or the other SUN VISORS WINDOW SHADES IF EQUIPPED to secure blind 1 To lower Pull straight down on the cord slightly and move it about 45 degrees to either the left or right and lower the blind Stop the blind in mid travel by moving it back to the straight down position Reattach the retainers when traveling To adjust the angle turn the adjusting rod either direction The day nigh...

Page 78: ...t of balance if not properly loaded Refer to the Motor Home Loading section of the 011 The Road chapter of this manual and follow the loading and weighing instructions in that section When storing equipment and supplies Always keep tools and equipment stored in areas where they will not shift While traveling Whenever possible place heavy articles in storage compartments which are low and in the be...

Page 79: ...the Motor Home Loading section in the 011 The Road chapter The slide out room s are designed to provide additional living space for site set up A detailed operating and maintenance guide is included in your Owner s In ormation Package Read all instructions for these systems carefully before operating the slide outs Slide out rooms are equipped with warning alarms that sound when the room is extend...

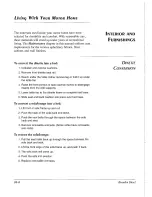
Page 80: ...le several inches to disengage inserts from the wall supports 5 Lower table top to the dinette frame to complete bed base 6 Slide seat and back cushion into place over bed base To convert a sofallounge into a bed 1 Lift front of sofa frame up and out 2 Push the back of the sofa back and down 3 Push the seat belts through the space between the sofa back and seat 4 Remove removable armrests Some sof...

Page 81: ...and water vapor Turn the crank in the center of the vent to open and adjust Some vents may also be equipped with a 12 volt fan A switch controls fan operation Be sure to turn the fan OFF before closing the vent Close the vents or lower them before traveling to avoid damage from wind and low overhead clearances The vent may be cleaned from the top of the motor home Use soapy water on the vent cover...

Page 82: ...mately 1 2 full for example lights E 1 4 and 1 2 will be on Erroneous tank level indications can be caused by a Water with low mineral content The level is measured by a very low level electrical signal traveling through the liquid Some water may not conduct the signal properly This condition may be infrequent but can exist Check the panel reading when the fresh water tank is filled b Material tra...

Page 83: ...nage and control the humid conditions and condensation that you may experience Modern RVs are much smaller than a house and are tightly built This means that the interior air will become saturated with moisture more quickly than in a typical house The routine activities of a few people can put a lot of water into the air In cold weather this moisture may become visible as condensation Condensation...

Page 84: ...he air cools the water vapor condenses back to a liquid Since your windows are usually cooler than the air the water collects on the surface of the glass Q Where does all the water come from A Moisture in the air comes from many sources Some of the most common are Cooking Meals prepared for a family of four can add up to a gallon of water per day into the air from cooking Bathing An average shower...

Page 85: ...nts and aquariums Plants give off almost as much water as you put on them And open aquariums permit higher rates of evaporation than closed types People and animals A large source of water in the RV is the inhabitants themselves A family of four can put up to 12 pounds of water into the air per day through breathing and perspiration As you can see just the normal course of living adds a great deal...

Page 86: ...r and iI crease ventilation To reduce moisture released inside the RV 1 Run the vent fan when cooking and the bath vent fan or open the bath vent when bathing Avoid making steam from excessive boiling or use of hot water Remove water or snow from shoes before entering to avoid soaking the carpet Avoid drying clothes inside except in the dryer if equipped The water drying out of the clothes goes in...

Page 87: ...ondensation and prevent possible ice formation Avoid crowding closets or wardrobe space Overstuffed closets restrict air flow 5 Stock kitchen and bath cabinets to allow free air circulation 6 Open window coverings and windows as often as possible and convenient 7 Install a dehumidifier appliance During prolonged continuous use a dehumidifying appliance may be more comfortable and effective in remo...

Page 88: ...to keep good air circulation Keep registers and the furnace blower clean and unobstructed This helps air circulation Do not operate a humidity device on yourfunlace During cold weather and even in short term occupancy con densation frequently forms on ceiling vents and may even accumulate to the point of dripping onto the surfaces below This is frequently misinterpreted as a leaking roof vent but ...

Page 89: ...roperly so this material is not wasted Fire extinguishers are pressurized mechanical devices They must be handled with care and treated with respect They must be maintained as outlined in any maintenance instructions provided with the device so they are ready to operate properly and safely Pmts or internal chemicals may deteriorate in time and need replacement Always follow maintenance and recharg...

Page 90: ... stand clear of the vehicle and wait for the fire department or other emergency assistance If your motor home is damaged by fire do not drive or live in it until you have had it thoroughly examined and repaired 04 8 FIRE SAFETY PRECAUTIONS WARNING Do not store or carry LP gas containers or other flammable liquids inside your motor home WARNING Explosive fuel clouds may be present at fuel filling s...

Page 91: ...each trip and at least once a week during use The smoke detector alarm should never be disabled due to nuisance or false alarm from cooking smoke a dusty furnace etc Ventilate your motor home with fresh air and the detector alarm will shut off Do lot disconnect the battery Replace the battery once a year or immediately when the low battery BEEP signal sounds If the smoke detector alarm fails to op...

Page 92: ...This page intentionally blank ...

Page 93: ...ter hoses are available at RV supply stores 2 Run the city water supply for a few seconds to clear the line Turn off the water 3 Attach the other end of the potable water hose to city water connection located inside the motor home utility compartment Make sure all connections are tight 4 Turn on the RV park city water supply Open all faucets inside the motor home to clear the lines Then turn off f...

Page 94: ... fresh water tank remove the cap remove the vent plug and fill the tank using a potable water hose Check the monitor panel often to determine if the tank is full If water is flowing from the top vent your tank is full Stop filling Replace the vent plug and filler cap Avoid leaving the water in the tank when the motor home is not in use Turn the water pump OFF before draining the water tank Wheneve...

Page 95: ...or concern The water flow will become steady when all air is bled from the water lines Dirt mineral scale and organic matter are filtered out of the fresh water system by an in line water filter on the inlet side of the water pump If you suspect a clogged filter it is easily removed and cleaned Inspect the filter after mnning the first full tank of water Clean and inspect monthly thereafter The fi...

Page 96: ...ost often around threaded fittings If neces sary tighten or clean and tighten the fittings Do not over tighten fittings Connections at galley and lavy fixtures should not be tightened with a wrench They will normally seal with hand tightening If a leak persists at one of the fit tings disconnect it completely and check for mineral deposits or other foreign matter at the seating surfaces Clean the ...

Page 97: ...DC power Open all faucets individually until water flows steadily then turn them off This will purge any air from the lines 4 Top off water tank with fresh water and wait three hours 5 Drain the entire system by opening all fresh water tank valves faucets and plumbing line drain valves 6 Flush the system with drinking quality water Let the fresh water flow through the system for several minutes to...

Page 98: ...ck water holding tank Generally water from the sinks and shower drains into the grey water tank the toilet drains into the black water tank The holding tanks make the system completely self con tained and allow you to dispose of waste water at your con venience A flexible sewer hose is required to connect the holding tank outlet to the inlet of an approved waste water dump station or sewer system ...

Page 99: ...ng Waste water and sewage in the holding tanks reduce the car rying capacity of the motor home See the Motor Home Loading chapter During extended or semi permanent hookups to sewage sys tems waste materials will build up in the tank and cause serious plugging if the tank valves are continuously open In these cases keep the valves closed until the tanks are full and then drain into the sewage syste...

Page 100: ...he tank to cover the bottom This will aid the break up of solid wastes and reduce pyramiding of waste material 4 To drain the gray water tank repeat the steps above using the small knife valve This tank is drained last to aid in flushing the outlets and hose The gray water knife valve may be left open in a semi permanent hookup 5 Remove the sewer hose and cap the outlet 6 With the dump valves open...

Page 101: ...d from the black tank close the knife valve and replace the termination cap If you are parked at a site with a semipermanent sewer hookup keep the black water knife valve closed to allow the waste level to build up The outlet will probably clog if you leave the knife valve open continually Run enough water into the tank to cover the bottom This will aid the break up of solid wastes Please Practice...

Page 102: ...nk or RV sanitation systems Keep both knife valves closed and locked and the drain cap tightly in place when using the system on the road Use only cleaners that are approved for use in septic tank or RV sanitation systems Use a special holding tank deodorant chemical approved for septic tank systems in the black water holding tank These chemicals aid the breakdown of solid wastes and make the syst...

Page 103: ...valve will get clogged In this case a hand operated auger may be necessary Be ready to close the valve quickly once the clog is cleared If the seal gets damaged it is easily replaced N CABLE TELEPHONE CmmECTlONS ELECTRIC CORD STORAGE BYPASS VALVE HOT COLD VAlVES FOR OUTDOOR SHO NER DRAIN COLD WATER POWER CORD J BOX WATER PUIJP SHOWER SWITCH HEAD SEWER HOSE Utility Compartment detail varies dependi...

Page 104: ...ermostat should be set no lower than 65 degrees if the outdoor temperature is 10 to 35 degrees For tempera tures lower than 10 degrees set the thermostat 1 degree high er for each degree the outdoor temperature drops below 10 degrees See the examples in the table below Ambient Outdoor Furnace Temperature Thermostat Setting 10 35 65 9 66 8 67 7 68 6 69 5 70 07 12 GALLEY SINK EXTREME COLD WEATHER US...

Page 105: ...effect at the time the motor home was built This is the chassis 12 volt or vehicle electrical system It includes the chassis battelY chassis house battelY charging system ignition system instrument panel and controls headlights taillights tum signals power entlY step LPG detector alarm levelingjacks if equipped slide out if equipped fog lights if equipped air homs if equipped power seats if equipp...

Page 106: ...ity house batteries provide 12 volt DC power These batteries are not the chassis 12 volt batteries Power is also provided by a DC converter that operates when the motor home main electrical cord is plugged into l20 volt AC power source or by the generator if equipped The house batteries are charged by the motor home engine alternator or by the converter when it is operating Your motor home has two...

Page 107: ...between the terminals and discharge the battery To clean the battery 1 Be sure the vent caps are installed and tight 2 Wash the battery with a diluted solution of baking soda and water to neutralize any acid present 3 Flush with clean water Foaming around terminals or on top of the battery is normal acid neutralization Avoid getting the soda solution in the battery 4 Dry the cables and terminals B...

Page 108: ...e you are connected to 120 volt AC power through the converter charger circuit Do not break live circuits at the terminals of the battery Use care when connecting or disconnecting booster leads or cables Attaching booster cables and poor connections are a common cause of electrical arcs which can cause explosion Check and adjust the electrolyte level before charging Fill each cell to the indicator...

Page 109: ...liances with the output of the solar panel A light on the air conditioner indicates when the solar panel is operating The panel can be expanded with optional expansion panels Contact your dealer for more information on these optional panels When the battery requires replacement always choose a battery with the same physical and electrical characteristics as the original equipment Your dealer or an...

Page 110: ...itch on the instru ment panel 3 Start the chassis engine with the ignition switch 4 Release the Auxiliary Start switch To use the Auxiliary Start System to start the generator 1 Press and hold the Auxiliary Start switch on the instru ment panel 2 Press the generator start switch until the generator is running 3 Release the Auxiliary Start switch This system provides grounded 120 volt AC electrical...

Page 111: ... A low power indicator and automatic shut down system built into the inverter can help prevent deep battery discharge When the inverter shuts down the batteries will require recharging from the generator converter or an external AC power source the solar charger or the engine alternator The converter will automatically supply 12 volt DC power when your motor home is operating on 120 volt from the ...

Page 112: ...eep the card in a conspicuous place and keep it up to date Your motor home may be equipped with a diesel powered generator which will provide complete electrical self con tainment when regular public utility AC power is unavail able Controls are at the generator and at a remote panel located in the living area of the motor home With the generator operating and the power cord plugged into the gener...

Page 113: ...he generator is slow to start DO NOT hold the switch in the START position for more than 10 seconds Release the switch wait 15 seconds then try to start again This will help avoid overheating and damage to the generator starting system BOUNdER DiESEL ELEcTRicAL SYSTEMS OPTIONAL DIESEL GENERATOR FUEL SUPPLY IF EQUIPPED GENERATOR OPERATIONS til NOTE Refer to the generator operating instructions prov...

Page 114: ...ble material or store any other materials in the generator compartment WARNING Do not operate the gen erator when parked in or near high grass or brush Exhaust component heat may cause a fire WARNING Do not modify the genera tor installation or exhaust system in any way Do not use the generator as an emergency power source to a general resi dential or industrial utility line This is illegal and ma...

Page 115: ...long as required and then automatically return them to normal operation The system is designed to operate from 120 volt 30 amp AC service ONLY Connection of the motor home to any other power source will cause improper operation of the system If only 20 amp service is available current load management must be done manually by the owner and only one air conditioner can be operated at anyone time ElE...

Page 116: ...og light and some other automotive circuitry 3 12 volt Chassis Fuses This electrical panel is located under the driver s side instrument panel GENERATOR REMOTE START AND HOURI ETER __ r L_J 00 IlECEPTS MOTOR HOME FUSES AND CIRCUIT BREAI ERS WARNING Do not install 12 volt fuses or 120 volt break ers with amperage rat ings greater than that specified on the device or label Doing so consti tutes a fi...

Page 117: ...the motor home chassis LP gas is stored as a liquid under pressure and vaporizes under the control of a pressure regulator A typical LP gas tank installation is illustrated below Although specific details of the system may differ in your motor home the major components and their relationships will be similar to those shown FILL BLEED VALVE NOTE LPG TANK FilL PORT EMERGENCY SHUT OFF SWITCH REMOTE T...

Page 118: ...s and all smoking materials Shut off the gas supply at the container valve s or gas supply connection Open the door and leave the area until the odor clears Have the gas system checked by a professional and the cause of the leak corrected before using the motor home again 2 Inspect the entire LP gas system for leaks or damaged parts before each trip and before filling the container See section on ...

Page 119: ...ng components are compatible 8 Turn off LP gas main valve before filling LP gas container or entering an LP gas bulk plant or motor fuel service station Turn off all pilot lights and appliances individually before refueling of motor fuel tanks and or LP gas containers When not individu ally turned off automatic ignition appliances may continue to spark when LP gas is turned off at the container 9 ...

Page 120: ...ed in the system Although they are designed for efficient and trouble free use they can deteriorate from impurities in the air The average life of LP hoses is two to three years Consequently check the hoses for weather checking or other signs of deterioration every time you have the gas tank filled or serviced When you replace hoses be sure that replacements are properly rated and approved for RV ...

Page 121: ... system will function at low temperatures provided the system components are kept at a temperature above the vapor point of the LP gas Ask your LP gas supplier or your motor home dealer for information on product blends available in your area and the areas in which you will be traveling The following chart shows the reduction in available BTU s hour under various fill levels as the temperature dro...

Page 122: ... and causes the problem This ice can build up and partially or totally block the gas supply There are a number of things you can do to prevent freeze up 1 Be sure the gas tank is totally moisture free before it is filled If you are not sure have an LP service station inject an approved antifreeze or de icer into the tank 2 Be sure the tank is not overfilled This is also a safety consideration 3 Ha...

Page 123: ...the odor for future reference A small number of people can not smell this odor if you are one of these you must take extra care in checking for leaks as well as whenever you use LP gas appliances For your safety check for leaks in your gas system each time the tank is filled and before each trip Always check the system any time you detect a garlic like odor Listen for a sustained hiss or hum when ...

Page 124: ...piping and fittings after you have al1 ived at a destination and before you use the LP gas system Travel and road shocks may have caused damage to the system that you will need to repair before using the appliances Keep the tank valve closed and turn off all appliances if the unit is not being used A permanently installed LP gas leak detector alarm is located near the floor The unit contains an al...

Page 125: ... alarm to insure complete dispersion of the gas from the lighter and to pre vent another sounding of the alarm 6 A silence button allows you to temporarily quiet the alarm for 60 seconds after it has been set off or after testing 7 If the alarm does not sound during a test or if the green indicator light is not visible see your dealer or an autho rized Fleetwood Service Center There are no batteri...

Page 126: ...re quickly We recommend lighting the pilot light at the range if equipped rather than individually lighting each burner This will help prevent accidental leaks at the burner Be sure the pilot light is extinguished while traveling The first time the furnace or oven is operated paints and oils used in its manufacture may generate some smoke and fumes If this occurs open doors and windows to air out ...

Page 127: ...r is reached through an access panel on the outside of the motor home Turn on the hot water faucet at the galley sink If water flows continuously the heater is full ApPLIANCES II NOTE The individual appliance manuals included in your Owner s Information Package contain detailed operating and mainte nance instructions Always refer to the respective manual for the appliance in question WARNING The w...

Page 128: ... the refrigerator when the motor home is parked make sure it is level If it is not level the refrigerant will not circulate cooling action will stop and the refrigeration system may be damaged The refrigerator uses the absorption principle of operation If you plan to cool food or drinks in high outside temperatures precool the food and park the motor home with the refrigerator vent door in the sha...

Page 129: ... the first time open all windows and doors until the residues are completely burned off These materials should burn off after the fIrst 15 to 20 minutes of appliance operation Always follow the appliance manufacturer s lighting and operating instructions If the furnace does not keep you comfortably warm NEVER use the range oven or a catalytic heater for supplementary heat even with a vent or windo...

Page 130: ... oven for cooking or baking always open a vent or window to provide ventilation Never operate the range or oven when you are sleeping or if your alertness is impaired in any way The exhaust hood allows vapors and cooking odors to escape and may provide a vent for the galley area Switches for the fan and light are located either on the range hood or the front of the microwave The hood has two greas...

Page 131: ... conditioner manufacturer s instlUctions for detailed operating and preventive maintenance requirements Remember that air conditioners use a large portion of your available electric power See the Electrical System chapter for operating details on the Fleetwood Climate Control System BOUNdER DiESEL AppliANCES Am CONDITIONER II NOTE Your motor home is equipped with a ceiling ducted air conditioning ...

Page 132: ...s the motor home is delivered Extended use of the TVs on 12 volt power can drain the batteries The front TV operates on 120 volt only The TV can also operate on 120 volt power from the inverter generator or public utility To use the TV on 120 volt power remove the l2 volt cord from the rear of the TV and install the 120 volt cord The video switcher located near the VCR allows routing of the antenn...

Page 133: ...veling remember to lower the antenna and secure it to prevent damage to the antenna motor home roof or objects in the path of the antenna such as overhead wires Do not travel with the antenna raised A telephone jack is conveniently located in the bedroom near a nightstand and in the front under the dash The park connection point is located in the dump station compartment BOUNdER DiEsEL AppliANCES ...

Page 134: ...istances from broadcast facilities is probably the result of satellite microwave or other cable distribution systems The antenna on your RV is no competition for these very expensive installations In addition TV and radio frequency interference results from the electromagnetic fields produced by electric arc discharge This arcing is found in lightning vehicle ignition systems and in 12 volt DC bru...

Page 135: ...dition of the RF signal If the signal is too weak or contaminated with multipath reflections to be received in stereo without objectionable noise or distortion the radio will automatically blend its stereo decoder toward mono The radio will constantly vary its reception from full stereo to mono depending on the reception conditions This variation and blending is built into the radio s circuitry an...

Page 136: ...This page intentionally blank ...

Page 137: ...tor with a general overview of service and maintenance information for the motor home Detailed service and main tenance information may be found in the owner s operator s mannals contained in the OWller s Information Package While the information in this section is intended to establish proper maintenance and inspection procedures there may be times when detailed diagnostic and repair procedures m...

Page 138: ...ith acids bases or ammonia 3 Wax the exterior at least once a year twice if possible with a wax formulated for fiberglass When waxing always read and follow the instructions and precautions on the container Some cleaners and waxes are recommended for use on only certain types of surfaces 4 In some cases a light rubbing compound may be required Always follow rubbing compound with a high quality wax...

Page 139: ...cksets in doors and exterior storage compartments at least annually with powdered graphite If the motor home is located at a beach or is exposed to salt air more frequent lubrication may be required For normal cleaning standard household detergents or cleansers may be used Use a nonabrasive common household detergent and plenty of water Be sure to keep the sidewalls wet to reduce streaking For per...

Page 140: ...our motor home Leak damage caused by failure to inspect and maintain the roof vents TVIsatellite antenna and molding seals may affect your warranty coverage The adhesives and sealants used in the construction of your motor home were developed to remain waterproof under sustained effects of weather and vibration However even the finest materials will eventually dry out and lose their effectiveness ...

Page 141: ...ll pads are mannfactured from high quality materials and should be dry cleaned only Frequent vacuuming will keep them free of dust and dirt Minor spills should be cleaned np quickly to avoid staining The affected area should be blotted not rubbed to prevent the stain from working deeper into the fabric BOUNdER DiESEl MAiNTENANCE DOOR WINDO j ROOF COMPONENT AND MOLDING RESEALING II NOTE Do not seal...

Page 142: ...aners or damage will occur to the surface The paneling and the ceiling of your motor home may be any of several finishes and textures Never use harsh detergents or abrasive cleaners on walls or ceilings Most surfaces will clean with a soft cloth moistened with mild liquid detergent in warm water or a clear window cleaner solution Do not scrub the surface or use large amounts of water which could s...

Page 143: ...cuum carpeting regularly and clean it with a quality carpet cleaner Do not use water or waxes mixed with water on the wood floor Floors are natural resting places for dust dirt grit and food spills Dirt underfoot causes abrasions Therefore keep the floor clean and use exterior walk off mats at the entry door and Immediately blot up spills or spots with a damp cloth Periodically clean the floor wit...

Page 144: ...engine cover is heavy Use care when opening or closing the cover ENGINE ACCESS AI WARNING When installing the engine cover be sure the cover is fully seated on the gasket seal and secured by the clamps Do not allow insulation carpeting or other mater ial to interrupt the seal between the cover and the engine compartment If the engine cover is not installed correctly engine exhaust gases could leak...

Page 145: ... black pipe Permatex 80726 All fresh water threaded fittings Rectorseal lOO virgin Teflon All threaded LPG black pipe Rectorseal Slow Dry 5 Soft pipe thread compound Consult your Fleetwood Motor Home dealer or see the Onan Service and Parts Directory in your Owner s Information Package Oil Filter Fuel Pump Filter Element Fuel Filter BOUNdER DiESEl MAiNTENANCE EXTERIOR SEALANTS GENERATOR FILTERS ...

Page 146: ...v Brake light clearance 2057 12v For your convenience a maintenance checklist is included in this manual Options and accessories usually have their own owner user manuals that often contain added maintenance instructions Consult these manuals as required LAMPS AND BULBS AJ CAUTION Before relamping dis connect power source by removing fuse or placing circuit breaker and control switch in OFF positi...

Page 147: ...to the connector on the motor home 3 4 6 2 Terminal Wire No Color 1 White 2 Blue 3 Green 4 Black 5 Red 6 Brown 7 Yellow 7 5 1 Circuit Connection Ground Electric Brake Tail Clearance Spare Left Turn RightTurn Stop MAiNTENANCE TRAILER HITCH CONNECTOR WIRING ...

Page 148: ...st safety eqUipment Fire extinguisher LP CO and smoke detectors alarms and GFI receptacles Service appliances and equipment refrigerator roof air conditioner furnace generator Inspect generator exhaust system Inspect LPG system including leak check Sanitize fresh water tank Clean drapes and interior fabrics Check exterior lamp operation Re torque U bolts Mor Ryde equipped only Chassis refer to cha...

Page 149: ...ets counter tops lavy tub and shower and galley 3 Inflate tires to maximum rated cold pressure 4 Park the motor home as level as possible front to rear and side to side Block wheels front and rear Put trans mission in park and set the parking brake S Check the charge in the battery Recharge as necessary 6 Disconnect battery cables Refer to Chassis Operator s Manual for proper removal and installat...

Page 150: ...ly open Y i roof vents at front and rear for ventilation If the motor home is being stored below freezing close and cover all vents to prevent entry of snow etc 17 Close and lock all windows Be sure vent fan and range hood fan switches are off 18 Cover exterior appliance vents water heater furnace range hood refrigerator to prevent insects from get ting in Be sure to remove all covering material b...

Page 151: ...ndshield wiper blades and store inside the motor home 4 Charge and remove both the chassis and house batter ies Store them in a cool dry place and check the charge and water level every 30 days If the specific gravity is being checked recharge the battery when it drops to 1 220 The time it takes the battery to reach 1 220 depends on its condition and the temperature The colder the storage area the...

Page 152: ...dded whenever actual or expect ed storage periods exceed 60 days Follow the additive manufacturer s instructions Operate the vehicle regu larly dUling the storage period to mix and circulate the anti oxidant agent throughout the fuel system 11 Refer to the Chassis Operafor sIOwner s Guide Manual for procedures on extended vehicle storage 12 Check tire inflation pressures every 30 days Maintain max...

Page 153: ...and flush engine cooling system and add antifreeze per the chassis operator s manual 2 Service and winterize the generator as outlined in the generator operating manual included in your Owner s Information Package 3 Winterize the LP gas system Your LP dealer or service station will perform this for you 4 Winterize all appliances as outlined in the individual operator s manuals 5 Remove snow accumu...

Page 154: ...od s 12 Be sure ALL water from ALL plumbing fixtures has been drained 13 Close holding tank drain valves 14 Pour approximately five gallons of approved non toxic antifreeze into the fresh water tank IS Turn the water pump master switch ON 16 Open each cold water faucet run the water pump and let about a cup of antifreeze solution flow continuously through each faucet Close each cold water faucet C...

Page 155: ...antifreeze solution to flow freely 20 Pour one cup of antifreeze solution down each drain 21 Install all protective caps Water tank fill City water inlet cap Waste tank drain outlet cap 22 If your refrigerator is equipped with an ice maker win terize it as follows 1 Shut off the water supply valve to the ice maker 2 Place a shallow pan under the water solenoid valve 3 Remove the inlet fitting to t...

Page 156: ...k for animal nests in wheel wells under the hood in air cleaner or in other out of the way places 2 Remove all appliance vents ceiling vent and air condi tioner coverings Be sure all furnace water heater and refrigerator openings are clear and free of debris or insect nests webs etc 3 Open all doors and compartments Check for animal or insect intrusion water damage or other deterioration 4 Refer t...

Page 157: ...checked by a qualified air conditioner technician 12 Drain flush and sanitize the fresh water system as out lined in the Plumbing chapter Inspect the drain hose for leaks Replace if necessary repairs are usually not effective 13 Install a new water filter cartridge if equipped 14 Operate all faucets and fixtures in the fresh water sys tem Check for leaks at all joints and fittings Repair if necess...

Page 158: ...e to uncover air conditioner shroud s 25 Inspect the LP gas system and check for leaks as described in the LP Gas System chapter If the LP tank shows signs of rust or corrosion have it inspected by a qualified LPG technician 26 Operate each LP gas appliance Observe all burner pilot flames for proper color and size In any case have the LP gas regulator adjusted for proper pressure by a qualified te...

Page 159: ...onal checks of steering brakes engine and transmission Operate vehicle slowly during these checks to allow sufficient circulation of fluids and reseating of components Your motor home should now be ready for a new traveling season If you choose your dealer can double check your preparation and correct any defects or make any necessary adjustments BOUNdER DiESEL ...

Page 160: ...This page intentionally blank ...

Page 161: ... components ChASSis 0PERATOR S OWNER S CuidEiMANUAI This is the operating and maintenance manual supplied by the chassis manufacturer It is part of your Owner s Infomwtion Package It contains information on operating and maintaining the engine transmis sion dtivetrain and other components of the motor home chassis CLEARANCE LiqhTS This switch will flash the clearance lights and is useful when sign...

Page 162: ...control on slick or icy roads and on downgrades Downshifting to lower gears increases engine braking The selection of a lower gear often prevents cycling between a gear and the next higher gear on a series of short up and down grades GFCI GnouNd FAULT Cincuir INTERnupTER An electrical device attached to the bathroom AC circuits that disconnect the out let if a problem occurs in the ground circuit ...

Page 163: ...ATioN PAC AqE This is a package of papers manu als warranty and instruction cards and other material put together for you by Fleetwood These materials contain oper ating and maintenance instructions for most of the compo nents and appliances in your motor home OWNERCARE CARd The card that has your name and vehicle ID FIN embossed on it Use this card when you request or need war ranty service Pleas...

Page 164: ...ber of sleeping positions mul tiplied by 154 pounds 70 kilograms UYW UNLoAdEd VEhiclE WEiqhT The weight of the motor home as built at the factOlY with full fuel engine oil and coolants The UVW does not include cargo fresh water LP gas occu pants or dealer installed accessories Note Canadian UVW inclndes designated seating LP and water YIN YEhicLE IdENTiFicATioN NUMbER The legal 17 digit vehicle id...

Page 165: ...NOTES ...

Page 166: ...NOTES 1 ...

Reviews: