background image


CLEAR COAT  

The  clear  lacquer  topcoat  is  also  available  at  most  auto  parts  stores.  If  you 
have  applied  a  colour  coat,  it  is  advisable  to  select  the  same  brand  of  clear 
lacquer to assure compatibility. 
 - The clear coat is applied to the body using the same technique as described 
for the colour coat. Two or three coats of clear should be adequate. 
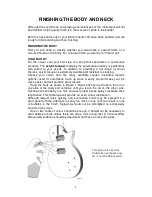
For  best  results  the  body  finish  should  be  allowed  to  harden  for  one  week 
before the final cut and polish. 
 
Caution:  Remember  that  spray  paint  is  extremely  flammable.  Do  not  spray 
near  open  flames,  heat  or  sparks.  The  area  where  you  spray  must  be  well 
ventilated  while  spraying  and until  all  vapour  is  gone.  Do not  smoke!  Do  not 
breathe the vapour and keep doors and windows open during application and 
drying.  

 
SHAPING THE HEADSTOCK  

The  headstock  of  the  SLPP  380B  has  been  left  extra  long  and  here  is  a 
chance  to  express  your  individuality  and  to  make  a  guitar  that  is  truly  your 
own.  First,  decide  on  the  shape  of  the  headstock  that  you  would  like  to  use 
and draw the outline on the top of the headstock.  
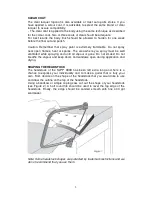
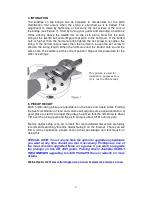
Using a bandsaw or simple coping saw, cut out the shape of your headstock 
(see  Figure  2).  A  half  round  file  should  be  used  to  level  the  top  edge  of  the 
headstock.  Finally,  the  edge  should  be  sanded  smooth  with  fine  400  grit 
sandpaper.


Note: Some headstock shapes are protected by trademark restrictions and we 
do not recommend that you use them. 


Summary of Contents for SPR01

Page 1: ...KIT SP SP SP SPR R R R 01 01 01 01 Joint Bolt on Body Basswood with Flamed Maple Top Neck Maple Fingerboard Rosewood Tuning Machines Chrome Die cast Scale Length 628mm 24 75 Fret 22 Control 1V 1T 3 Wa...

Page 2: ...u may order replacements from your local music shop or directly from us Quantity Description A 1 Basswood with Flame Maple Carve top body B 1 Maple Neck with Rosewood Fingerboard C 1 Output Jack Chrom...

Page 3: ...ur from the many available shades including metallic options used for automobile touch up work A spray can will make your job much easier and will produce great results Hang the body as shown in Figur...

Page 4: ...l ventilated while spraying and until all vapour is gone Do not smoke Do not breathe the vapour and keep doors and windows open during application and drying SHAPING THE HEADSTOCK The headstock of the...

Page 5: ...n as wet and dry During sanding be sure to place a firm material behind the sandpaper A large rubber eraser works fine The eraser is flexible enough to sand the gradual curves but is stiff enough to p...

Page 6: ...the locator holes on the back of the body 2 THREE WAY PICKUP SWITCH PART E Looking at the back of the guitar body push the threaded shaft of the switch through the 1 2 hole on the bottom right of the...

Page 7: ...ol cavity also Attach the bridge position humbucking pickup to the body with four 5 8 screws 5 VOLUME AND TONE CONTROLS PART D There is one volume and one tone control for this guitar The 1 volume and...

Page 8: ...ece of wood on top of the bushing to prevent damage and tap the bushing in place with an ordinary hammer Now screw the tailpiece mounting screws back into the bushings 8 THE BRIDGE PART J Now tap the...

Page 9: ...might want to make some adjustment Here s how to do it Push the sixth string down between second and third fret The space between the top of the first fret and the bottom of the string should be about...

Page 10: ...humbucking pickup is adjustable on the bass and treble sides Finding the best combination of tone and volume will require some experimentation A good place to start is to adjust the pickup height so t...

Page 11: ...10...

Reviews: