Operation
2
11.
Press down firmly to ensure the Guide Strip rib is
embedded in the slot.
12.
Gradually peel back, and press down both blue liners until the Guide Strip is completely adhered.
♦
Note: The Guide Strip will end approximately 1" (28mm) from the left black End Cap.
13.
Confirm the Guide Strip is completely secured before continuing.
14.
Turn over the cutter.
15.
Place it on a firm cutting surface.
16.
Install the Blade Magazine (see “Inserting the Blade Magazine” and “Installing the Blade”)
on page 3) with the Blade in the back stop position for cutting thinner material).
17.
Position the Cutting Head to the far left of the cutter.
18.
Slightly rotate the Cutting Head down so the Blade cuts partially into the green Guide Strip.
♦
Note: Do not cut all the way through the green Guide Strip on the first pass.
19.
Repeat Steps 17 and 18 once more, cutting all the way through the material this time.
♦
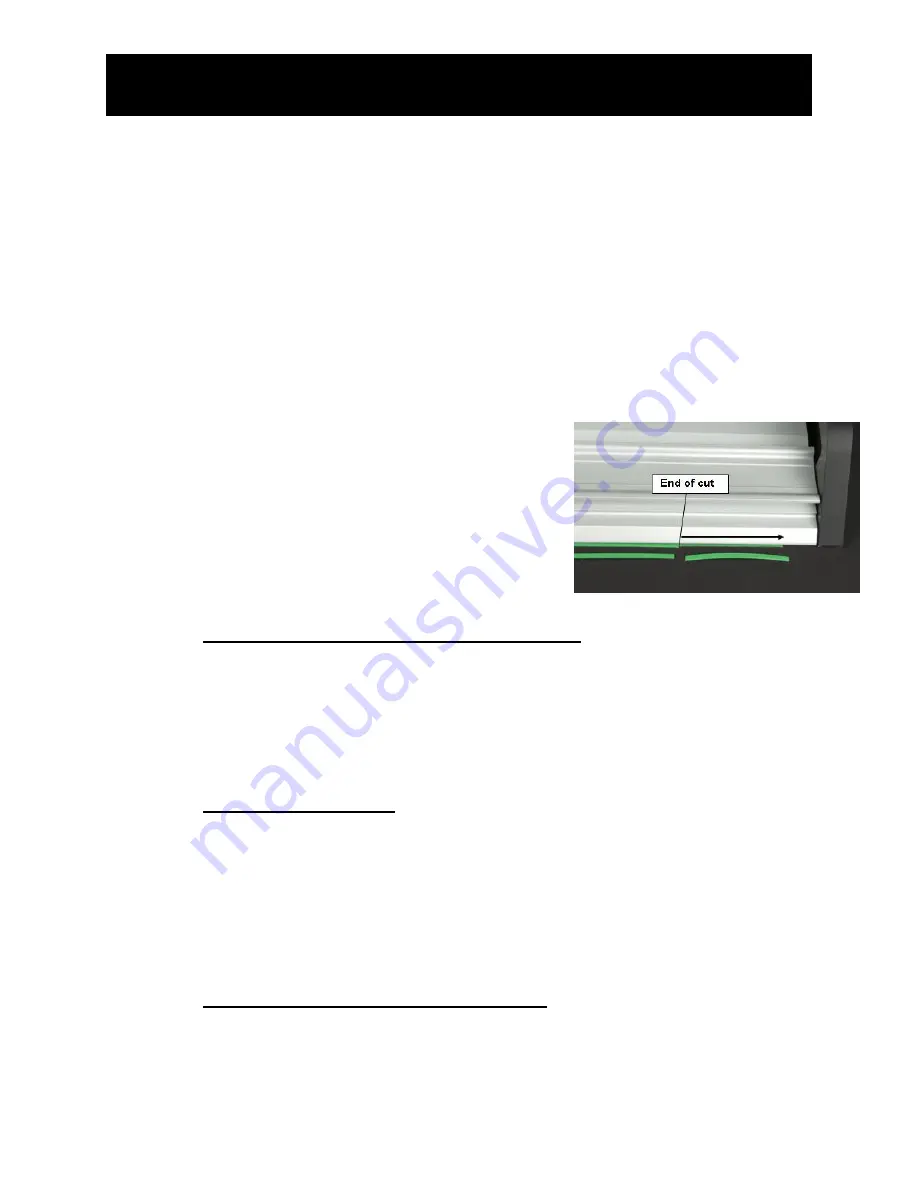
Note: There will be a portion on either end of the Guide Strip that will not be cut.
20.
Remove the Blade Magazine, and move the Blade to
the forward stop position.
21.
Reinsert the Magazine into the cutter.
22.
Position the Cutting Head to the far left.
23.
Make another cut just until the new cut meets the
original cut.
24.
Move the Cutting Head to the middle of the cutter.
25.
Using a utility knife, continue the cut made by the
Gemini Pro on either end of the Guide Strip, and
remove the excess Guide Strip.
(Figure 4)
A.
Attaching the Cutter to the Atlas Workbench
a. Ensure the two (2) black handles on the Atlas Workbench are in the lowered position.
b. Locate the gap in the center of either End Cap of the cutter.
c. Position the gaps over the receiving tabs of the Atlas Workbench, and lower into position.
♦
Note: For information regarding the assembly of the Atlas Workbench,
please reference the Atlas Owner’s Manual.
B.
Alternative Installation
When not using the Atlas Workbench, put the Gemini Pro Cutter on a flat, even surface to
ensure a straight cut.
♦
Note: Optional Table Mount Elevators are available to raise and lower the
Gemini Pro on your work surface. Please contact Fletcher-Terry’s
Customer Service Department at 800.843.3826, and reference Part
#04-739 for more information.
C.
Mounting the Shelf Brackets for Storage
a. Locate one wall stud per shelf bracket. Different models have different numbers of brackets.
b. Using a drill, secure the brackets in place.
¾
Tip: Use a level to ensure the brackets are at the same height.
Figure
4


