


11
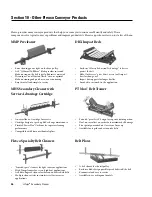
Fig. 4Jb
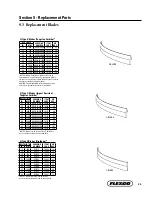
Fig. 4Ja
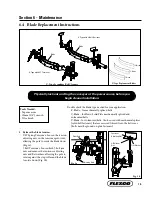
4J. Install the stop collars.
a. Slide one stop collar onto the most convenient pole end (Fig. 4Ja).
b. Insert a screwdriver or small rod into hole on end of cleaner pole. Pushing on the rod, move blade
into a positon parallel to belt (Fig. 4Jb). Blade should not be touching belt at this time.
c. Tighten stop collar set screw and lock nut to hold blade parallel to belt and remove screwdriver or rod.
d. Install second stop collar on other pole end. Do not tighten set screw and lock nut at this time.
Stop Collar Set Screw
and Lock Nut
Screwdriver
or Small Rod
Blade
No contact with belt
Stop Collar
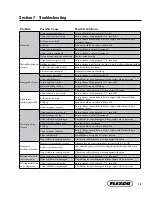
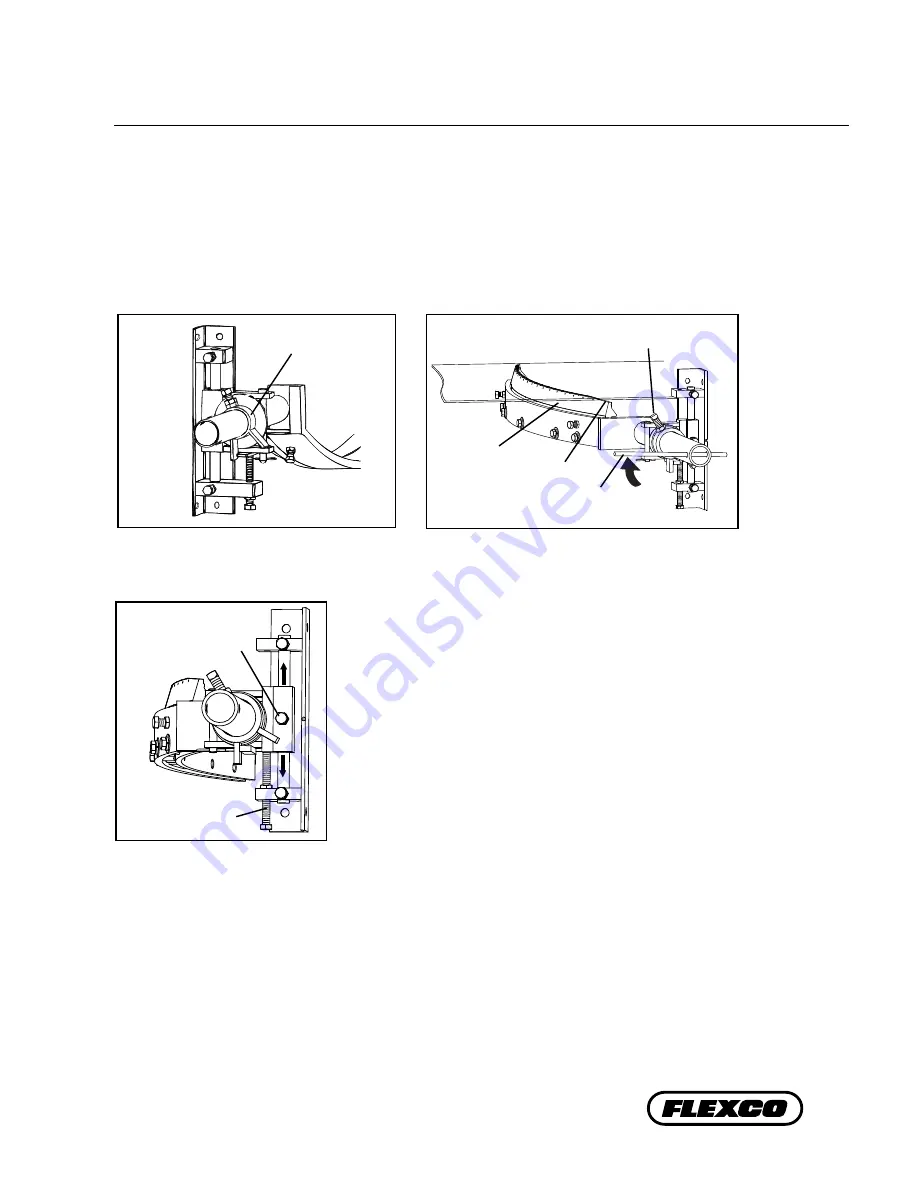
Adjusting Bolt
5J. Adjust blade to belt.
a. Loosen bearing mount set screws and lock nuts. Adjustments will be
made by turning adjusting bolts either up or down (Fig. 5J).
b. Adjust blade either up or down until both blade ends and the center
make full contact with belt.
IMPORTANT: In some cases, due to irregular belt wear or cupping, it may
be necessary to make final adjustments independently on both sides.
c. Tighten lock nuts on adjusting bolts to secure blade in correct position.
Also tighten bearing mount set screws and lock nuts.
Fig. 5J
Bearing Mount Set
Screw and Lock Nut
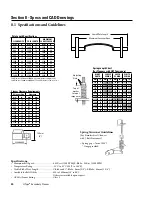
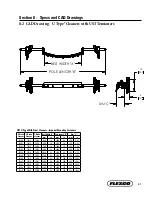
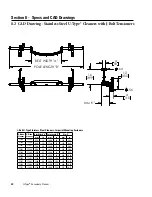
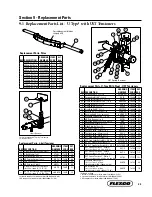
4.2 U-Type® Stainless Steel J-Bolt Cleaner (cont.)
Section 4 - Installation Instructions