5
Flexel
Installation Manual
Cable Kit Instructions
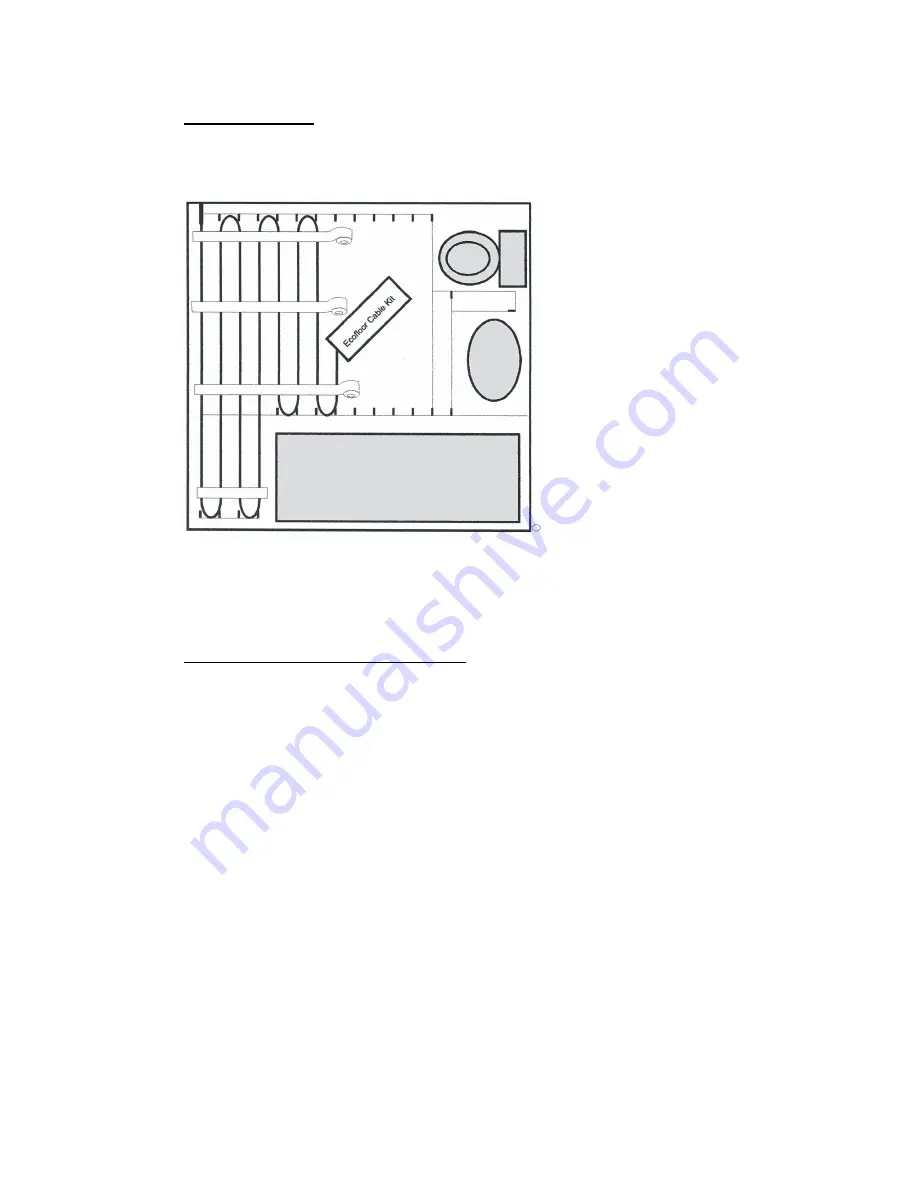
4) Laying the cable.
A hole is provided at the side of the box to feed out the cable. Do not take the cable off the
drum before laying as it will twist and make the installation difficult..
Connection is only required at one
end. The first 3metres is black
cable that can be cut as required.
The orange cable is the heated
part that must never be cut or
shortened.
As shown loop the cables to the
required marked spacings and
secure to the floor as you go
using the fixing tape supplied.
Towards completion it may be
necessary to slightly readjust the
cable spacings to the available
area. This will not be a problem
as long as the cables remain at
least 50mm apart and do not
cross or touch each other.
Never bury or try to hide the
cable. If necessary, start again.
If you have ordered the wrong size of kit contact your supplier.
Now and referring to the tables on page 1 test the cable circuit for continuity
(resistance) using an ohmeter. Avoid traffic over the laid area until floor tiling is
complete.
5). Install the Thermostat and Floor Probe.
Follow the instructions provided with the thermostat and the floor probe. For the floor probe
you will need to cut a channel for the protective spiral hose. (This may have been done at an
earlier stage as suggested). Fix the hose into position and shorten to the required length.
Feed the floor probe into the hose and block off the end. The floor probe is then attached to
the thermostat.
The thermostat should be installed in the room that is to be heated. F or bathrooms the
thermostat must be placed outside the bathroom but as close to the installation as possible.
If necessary the heating cable cold tail and thermostat can be extended by up to 50 metres
using cable supplied by Flexel International Limited.
Figure 4.


