20
1
2
9 Cleaning and maintenance
9.1 Changing the filters
The filters have a limited life, and to preserve a healthy
indoor air quality it is important to change them when
they are dirty.
How often the filters need to be changed depends on the
degree of contamination of the air where they are installed. In
general, the filters need to be changed at least once a year,
preferably in the autumn (after the pollen season). In areas
with a lot of dust and contamination, the filters should be
changed in the spring and autumn.
Dirty filters can, among other things, lead to:
•
Reduced performance of the unit
•
The unit becoming dirty
•
Humidity damage in the home
•
Reduced indoor air quality
A filter subscription is recommended to ensure full benefit
from the system.
The order no. for a new set of filters is
111738.
Both filters should always be changed.
To take out the filters:
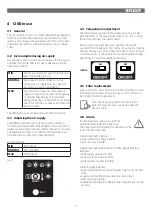
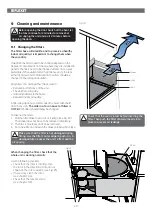
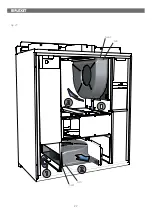
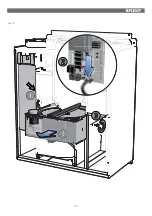
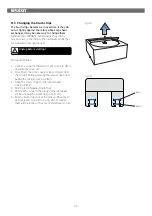
1. Pull the filter drawer out as far as it will go (see Fig. 24).
The drawer does not have to be removed completely.
2. The filter is now loose and can be removed.
3. Put a new filter in and push the drawer properly into place.
When changing the filter, check that the
whole unit is working normally.
Use the following checklist:
•
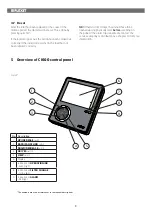
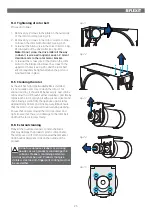
Check that the rotor is rotating. Turn
the rotor in the direction of rotation as
shown on the rotor cassette (see Fig. 25).
•
If necessary, clean the rotor
(see chapter 9.4).
•
Check that the fans are clean
(see chapter 9.2).
Fig. 24
Fig. 25
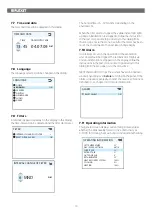
Check that the seal is intact before inserting the
filter. Then push the filter drawer properly into
place to prevent air leakage.
Before opening the door: Switch off the heat, let
the fans continue for 3 minutes to remove hot
air, unplug the unit and wait 2 minutes before
opening the doors.
!
Seal
Filter
Drawer
Rotor
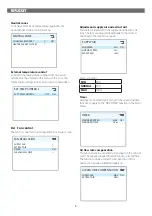
Make sure that the filter is not damaged during
fitting. Use the filter's outer edge to push it in. A
damaged filter reduces the unit's effect and the
air's purity.


