Remove the PowerStim 15R and all of the accessories from the box. You will need a knife
or scissors to remove the bubble wrap, the unit is very well wrapped and heavily taped up, be
careful as to not damage the unit.
STEP 2:
Lay all of the accessories out on a flat surface and use the above checklist to make sure that
you have all of the accessories and cables. Take the black AC Adapter and plug it into the
wall. There is a green light on the top of it, it will take 3-5 seconds when you first plug it in
for the light to come on, but once it does, the AC Adapter is ready to use. Grab your
PowerStim 15R and turn it around, you will see an AC Port and directly beside it a circular
object that says "FUSE." Plug the AC Adapter into the AC Port. DO NOT play with the
circular electrical fuse.
Karen- Please insert Photo of the fuse and adapter plug here
STEP 3:
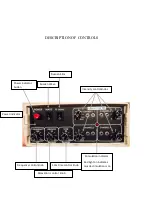
Make sure that the unit is off and all knobs are twisted to the far left. There are 4 Intensity
Knobs labeled Channel 1,Channel 2, Channel 3, Channel 4. Make sure that these 4 Channel
knobs are all the way turned to the left to the off position. You will hear the knob “Click” to
be sure it is OFF. Open up the 4x cables, they will be in sealed baggies. The cables will
have a black 2-prong head on one end and 2x dual pin lead wires on the back, these wires are
red and black. Now open up the bag of electrodes and remove one of the 4x packs of
electrodes. You will notice on the electrodes there is a short stem coming out of each
electrode, this is where you will connect the black and red ends to the electrode.
STEP 4:
Take one of the cables and plug the 2-Prong connection into Channel 1 on the front of the
PowerStim 15R unit. Do the same thing with a second cable and plug it into Channel 2.
Karen- PHOTO OF 2 PRONG PLUG GOING INTO FACE OF UNIT HERE
STEP 5:
Summary of Contents for PowerStim 15R
Page 19: ......


