background image


INSTALLATION AND SERVICE MANUAL FOR THE 

TAC1000-P FAN SERIES 

(PNEUMATIC CONTROL) 

TAC1000-H FAN SERIES 

(HYDRAULIC CONTROL) 


Publication No. 01553 

Revision 8 

Printed in Canada 

Summary of Contents for TAC1000-P series

Page 1: ...INSTALLATION AND SERVICE MANUAL FOR THE TAC1000 P FAN SERIES PNEUMATIC CONTROL TAC1000 H FAN SERIES HYDRAULIC CONTROL Publication No 01553 Revision 8 Printed in Canada ...

Page 2: ...roduct This makes it important to use caution when performing any type of service work A knowledge of the product and or its components is important before the removal or disassembly of any component 1 2 1 PROTECTIVE EQUIPMENT Always wear protective glasses protective shoes and any other protective equipment as required by job conditions when working around this product 1 2 3 SPRING LOADED FAN HUB...

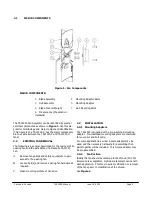
Page 3: ...hen the pressure is released the fan blades return to their default position See below The TAC1000 has a number of inherent features 1 Fail Safe Operation The blades are spring loaded into the default full pitch position If the fan loses pressure the fan will default to full pitch and act like a fixed pitch fan giving maximum cooling 2 Depending on the control kit ordered see section 2 0 the fan c...

Page 4: ...isting fan and the installation of a Flexxaire TAC1000 Fan A Remove fan guards and safety equipment to gain access to the existing fan B Loosen belt s and remove existing fan hardware as required C Clean mounting surface of fan drive 2 3 INSTALLATION 2 3 1 Mounting Adapters The TAC1000 is supplied with a pre machined mounting adapter Pre machined mounting adapters are machined for your pilot and b...

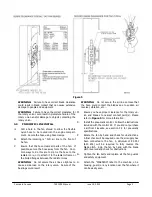
Page 5: ...dapter Runout should not exceed 0 005 0 127 mm in either direction Refer to Figure 3 Figure 3 Adapter Plate Mounting C Remove the shipping plug from the rear of the fan Place the TAC1000 fan onto the adapter plate and torque the M8 bolts supplied loose in fan kit to 21 Ft Lbs 28 N m Do not use thread locking com pound Refer to Figure 4 WARNING Do not remove the three M8 bolts from the rear of the ...

Page 6: ...s WARNING Do not secure the air line so tight as to cause a side load on the rotary union Failure of the bearings could result WARNING Do not secure the air line so loose that the hose could contact the blades due to sudden air reversal vibration etc D Ensure you have proper clearance for the rotary un ion and blades to nearest contact point s Please refer to Figure 5 for more information E Instal...

Page 7: ...r obstructions Use Figure 5 on Page 5 for clearance between the blades and any stationary objects F Tighten the fan belts and replace all the fan guards and safety equipment G Attach the WARNING label to the machine on a housing guard or any location near the fan where it can be easily seen WARNING Do not secure the hydraulic hose so tight as to cause a side load on the rotary union Failure of the...

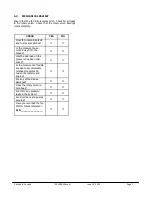
Page 8: ... and full reverse pitches Is the pressure line se cured away from the blades Has the side load on the pressure line been mini mized Is the pressure line flexible enough to accommodate relative movement be tween the radiator and engine Are any of the blades damaged Does the rotary union ro tate freely Are there any pressure leaks in the system Are all screens and guards secured Have you recorded th...

Reviews: