Printed in Canada
TAC1000 Manual
June 19, 2013
Page 4
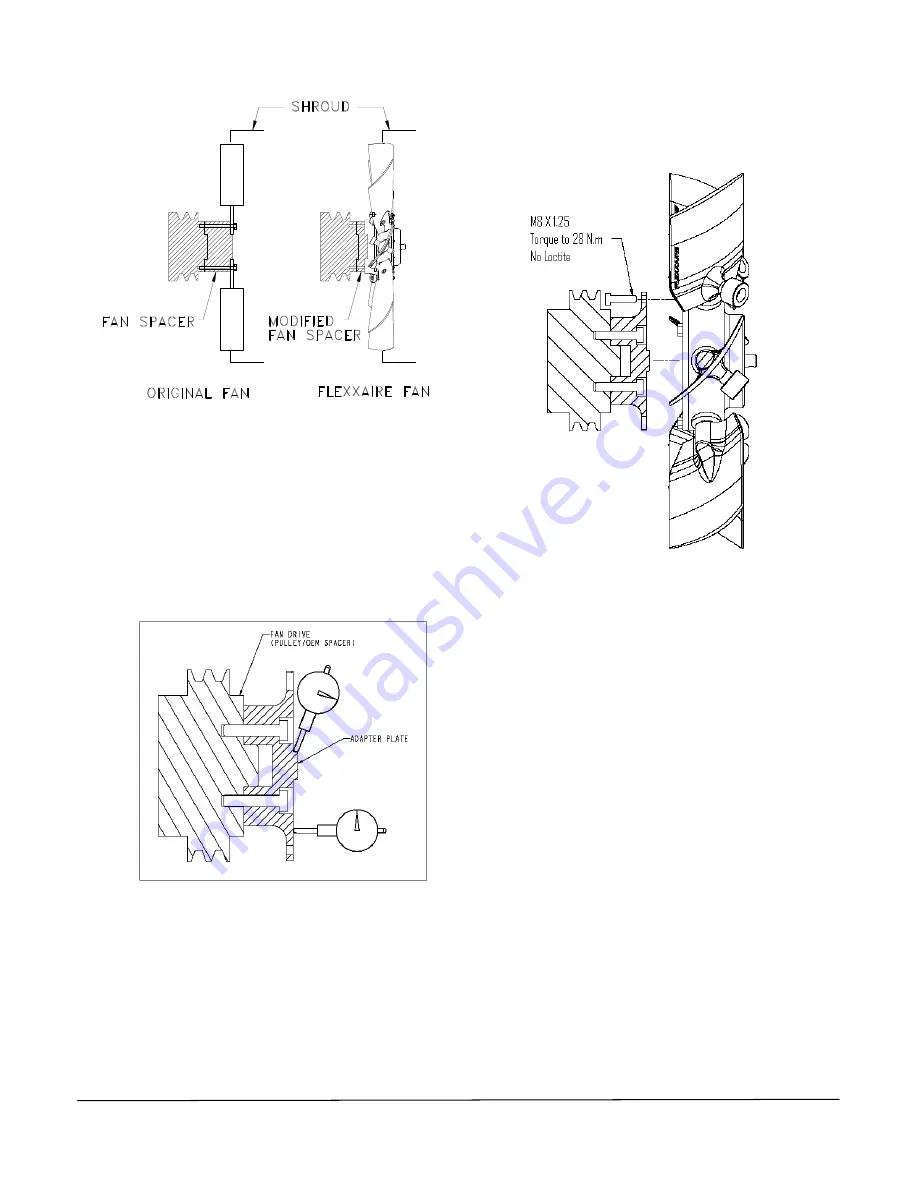
Figure 2
A.
Install the Flexxaire supplied adapter plate using
bolts from the original fan. If the bolt length needs
to be changed, use an equivalent or better grade of
bolt. Follow original equipment manufacturers
torque and thread locking specifications when in-
stalling the mounting adapter to the fan drive.
B.
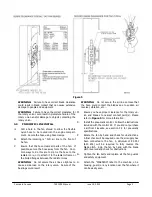
Measure axial and radial runout of the installed
adapter. Runout should not exceed 0.005” (0.127
mm) in either direction. Refer to
Figure 3
.
Figure 3: Adapter Plate Mounting
C.
Remove the shipping plug from the rear of the fan.
Place the TAC1000 fan onto the adapter plate and
torque the M8 bolts, supplied loose in fan kit, to 21
Ft-Lbs (28 N.m). Do not use thread locking com-
pound.
Refer to
Figure 4
.
WARNING:
Do not remove the three M8 bolts from
the rear of the Flexxaire Fan. The TAC1000 fan is
spring loaded; improper removal of these bolts could
result in injury.
Figure 4: Fan Mounting
Refer to
Figure 5
on page 5 for proper clearance for fan
rotary union and blade clearance.

