Not included
on all units
)
s
(
t
e
lt
u
o
k
n
a
t
o
t
e
p
i
P
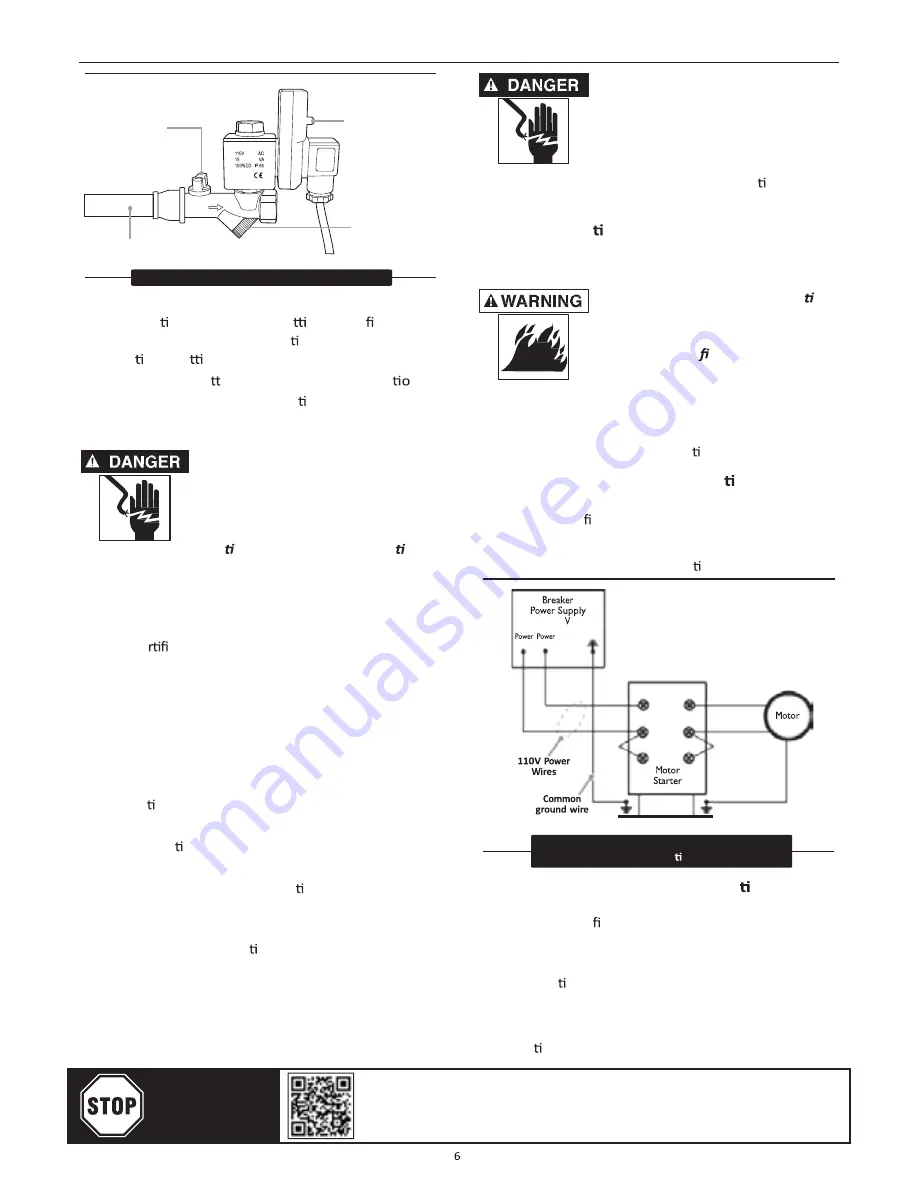
Manual OPEN/
CLOSE valve
Drain me and
Drain interval
Filter access
Clean regularly,
see Fig. 13.
Improperly grounded electrical
components are shock hazards.
Make sure all the components are
properly grounded to prevent
death or serious injury.
9. Make sure proper overload protec on for the
motor is installed.
Wiring Installa on
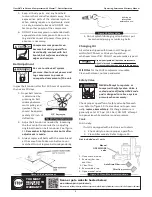
Install power leads into terminals opposite motor
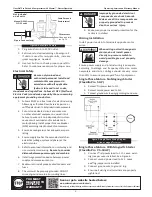
Figure 4: Auto Drain Feature
1. Plug auto drain into 120V outlet.
2. Set mers to desired se ngs. See gure 4.
If drain is used for mul ple units, increase
mer se ngs as needed.
3. Use test bu on to check proper opera n.
wires.
When wiring unit with magne c
starter, do not install power
directly to pressure switch to
avoid possible re and property
damage.
Refer to maintenance sec
.
e
r
a
c
r
e
p
o
r
p
r
o
f
n
o
Electrical Safety
Be sure only trained and
authorized personnel install and
maintain this compressor in
accordance with all applicable
federal, state and local codes,
standards and regula ons. Follow all NEC (Na onal
Electric Code) standards, especially those concerning
equipment grounding conductors.
1. Follow all NEC and local codes for electrical wiring.
Allow only authorized Flexzilla service person or
ce ed electrician to install electrical components.
2.
e
r
u
s
e
k
a
m
d
n
a
t
i
u
c
ri
c
d
e
t
a
ci
d
e
d
n
o
t
i
n
u
t
u
P
no other electrical equipment is wired into it.
Failure to wire unit on independent circuit can
cause circuit overload and/or imbalance in
motor phasing. Install proper No Fuse Breaker
(NFB) according to kW output of compressor.
3. Ensure incoming service has adequate ampere
ra ng.
4. Ensure supply line has the same electrical char-
acteris cs (voltage, cycles and phase) as the
electric motor.
5. Refer to amp load informa on on motor tag and
use correctly sized wiring.
Be sure to consider
distance between power supply and machine.
6. Install surge protec on device between power
supply and compressor motor.
7. Make sure to install properly sized breakers and
fuses.
8. The unit must be properly grounded. DO NOT
connect ground wire to air or cooling lines.
e
t
a
u
q
e
d
a
si
g
n
ir
i
w
l
a
n
r
e
t
n
i
d
n
a
y
l
p
p
u
s
r
e
w
o
p
e
r
u
s
n
E
according to voltage and frequency stated on motor
nameplate and starter. Voltage should not vary more
than 12% to ensure proper opera
.r
o
s
s
e
r
p
m
o
c
f
o
n
o
S
(Flexzilla Pro 5 HP)
S
(Flexzilla Pro 7.5-10 HP)
ingle Phase Motors - No Magne c Starter
1. Connect rst power lead to 1L1.
2. Connect second power lead to 3L2.
3. Connect ground wire to exis ng motor ground wire.
m
a
r
g
a
i
D
g
n
ir
i
W
e
s
a
h
P
e
l
g
n
i
S
:
5
e
r
u
g
i
F
without magne c starter
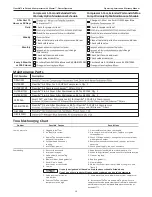
Single Phase Motors - With Magne c Starter
1. Connect rst power lead to 1L1. Leave exist-
ing jumper wire installed. See Figure 6.
2. Connect second power lead to 3L2. Leave
exis ng jumper wire installed.
3. Connect ground wire to ground lug.
4. Ensure all wiring and terminals are properly
ghtened.
220
1
2
1
2
3
4
5
6
Operat ing, Service and Warranty Manual
Flexzilla® Pro Piston Air Compressors with Silencer™, Electric Operated
YOU MUST
REGISTER TO
ACTIVATE
WARRANTY
Scan or go to website hosted below:
www.eatoncompressor.com/warranty
Warranty only valid by following conditions expressed in the Warranty Statement section of this Air Compressor Manual.


