7
Breaker
Power Supply
220 V
Power Power
Common
Wire connec on
from coil to
pressure switch
Breaker
Power Supply
220 V
Power Power Power
Common
Wire connec on
from coil to
pressure switch
1
2
ground wire
1
2
3
ground wire
A1
A2
Pressure
Switch
A1
A2
Pressure
Switch
1L1 3L2 5L3
1L1 3L2 5L3
110V Power
Wires
Jumper wire
from 3L2 power
to NC96
Jumper wire
from 1L1 to
Mag
A2
Starter
T1 T2 T3
Jumper wire
from bo om of
selector switch
to pressure switch
110V Power
Wires
Jumper wire
from 3L2 power
to NC96
Jumper wire
from 1L1 to
Mag
A2
Starter
T1 T2 T3
Jumper wire
from bo om of
selector switch
to pressure switch
top of
NC
Thermal
NC
Jumper wire
fr
top of
NC
Thermal
NC
selector switch
ON-OFF
Selector Switch
(if equipped)
96
Overload
95
T1
T2
T3
om NC95 to A2
Large jumper wire
o
n
o
2
T
o
t
3
L
5
verload
Motor
selector switch
ON-OFF
Selector Switch
(if equipped)
96
Overload
95
T1 T2 T3
Jumper wire
from NC95 to A2
Motor
Three Phase Motors
(See gure 7)
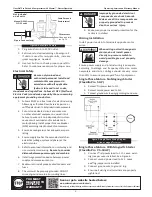
1. Connect rst power lead to 1L1.
2. Connect second power lead to 3L2.
3. Connect third power lead to 5L3.
4. Connect ground wire to exis ng motor ground
wire.
5. Check for proper motor rota on. When facing
motor sha , pulley should turn counterclock-
wise. If rota on is reversed,
turn o power
then switch two power leads.
Ensure wiring is installed
according to voltage required for
proper motor opera
.)
V
0
6
4
r
o
V
0
2
2
(
n
o
Opera on
Safety Rules
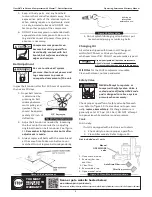
1. Make sure all operators receive product train-
c
u
r
t
s
n
i
ll
a
d
n
a
t
s
r
e
d
n
u
d
n
a
d
a
e
r
d
n
a
g
n
i
ons.
Keep all ammable, combus ble,
poisonous and noxious materials
away from opera ng area. Make
sure there are no oily rags, trash,
leaves, li er or other combus ble
materials in opera ng area. Keep
suitable, fully charged re ex nguishers nearby
when servicing and opera ng the compressor.
2.
NEVER
allow modi ca ns to compressor
structure or controls.
3. Keep all igni n sources away from exposed
electrical parts.
4. Keep all persons clear of compressor during
start-up and opera on.
5. NEVER operate the compressor with the fan,
coupling or other guards removed.
6. DO NOT engage in horseplay with air hoses as
death or serious injury may result.
7. Make sure to provide adequate ven la on
and use proper lubricant while opera ng the
compressor. If lubricant or other combus ble
substances are spilled, clean up immediately.
8. When checking or adding lubricant or when re-
ing air line an -icer systems with an freeze
compound, shut o compressor and allow it to
cool. Keep sparks, ames and other igni on
sources away and DO NOT permit smoking in the
vicinity.
9. Stop compressor and disconnect power if a
hazardous condi on arises.
10. Wear snug
ng clothing and con ne long hair
when around compressor. Keep all body parts
and clothing away from couplings, ywheel and
other moving parts of the equipment.
Operat ing, Service and Warranty Manual
Flexzilla® Pro Piston Air Compressors with Silencer™, Electric Operated
YOU MUST
REGISTER TO
ACTIVATE
WARRANTY
Scan or go to website hosted below:
www.eatoncompressor.com/warranty
Warranty only valid by following conditions expressed in the Warranty Statement section of this Air Compressor Manual.


