427-0101-01-12 Revision 100
September 2020
14
This document does not contain any export-controlled information.
Installation
2.6
Installing the Radar Assembly
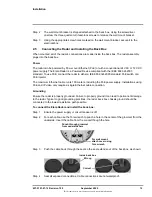
Step 1
Secure the radar assembly onto the back box
using the guide pins on the radar assembly and
the guide holes on the back box.
Make sure the THIS SIDE UP marking and the
FLIR logo on the radar assembly’s front panel
face up.
Important
Step 2
Securely tighten the radar assembly’s outer
circular ring. Then, use the Torx wrench to securely tighten the set screw on the outer
circular ring.
Step 3
Make sure the radar assembly is pointed at the area under surveillance, but do not tighten
the set screws.
Step 4
Provide power to the radar. Wait one minute to allow the radar to fully power up, and then
proceed.
Important
Step 5
If you have not yet configured the radar for networking and would like to change the
radar’s default networking settings, proceed with
Configuring the Radar for Networking
2.7
Uploading a Map Image and Configuring Georeference Settings
Upload a reference map image upon which the radar will overlay its display. Uploading a map makes
aiming the radar easier and also makes the radar display more useful to operators. To upload a map
and configure the radar’s georeference settings, you need to access the radar’s web page.
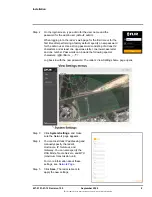
Step 1
Access the radar’s web page by doing one of the following:
• In the DNA tool, double-click the radar in the DNA Discovery List.
• Type the radar’s IP address in a browser’s address bar (when the PC and the radar are
on the same network).
Log in using the admin user and password (default:
admin
). The View Settings home page
appears.
Step 2
Click
System Settings
, open the
, and then upload and calibrate a map image.
Step 3
Click
Back to View Settings
, open the
, and specify the radar’s
latitude, longitude, and orientation.
When removing the radar assembly from the
back box, take precautions to prevent it from
becoming a drop hazard for persons or
property.
Do not provide power to the radar when it is resting on its flat front panel or with it
pointing at any reflective surface closer than one meter away.
Radar assembly
set screw (2)
This side up
Radar assembly
outer circular ring


