11
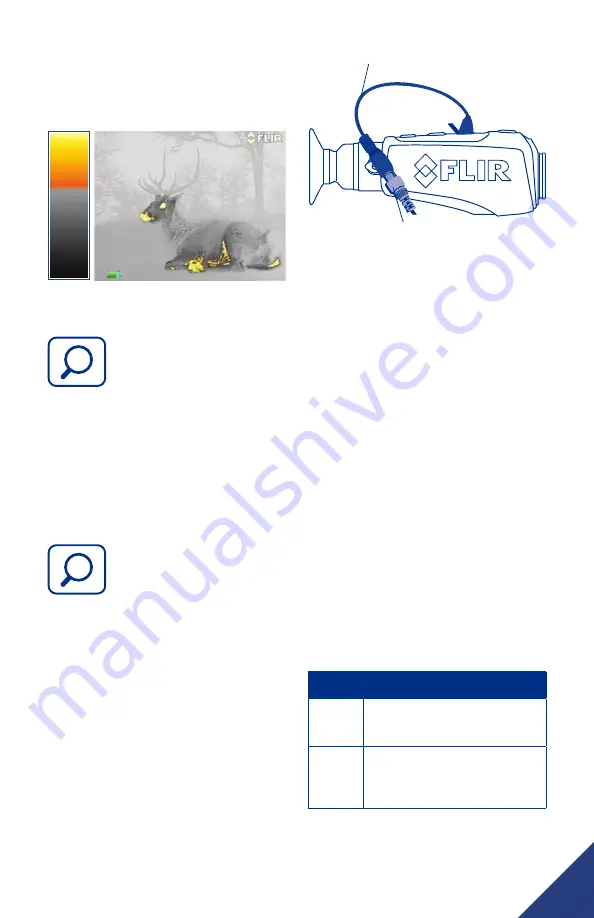
GRADED FIRE
The hottest things in the image are colored with
a gradient color of yellow’s and oranges and
everything else is greyscale.
3.1.5 ZOOM BUTTON
(SCOUT III 320 AND 640 ONLY)
Use this button to switch the
monocular between no zoom (full
resolution), 2x zoom (320), and
2x & 4x zoom (640). The central
part of the image is magnified by the zoom level
selected.
When zoom has been selected, the icon appears
continuously in the display. See user menu
section for additional details
FREEZE FRAME BUTTON
(SCOUT III 240 ONLY)
Allows current visible frame to be frozen
Use this button to freeze the video
so that a single frame may be
inspected closely
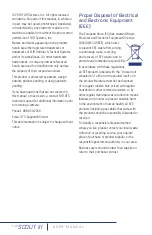
3.2 USING USB/ANALOG
VIDEO ADAPTER CABLE
(SCOUT III 320 AND 640 ONLY)
To obtain analog video out, insert the adapter
cable into the USB connector. The monocular
will detect the adapter cable and provide the
video stream. Use an RCA cable to connect to a
monitor or a video recorder.
When using the USB/Analog Video Adapter
cable to record video or supply video to a remote
monitor, it may be useful to turn off the Auto
Power Off feature of the monocular. Set the
video format using the SCOUT III/LS-X/LS-XR
End User Tool.
3.3 SCOUT III POWER
MANAGEMENT
Your SCOUT III Series monocular is equipped
with a power management system that provides
up to five hours of continuous operation. When
left in the Off state the battery will hold a charge
for up to two months. To use the product it is
important to understand the basic power states
of the product.
• When the monocular is turned on from
the Off state, it takes about five seconds
to become operational. During the bootup
process, the FLIR splash screen is shown.
Pressing the Power button will toggle the
monocular between On and Off.
• The camera shuts down after about five
minutes if no buttons are pushed.
USB to RCA Video Cable
Customer Supplied RCA Cable
SYSTEM
STATE
HOW DO YOU KNOW?
OFF
The display is off and the Task
Light comes on when the
Brightness button is pressed.
ON
The display is on and the LED
Task Light is disabled. If the
image appears blank, make sure
the lens cover is removed.


