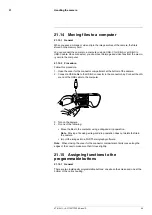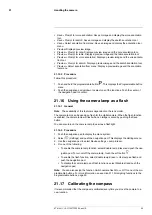
Configure
menu:
•
Follow Inspection route
: Select the check box to use the configuration from the in-
spection route file. Deselect the check box to make it possible to override the settings
in the inspection route file.
•
Auto next
: This setting defines if the camera after saving an image automatically will
set the default status and step to the next inspection point. If most inspection points
will have the default status, you will save inspection time by selecting the check box. If
you often want to set the status or add comments to the inspection points, it may be
more convenient to deselect the check box.
•
Default status
: This submenu is used to select the status to be set when an image is
saved. The options in the submenu come from the inspection route file.
•
Require image
: This setting defines if the operator must save an image before it is
possible to set the status of an inspection point.
•
Delete empty inspection points
: This setting defines if all empty inspection points (no
image and no status) will be removed from the inspection route file when the operator
locks an inspection.
20.5
Creating an inspection route
The inspection route is defined by an XML file. The inspection route XML file specifies
the route structure, consisting of multiple levels of nodes (sites/assets) and inspection
points.
The inspection route file also defines the available statuses and the configuration of the
camera behavior.
The inspection route file can be created using one of the following methods:
• FLIR thermography software that has inspection route support.
• Your own solution. The FLIR Thermal SDK can be used to build your own export/im-
port software or to interface your existing asset management system.
• Create a file in the camera.
• Manually edit an XML file.
20.5.1
Creating an inspection route in the camera
1. Make sure that there is no inspection route XML file on the memory card.
2. Select
(
Settings
) >
Save options & storage
>
Inspection route
>
Getting started
>
Create an empty Inspection route
.
This places a basic XML file on the memory card.
3. In live mode, tap the current point indicator. This displays a drop-down menu.
4. Tap
Inspection list
. This displays a list with a node placeholder.
5. Tap
Edit
to enter edit mode.
6. In edit mode, use the following buttons to build the inspection route:
• Tap
to add a new item below the selected one. You can select the name of the
new item and select if the new item is a node or an inspection point.
• Tap
to delete the selected item and all of its dependents.
• Tap
to add comments to the node. These comments will apply to all of its
dependents.
7. Tap
Done
to exit edit mode.
8. To make changes to the camera behavior configuration, see section 20.4
#T810411; r. AC/70277/70566; en-US
77
Summary of Contents for GF7 Series
Page 1: ...User s manual FLIR GF7x series...
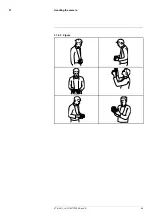
Page 93: ...Handling the camera 21 21 8 2 Figure T810411 r AC 70277 70566 en US 85...
Page 119: ...Mechanical drawings 28 See next page T810411 r AC 70277 70566 en US 111...
Page 124: ...CE Declaration of conformity 29 See next page T810411 r AC 70277 70566 en US 116...
Page 125: ......

