
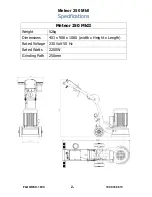

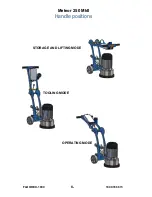
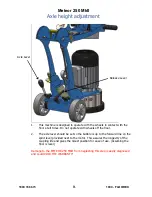


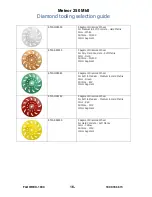

Meteor 250 MkII
FLOOREX- 1800
14
.
1800 356 673
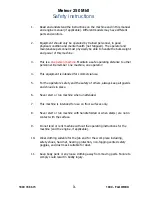
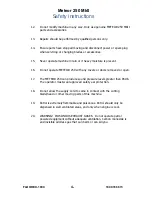
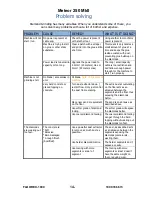
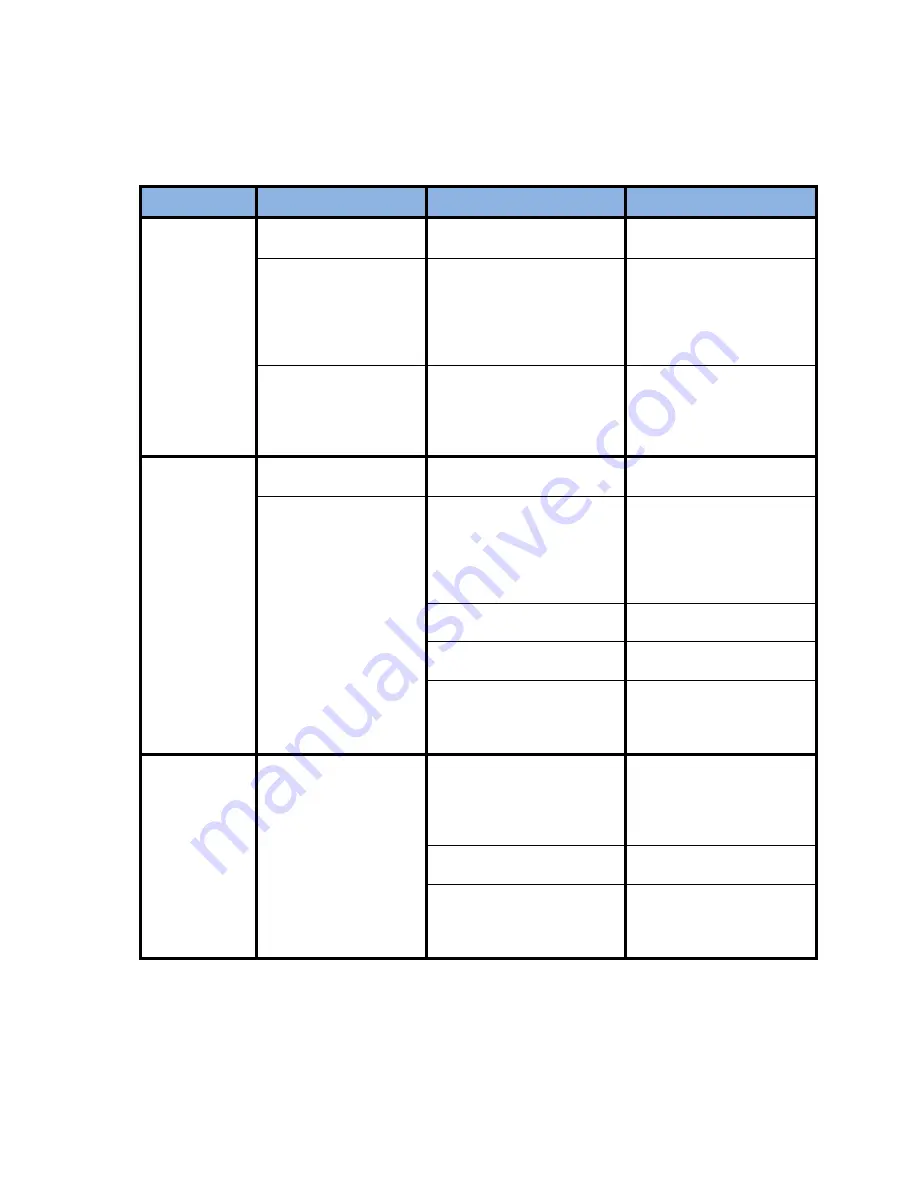
Problem solving
Diamond Grinding has many variables. When you understand some of these, you
can solve many problems without a lot of bother and expense.
PROBLEM
CAUSE
REMEDY
WHAT IS IT DOING?
Machine will not
start / run.
No power is present at
cable end.
Check the power is present
with another tool.
Using another tool confirms
power is present
Machine is trying to start
on glue or other sticky
substance.
Clear a patch with a scraper
and grind into the glue a little
at a time.
This means it only tackles a
small amount of glue at a
time and keeps the glue
residue coated with dust,
preventing glue build-up on
the diamonds.
Power lead is too small in
capacity or too long.
Upgrade the power lead to
2.5mm² (20 meters) max or
4mm² (50 meters max).
The long / small capacity
cable is too restrictive and
can’t allow enough power
through for the machine to
start / run properly.
Machine is not
grinding at all.
No blade / accessories in
unit.
Fit blade
. Note; check wear on
machine.
Very hard concrete or
glazed topping on
concrete.
Turn dust extractor down /
restrict flow. Only just control
the dust from escaping.
The extra dust accumulating
on the floor acts as an
abrasive between the
segments and the floor thus
exposing the diamonds
better.
Place river sand or equivalent
on the floor.
The sand is an abrasive as
described above.
Use softer grade of diamond
tooling.
The softer grade will expose
the diamonds better.
Use coarser diamond tooling. The coarser diamond tooling
can get through the hard
topping without wearing out
the diamonds too fast.
The diamonds
are wearing out
too fast.
The concrete is:
*Soft
*Abrasive
*Rain Damaged
*A rough finish
(Scarified).
Use a powerful dust extractor
to remove as much dust as
possible.
The dust, as described acts
as an abrasive between the
segments exposing the
diamonds prematurely,
wasting them.
Use harder diamond matrix.
The harder segments don’t
expose as easily.
Use tooling with more
segments or area² of
segment.
The tooling with more
segments or area² doesn’t
have the same weight on
them, reducing wear.
Summary of Contents for Meteor 250 MkII
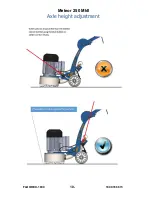
Page 11: ...Meteor 250 MkII FLOOREX 1800 10 1800 356 673 Axle height adjustment ...
Page 12: ...Meteor 250 MkII 1800 356 673 11 1800 FLOOREX Axle height adjustment ...
Page 13: ...Meteor 250 MkII FLOOREX 1800 12 1800 356 673 Axle height adjustment ...
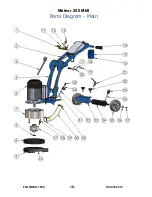
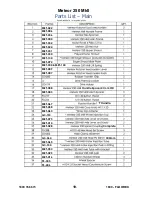
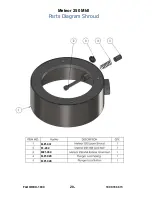
Page 19: ...Meteor 250 MkII FLOOREX 1800 18 1800 356 673 Parts Diagram Main ...
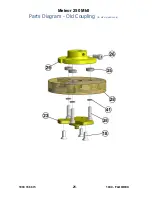
Page 22: ...Meteor 250 MkII 1800 356 673 21 1800 FLOOREX Parts Diagram Old Coupling for older models only ...
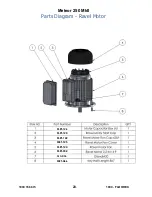
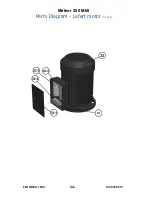
Page 25: ...Meteor 250 MkII FLOOREX 1800 24 1800 356 673 Parts Diagram Lafert motor If Fitted ...
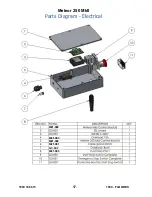
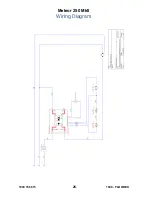
Page 26: ...Meteor 250 MkII 1800 356 673 25 1800 FLOOREX Wiring Diagram ...
Page 27: ...Meteor 250 MkII FLOOREX 1800 26 1800 356 673 ...


