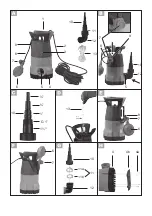
9
GB
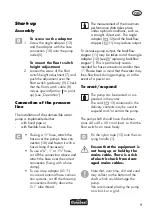
Start-up
Assembly
To screw-on the adapter:
1. Screw the angle adapter (12)
and the adapter with the hose
connection (10) onto the pump
outlet (5).
To mount the float switch
height adjustment
2. Loosen the screw of the float
switch height adjustment (7) and
push the adjustment over the
float switch guideway (9). Check
that the float switch cable (8)
moves upward (arrow to point
up) (see „Operation“).
Connection of the pressure
line
The installation of the submersible water
pump is implemented either
- with fixed pipe or
- with flexible hose line
• If using a ½” hose, attach the
hose over the pump’s hose con-
nection (10) and fasten it with a
hose clamp if necessary.
• To use a ¾”, 1“ or 1½” hose,
cut off the connection above and
attach the hose over the correct
connection
(fixing with a hose
clamp)
.
• To use a tap adaptor (IG 1“)
to connect external hose connec-
tion systems, cut off the three top
connections directly above the
G 1“ tube thread.
The measurement of the maximum
performance data takes place
under optimal conditions, such as
a straight, direct exit. The angle
adapter (
12) and the backflow
stopper (
11) may reduce output.
To increase pump output, the backflow
stopper (11) may be taken out of the angle
adapter (12) (see
“replacing backflow
stopper”). This is particularly recom
-
mended for hose connections smaller than
1“. Please bear in mind that the water may
then flow back during pumping, or in the
event of a power cut.
To erect/suspend
The pump can be erected or sus
-
pended in the water.
The cord (
13) contained in the
delivery contents may be used to
suspend and/or extract the pump.
The pump shaft should have the dimen
-
sions 40 x 40 x 50 cm at least, so that the
float switch can move freely.
Fix the nylon rope (13) onto the car-
rying handle (1).
Ensure that the equipment is
not hung up or held by the
mains cable. There is a risk
of electric shock from dam-
aged mains cables.
Note that, over time, dirt and sand
may collect on the bottom of the
shaft, which could damage the
pump.
We recommend placing the pump
on a brick or a grid.
Summary of Contents for 109771
Page 3: ...10 10 12 10 11 12 13 13 5 7 8 9 4a 4b 4 1 1 G 1 1 3 2 4 5 6 7 7 7 6 6 8 9 8 10 12 11 11a 11b ...
Page 42: ...42 ...
Page 88: ...88 ...
Page 89: ...89 ...


