background image

18

GB

Introduction

Congratulations on the purchase of your 

new device. With it, you have chosen a 

high quality product.

During production, this equipment has 

been checked for quality and subjected 

to a final inspection. The functionality of 

your equipment is therefore guaranteed. It 

cannot be ruled out that residual quantities 

of water or lubricants will remain on or in 

the equipment/hose lines in isolated cases. 

This is not a fault or defect and it repre-

sents no cause for concern.

  The operating instructions constitute 

part of this product. They contain 

important information on safety, use 

and disposal.


Before using the product, familiarise 

yourself with all of the operating 

and safety instructions. Use the 

product only as described and for 

the applications specified.


Keep this manual safely and in the 

event that the product is passed on, 

hand over all documents to the third 

party.

Intended purpose 

The tool is intended for breaking up and 

tilling coarse soil for the purpose of mixing 

in fertiliser, peat and compost in domestic 

areas.

Any use other than that specifically named 

in this manual may lead to damage to the 

tool and represents a serious injury hazard 

for the operator.

The operator or user of the tool is respon-

sible for any damage or injury caused to 

other persons or property.

Contents

Introduction ...............................18

Intended purpose  ......................18

General description ....................19

Scope of delivery .........................19

Functional description ...................19

Overview ....................................19

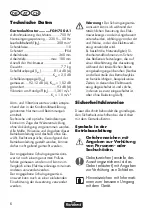
Technical data ............................19

Safety precautions .....................20

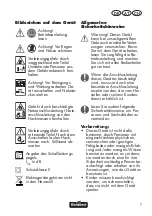
Symbols used in the manual ...........20

Symbols on the implement .............20

General notes on safety ................21

Assembly instructions .................24

Fitting the grip tubing ....................24

Operation ..................................25

Switching on and off .....................25

Operating instructions ...................25

Cleaning/Maintenance ...............26

General cleaning and maintenance 

work ...........................................26

Changing the tines .......................26

Storage ......................................27

Spare Parts/Accessories .............27

Disposal, environmental 

protection ..................................27

Guarantee .................................28

Repair Service ............................29

Service-Center ............................29

Importer ....................................29

Translation of the original  

EC declaration of conformity ......31

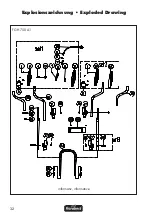
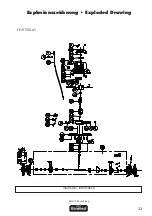
Exploded Drawing ............... 32/33

Summary of Contents for 270725

Page 1: ...Gartenkultivator FGH 750 A1 IAN 270725 Gartenkultivator Originalbetriebsanleitung Garden Cultivator Translation of the original instructions 270725_flo_Gartenkultivator_cover_AT indd 2 19 11 15 12 59...

Page 2: ...or dem Lesen die Seite mit den Abbildungen aus und machen Sie sich anschlie end mit allen Funktionen des Ger tes vertraut Before reading unfold the page containing the illustrations and familiarise yo...

Page 3: ...A D E B 10 9 7 8 6 4 5 3 1a 1b 2 3 14 14 14 14 15 15 5 15 15 6 16 2 18 17 12 12 11 1a 1b 13 4 4 2 C 20 19 11 10...

Page 4: ...ritte mit aus Bestimmungsgem e Verwendung Das Ger t ist f r das Hacken und Zerklei nern grobscholligen Bodens und f r die Einarbeitung von D nger Torf und Kompost im h uslichen Bereich bestimmt Jede a...

Page 5: ...t montierter Netzanschlussleitung Linker Gabelgriff Querb gel Kunststoff Montagezubeh r Kabelklemme und G rtelclip Originalbetriebsanleitung bersicht A 1a Rechter Gabelgriff mit Starthebel Entriegelun...

Page 6: ...Elektrowerkzeugs mit einem anderen verwendet werden Der angegebene Schwingungsemissi onswert kann auch zu einer einleitenden Einsch tzung der Aussetzung verwendet werden Warnung Der Schwingungsemis s...

Page 7: ...brauch ernsthafte Verlet zungen verursachen Bevor Sie mit dem Ger t arbeiten lesen Sie sorgf ltig die Be triebsanleitung und machen Sie sich mit allen Bedienteilen gut vertraut Wenn die Anschlussleitu...

Page 8: ...ille Das Tragen pers nlicher Schutzausr stung wie rutschfeste Sicherheitsschu he Schutzhelm oder Geh r schutz verringert das Risiko von Verletzungen Schalten Sie zur Vermeidung von Schnittverletzungen...

Page 9: ...ten Sie darauf dass die Griffe trocken und sauber sind Achtung beim R ckw rtsgehen Es besteht Stolpergefahr Seien Sie besonders vorsichtig wenn Sie das Ger t wenden oder zu sich heranziehen Falls es z...

Page 10: ...e sch digungen und lassen Sie es ggf reparieren Benutzen Sie das Ger t nicht in der N he von entz ndbaren Fl ssigkeiten oder Gasen Bei Nichtbeachtung besteht Brand oder Explo sions gefahr Wartung und...

Page 11: ...leitung nicht um den Netzstecker aus der Steckdose zu ziehen Sch t zen Sie die Netzanschlussleitung vor Hitze l und scharfen Kan ten Schlie en Sie das Ger t nur an eine Steckdose mit Fehlerstrom Schut...

Page 12: ...ach den Starthebel 18 Lassen Sie den Entriegelungsknopf los 17 Die Hackmesser A 11 begin nen zu rotieren und graben sich in den Boden ein 6 Zum Ausschalten lassen Sie den Starthebel 18 los Achtung Nac...

Page 13: ...fahr eines Stromschlags F hren Sie folgende Wartungs und Reinigungsarbeiten regelm ig durch Dadurch ist eine lange und zuverl ssige Nutzung gew hrlei stet Allgemeine Reinigungs und Wartungsarbeiten Sp...

Page 14: ...10 auf dass die Bohrungen der Messerachse mit den Bohrungen auf der Antriebswelle 10 bereinstim men siehe D Achten Sie auf die korrekte Dreh richtung der Hackmesser 11 Die Pfeile auf Getriebe 9 und H...

Page 15: ...nd so einer Wieder verwertung zugef hrt werden Fragen Sie hierzu unser Service Center Zur Entsorgung der Verpackung geben Sie den Karton zum Papierm ll Kunst stoffteile f hren Sie dem Dualen System zu...

Page 16: ...pa cken gemeldet werden Nach Ablauf der Garantiezeit anfallende Reparaturen sind kostenp ichtig Garantieumfang Das Ger t wurde nach strengen Qualit ts richtlinien sorgf ltig produziert und vor Anliefe...

Page 17: ...uren die nicht der Ga rantie unterliegen gegen Berechnung von unserer Service Niederlassung durchf hren lassen Sie erstellt Ihnen gerne einen Kostenvoranschlag Wir k nnen nur Ger te bearbeiten die aus...

Page 18: ...Intended purpose The tool is intended for breaking up and tilling coarse soil for the purpose of mixing in fertiliser peat and compost in domestic areas Any use other than that specifically named in t...

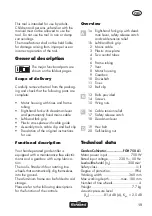
Page 19: ...maintenance free electric motor and a gearbox with sump lubrica tion The tool is fitted with four rotating tine wheels that automatically dig themselves into the ground The aluminium frame can be fol...

Page 20: ...ower tool from the stated value depending on the manner in which the power tool is used Safety precautions aimed at protect ing the user should be based on estimated exposure under actual usage condit...

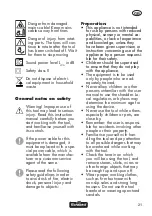
Page 21: ...sensory or mental ca pabilities or lack of experience and knowledge unless they have been given supervision or instruction concerning use of the appliance by a person responsi ble for their safety Ch...

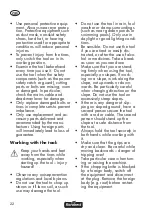
Page 22: ...stones or till lawn soil as such use may damage the tool Do not use the tool in rain foul weather or damp surroundings such as near garden ponds or swimming pools Only use in daylight or good lightin...

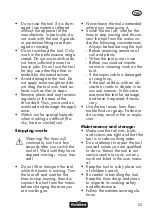
Page 23: ...n dis connect the tool from the mains before changing the area you are working on Never leave the tool unattended where you were using it Switch the tool off wait for the tines to stop moving and disc...

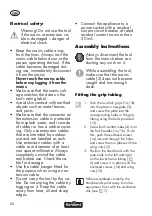
Page 24: ...ted for the purpose when using an ex tension cable Do not carry the tool by the ca ble Do not unplug the cable by tugging on it Keep the cable away from heat oil and sharp edges Connect the appliance...

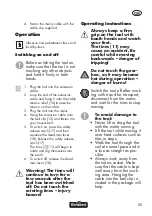
Page 25: ...d man lever 18 Warning The tines will continue to turn for a few seconds after the tool has been switched off Do not touch the rotating tines injury hazard Operating instructions Always keep a firm gr...

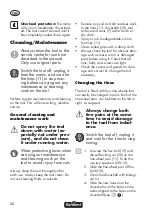
Page 26: ...s Remove any soil and dirt residues stuck to the tines 11 driveshaft 10 tool surface and vents 7 with a brush or dry cloth Spray or rub biodegradable oil into the tines 11 Clean soiled grips with a da...

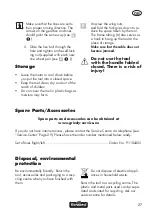
Page 27: ...t the place of storage Make sure that the cable does not become jammed Do not use the tool with the handle folded closed There is a risk of injury Spare Parts Accessories Spare parts and accessories c...

Page 28: ...od are chargeable Guarantee Cover The equipment has been carefully pro duced in accordance with strict quality guidelines and conscientiously checked prior to delivery The guarantee applies for all ma...

Page 29: ...s not covered by the guarantee can be carried out by our ser vice branch which will be happy to issue a cost estimate for you We can handle only equipment that has been sent with adequate packaging an...

Page 30: ...hemissionsrichtlinie 2000 14 EG best tigt Schallleistungspegel Garantiert 93 dB A Gemessen 92 12 dB A Angewendetes Konformit tsbewertungsverfahren entsprechend Anh VI 2000 14 EG Benannte Stelle NB 049...

Page 31: ...irm the following in accordance with the 2000 14 EC emissions guideline Sound power level Guaranteed 93 dB A Measured 92 12 dB A Compliance evaluation process accordance with appendix VI 2000 14 EC Re...

Page 32: ...32 Explosionszeichnung Exploded Drawing informativ informative FGH 750 A1...

Page 33: ...33 2015 11 20 rev02 op Explosionszeichnung Exploded Drawing FGH 750 A1 informativ informative...

Page 34: ...TOOLS GMBH CO KG Stockst dter Stra e 20 D 63762 Gro ostheim Stand der Informationen Last Information Update 11 2015 Ident No 76005566 AT IAN 270725 270725_flo_Gartenkultivator_cover_AT indd 1 19 11 1...

Reviews: