|
6
QS301034 Rev. C
MN300610 Rev B_9
6 of 10
1)
Press
MENU
to access the Setup screen.
1)
Press
Up Arrow / Max
and scroll through the options until you reach ProG.
2)
Press
ACK
to access ProG and SCALE will appear.
3)
Press
ACK
and Inpt1 will appear.
4)
PRESS
ACK
to view the existing InP1 (Input 1) value. This is typically the tank empty value for a 4 mA signal.
5)
Press
Right Arrow / Reset
to move the highlighted digit to the right and
Up Arrow / Max
to increase the
setting’s value. When correct, press
ACK
to save the setting.
6)
Press
ACK
to view the existing diS1 (Display 1) value. This is typically the tank’s empty value for a 4 mA signal.
7)
Press
Right Arrow / Reset
to move the highlighted digit to the right and
Up Arrow / Max
to increase the
setting’s value. When correct, press
ACK
to save the setting.
8)
Press
ACK
to view the existing InP2 (Input 2) value. This is typically the tank full value for a 20 mA signal.
9)
Press
Right Arrow / Reset
to move the highlighted digit to the right and
Up Arrow / Max
to increase the
setting’s value. When correct, press
ACK
to save the setting.
10)
Press
ACK
to view the existing diS2 (Display 2) value. This is typically the tank’s full value for a 20 mA signal.
11)
Press
Right Arrow / Reset
to move the highlighted digit to the right and
Up Arrow / Max
to increase the
setting’s value. When correct, press
ACK
to save the setting.
12)
Press
MENU
to exit the Setup screen.
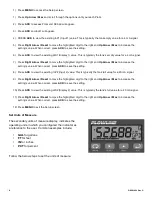
Set Units of Measure
The secondary units of measure display, indicates the
operating units in which you configured the indicator as
a reference to the user. Common examples include:
•
GAL
for gallons
•
FT
for feet
•
IN
for inches
•
PCT
for percent
Follow the below steps to set the units of measure.


