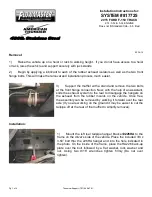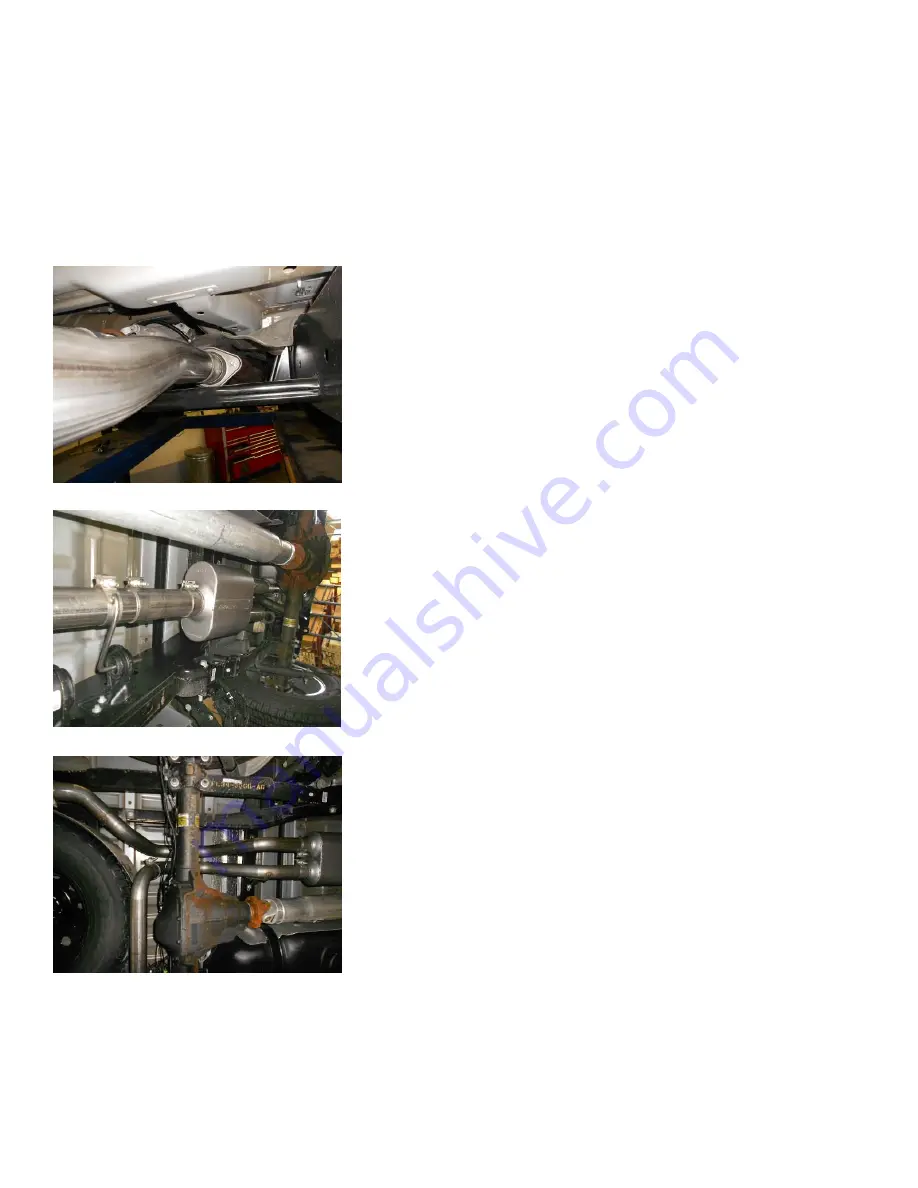
2)
Based on production variations this is a list of cab designs, bed lengths and wheel bases that
outlines the requirements for the front inlet pipe. Please follow the instructions for your particular
wheelbase listed below. Double check all measurements before cutting your inlet pipe:
141” WB - Regular Cab / 8’ Bed -
Trim 4” off of inlet pipe #26532S (do not use #26277S)
145” WB – SuperCrew / 5.5’ Bed -
Use inlet pipe #26532S with no modifications (do not use #26277S)
145” WB – SuperCab / 6.5’ Bed -
Use inlet pipe #26532S with no modifications (do not use #26277S)
157” WB – SuperCrew /6.5’ Bed -
Trim 6” off of extension pipe #26277S and use with inlet pipe #26532S
163” WB – SuperCab / 8’ Bed -
Use inlet pipe #26532S and extension pipe #26277S with no modifications.
3)
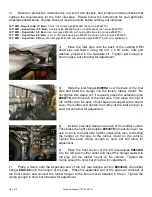
Place the inlet pipe onto the back of the existing OEM
head pipe and fasten using the 3/8” x 2.00” bolts, nuts and
washers provided in the hardware kit. Tighten just enough to
hold in place, but still allow for adjustment.
4)
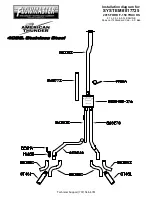
Slide the inlet hanger
#490HA
over the back of the inlet
pipe and insert the hanger into the factory rubber mount. Do
not tighten this clamp yet. If required, place the extension pipe
#26277S
onto the back of the inlet pipe. Then place the inlet of
the muffler onto the back of inlet pipe and support with a stand.
Level the muffler and tighten the clamp at the inlet enough to
hold, but still allow for adjustment.
5)
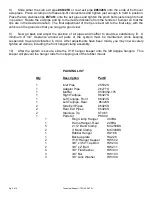
Install a provided clamp onto each of the muffler outlets.
Then place the right side tailpipe
#86327S
into position over the
axle and into the right side muffler outlet while also connecting
the hanger on the pipe to the rubber mount on the vehicle.
Tighten the band clamp enough to hold, but still allow for
adjustment.
6)
Place the front section of the left side tailpipe
#86323S
into the left side muffler outlet and insert the hanger welded to
the pipe into the rubber mount on the vehicle. Tighten the
clamp enough to hold, but still allow for adjustment.
7)
Place a clamp onto the expanded end of the left rear tailpipe section
#86324S,
slip rubber
hanger
#HA168
onto the hanger of the pipe
.
Place the expanded end of the pipe over the back of
the front section and connect the rubber hanger to the frame mount installed in Step 1. Tighten the
clamp enough to hold, but still allow for adjustment.
Pg 2 of 4
Technical Support (707) 544-4761

