M SLURRY USER
INSTRUCTION ENGLISH 71569241 - 02/08
Page 43 of 60
®
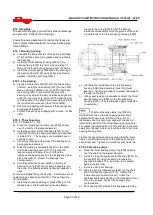
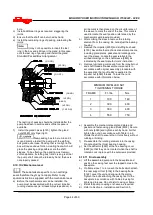
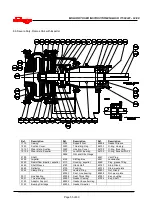
f) The shaft sleeve is grooved for an o-ring [4610].
Lubricate the o-ring and install.
g) Install the expeller [2250] onto the shaft sleeve
[2445] vanes first.
h) Using a locking collar secure the expeller in place.
i) Install the gasket [4590.1] into the expeller housing
[4110] recess. Use a small amount of lubricant to
hold in place. Remove clamps holding the
wearplate in place. Assemble the expeller housing
[4110] onto the wearplate [1915.3]. Clamp the
housing in place.
j)
Remove locking collar and assemble gasket
[4590.2] onto the shaft and seat against the
expeller hub face.
6.10.7 Impeller Installation
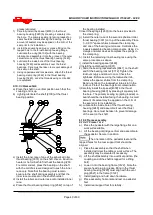
a) Install the impeller spacer [2460] on standard
pumps only and install the impeller gasket [4590.2]
on all pumps.
b) Due to the method of assembling the impeller, it is
recommended to smear the sleeve face and both
sides of the impeller spacer [2460] with a heavy
grease or a silicon sealant before assembling onto
the shaft which will help to hold the impeller spacer
in position during assembly.
c) For 2.5M182 only - The impeller requires an
adapter bushing to match the shaft threads. If a
new impeller is being installed an insert must be
installed. Thread the insert into the impeller and
lock into position using Loctite 242.
d) Apply anti-seize compound to the shaft threads and
screw the impeller onto the shaft. For large sizes it
is more practical to hold impeller using a sling and
hoist and turn the shaft.
Failure to tighten the impeller [2200]
spacer [2460] securely against the sleeve may
cause serious damage to pump components.
The thread is designed so that during
operation the impeller will tend to tighten onto shaft.
Therefore a clockwise shaft rotation (looking from
coupling end) will screw impeller on.
e) Release the thrust bearing housing hold down bolts
and tighten the jacking screws to pull the impeller
back to the stuffing box head [4100]. The stuffing box
head must not be rigidly clamped.
6.10.8 Suction Side Wearplate
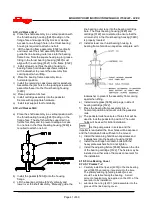
a) Install the studs [6572] in the wearplate [1915] using
Loctite grade A or equivalent.
6.10.8.1 Standard Duty Pumps
a) Lift wearplate and install into casing.
b) Place the sealing washer [4590.5] over the studs
[6572]. Secure wearplate [1915] in place using hex
nuts and washers using Loctite 242 or equivalent.
Tighten in accordance with Table tables in section
6.6.
Excessive or uneven tightening torque may distort wearplate
affecting impeller running clearances or result in broken
studs.
6.10.8.2 Severe Duty Pumps
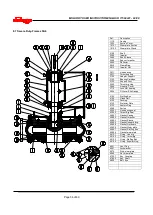
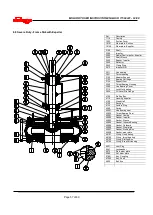
a) Lift suction cover [1223] and mount over the suction
side wearplate [1915].
b) Install o-ring into enclosed hex nuts. A small amount
of lubricant would be usefull to hold the o-ring in
place.
c) Fasten wearplate to cover with the enclosed nuts.
Tighten in accordance with Table tables in section 6.6.
Excessive or uneven tightening torque may distort wearplate
affecting impeller running clearances or result in broken
studs.
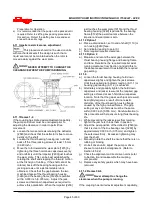
d) Place the casing [1110] on a clean section of the
floor with the discharge pointing counter-
clockwise. Refer also to the pump elevation
drawing if applicable.
e) Apply heavy grease to casing gasket [4590] and
place in position on the casing flange.
f) Lower the suction cover assembly [1223] into the
casing. Tighten the casing bolts. The casing to
suction cover gap is approximately .050 inches at
which point the casing gasket should be
compressed.
6.10.9 Casing
a) Smear a small amount of grease or anti-seize
compound over one face of the gasket [4590] and
place it on the stuffing box head [4100] with coated
face against flange.
b) Lift the casing and assemble to the pedestal. The
discharge may be orientated to various
configurations. Check the installation or GA drawing
for the proper position.
c) Secure into position. Ensure that the impeller is free
to rotate before torquing bolts.
d) Set the impeller front clearance in accordance with
instruction earlier in this section of the manual.
6.10.10 Shaft seal
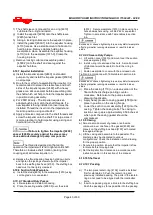
6.10.10.1 Packing
a)
The two piece lantern ring [4134] must be installed
first for standard L5. Push the lantern ring and
previously installed packing. The ports in the lantern
ring do not need to be aligned with the inlet/outlet
ports.
b)
Insert one packing ring at a time into the stuffing box.
Push the packing as far as possible into the packing

