HPXM USER INSTRUCTIONS ENGLISH 14983571 - 03/11
Page 15 of 48
additional flow paths until the given unit re-
establishes the acceptable temperature rise, and sets
off alarms if not achieved within reasonable/normal
time periods. (High limit could actually shut down
unit).
3.4.8 Pressure and/or Flow Control
Pressure and/or flow sensors can be used to hold the
unit at higher flows by opening additional flow paths
once a "high pressure limit" or " low flow limit" was
indicated. Upon system reaching increased flow a
"low pressure limit" or "high flow limit" setting would
close the bypass flow path. Care must be taken to
allow for signal spread to avoid cyclic conditions.
3.4.9
Operating at Reduced Capacity
Damage to pump may result from
prolonged operations at capacities less than MCSF
as stated in Data Sheet.
4 INSTALLATION
Equipment operated in hazardous locations
must comply with the relevant explosion protection
regulations. See section 1.6.4,
Products used in
potentially explosive atmospheres.
4.1 Location
Install the unit close to the source of the liquid to be
pumped.
It is desired to have a straight length of suction pipe
(approx. 7 to 10 times the pipe diameter) just
upstream of suction nozzle (No double turns).
When selecting the location, be sure to allow
adequate space for operation as well as for
maintenance operations involving dismantling and
inspections of parts.
Head room is an important consideration as an
overhead lift of some type is required.
4.2 Part assemblies
Motors may be supplied loose. It is the responsibility
of the installer to ensure that the motor is assembled
to the pump and lined up as detailed in section 4.5.2.
Prior to grouting, an initial alignment
check in accordance with the alignment section of
this document shall be performed to verify that
coupling spacing and final alignment can be achieved
without modifying the hold down bolts or the machine
feet. This is necessary to ensure that the baseplate
was not damaged during the transportation.
4.3 Foundation
There are many methods of installing
pump units to their foundations. The correct method
depends on the size of the pump unit, its location and
noise vibration limitations. Non-compliance with the
provision of correct foundation and installation may
lead to failure of the pump and, as such, would be
outside the terms of the warranty.
The foundation should be sufficiently rigid and
substantial to prevent any pump vibration and to
permanently support the baseplate at all points.
The most satisfactory foundations are made of
reinforced concrete. These should be poured well in
advance of the installation to allow sufficient time for
drying and curing.
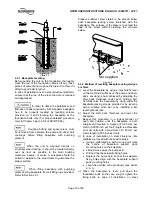
The General Arrangement Drawing (In Job’s User
Instruction) will furnish overall outline of pump
baseplate, anchor bolt locations, size of bolts, etc in
order to provide proper shape to the primary
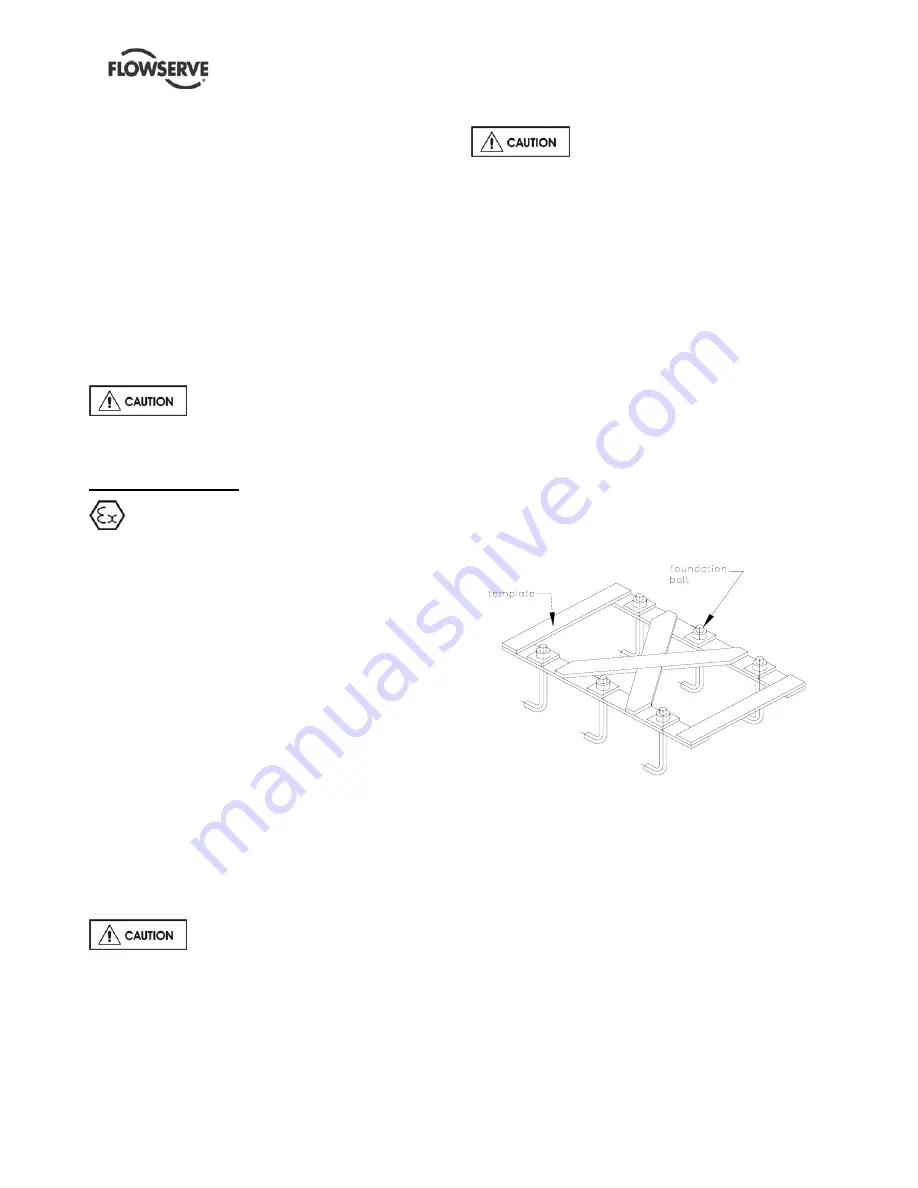
concrete. Anchor bolts can be positioned or by a
special template (not supplied by FLOWSERVE see
figure 4.1) or by the baseplate itself if proper pockets
have been provided in primary concrete.
Figure 4.1
Template for Hanging Foundation Bolts
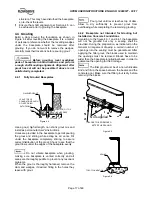
Figure 4.2 below illustrates an alternative foundation
bolt arrangement which can be used in lieu of
standard foundation bolts. Notice the large washer
with lugs at the bottom. It should be welded to the
bolt and pipe sleeve to prevent turning.
Allow a little more than the specified threaded bolt
length above the rail of the baseplate. The excess
can always be cut off if it is not needed.
A rough finish top surface is best when applying
grout.


