10
POSITIONING AND MOUNTING THE CUV
For best performance, we recommend installing the CUV in a horizontal orientation.
Mounting brackets
Mounting brackets are pre-fitted to the CUV for easy installation (except CUV-110N)
PLEASE NOTE:
Wall mounting screws and washers are not provided.
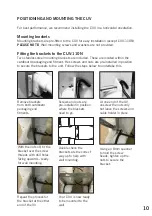
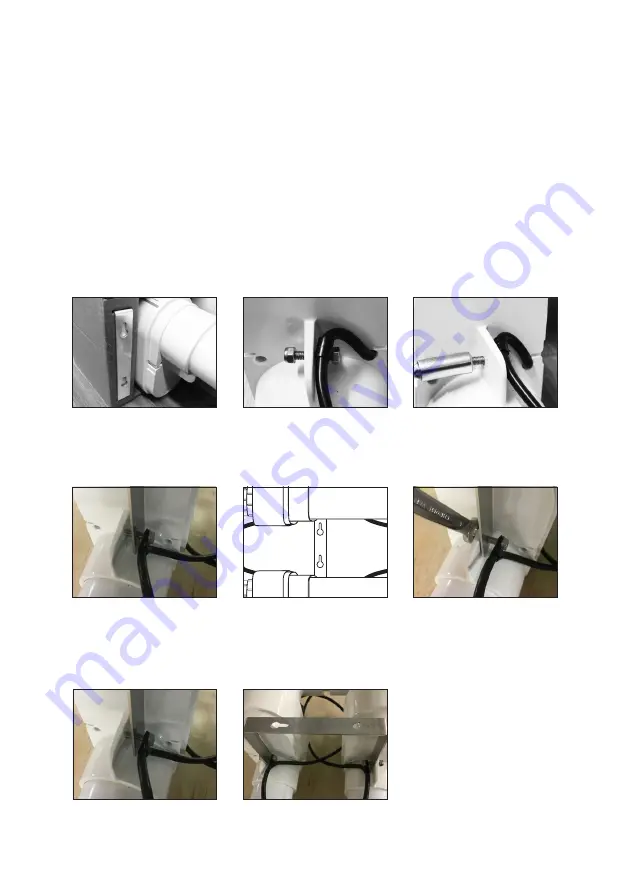
Fitting the brackets to the CUV-110N
Two stainless steel mounting brackets are included. These are located within the
cardboard packaging end fitment. Hex screws and nuts are pre-installed in position
to secure the brackets to the unit. Follow the steps below to undertake this.
Remove brackets
from both cardboard
packaging end
fitments.
Double check the
brackets are the correct
way up to help with
wall mounting.
Screws and nuts are
pre-installed in position
where the brackets
need to go.
At one end of the UV,
unscrew the nuts only
but leave the screws and
cable holder in place.
With the nuts off, fit the
bracket over the screw
threads with drill holes
facing upwards - ready
for wall mounting.
Using an 8mm spanner
to hold the screw
heads, tighten up the
nuts to secure the
bracket.
Repeat the process for
the bracket at the other
end of the UV.
Your CUV is now ready
to be mounted to the
wall.
Summary of Contents for Certikin CUV110N
Page 21: ......


