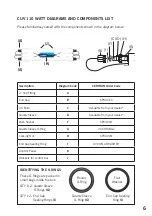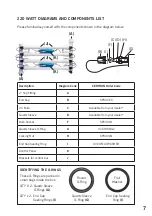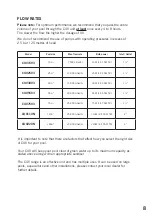
9
1.
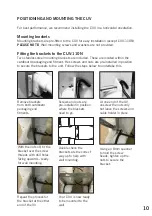
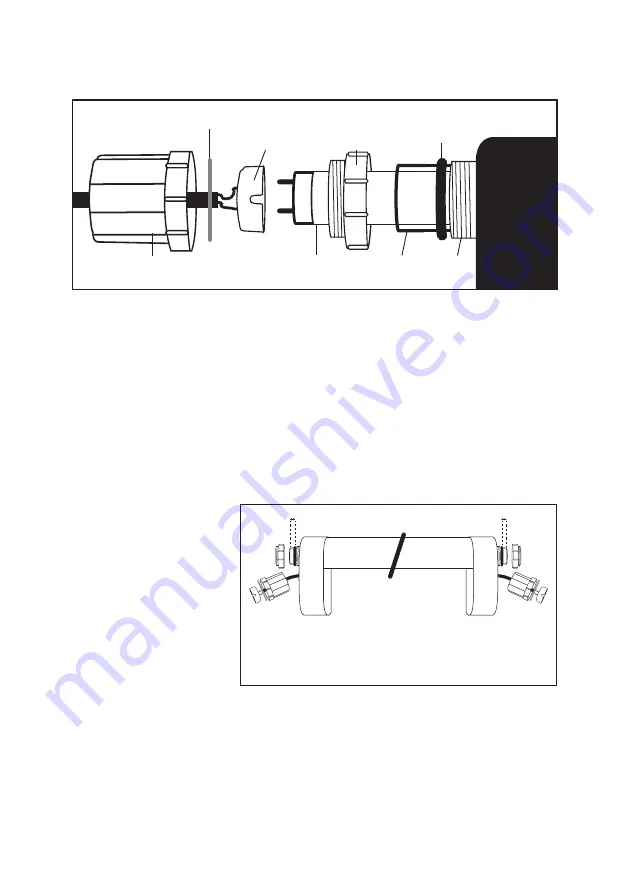
Starting at one end of the unit, unscrew the black end cap
(B)
. You will notice
that this black end cap houses the bulb socket
(F)
.
2.
Unscrew the white locking nut
(H)
from the same end.
3.
Repeat steps 1 and 2 at the other end of the unit.
4.
Take the quartz sleeve
(D)
from the packaging box and slide it through the UV until
it finds the hole at the far end of the unit.
5.
Take the quartz sleeve O-Ring
(G)
and fit it around one end of the quartz sleeve.
6.
Slide this quartz sleeve O-Ring
(G)
towards the thread on the UV body,
ensuring that equal amounts of quartz sleeve are visible at each end of the unit.
7.
Fit the quartz sleeve
O-Ring
(G)
at the
other end of the quartz
sleeve, again ensuring
that equal amounts
of quartz sleeve are
visible at each end of
the unit.
8.
Now screw the white
locking nut
(H)
back
into position.
9.
Ensure the locking nut is
HAND TIGHTENED
to prevent causing damage to the
O-Ring. No tools are needed.
10.
Repeat steps 8 and 9 at the other end of the unit.
11.
The quartz sleeve is now in position ready to take the UV bulb.
12.
Run for 24hours to check the installation is correct with no leaks.
Re-install if any leaks are detected - if no leaks proceed to lamp installation.
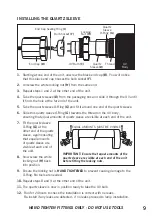
End Cap
(B)
UV Bulb
(C)
Bulb Socket
(F)
End Cap Sealing Ring
(I)
Quartz
Sleeve
(D)
Thread
Quartz
Sleeve
O-Ring
(G)
Locking
Nut
(H)
UV
Body
INSTALLING THE QUARTZ SLEEVE
EQUAL AMOUNTS MUST BE VISIBLE
IMPORTANT:
Ensure that equal amounts of the
quartz sleeve are visible at each end of the unit
before fitting the locking nuts.
HAND TIGHTEN FITTINGS ONLY - DO NOT USE TOOLS
Summary of Contents for Certikin CUV110N
Page 21: ......


