Automotive Multimeter
Maintenance
MIN MAX
RANGE
REL
Hz %
AutoHOLD
A
mA
COM
400mA
FUSED
10A MAX
FUSED
A
88
MIN MAX
RANGE
REL
Hz %
AutoHOLD
A
mA
COM
400mA
FUSED
10A MAX
FUSED
A
88
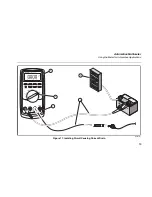
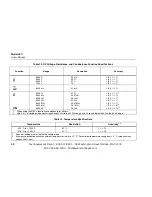
Good F2 fuse: 00.0
Ω
to
00.5
Ω
Good F1 fuse: 0.995 k
Ω
to
1.005 k
Ω
Replace fuse: OL
Replace fuse: OL
Touch top half
of input contacts
ayg05f.eps
Figure 20. Testing the Current Fuses
Replacing the Battery
Replace the battery with a 9 V battery (NEDA A1604,
6F22, or 006P).
X
W
Warning
To avoid false readings, which could lead to
possible electric shock or personal injury,
replace the battery as soon as the battery
indicator (
b
) appears. If the display shows
“
bAtt
”
the Meter will not function until the
battery is replaced.
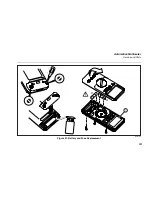
Replace the battery as follows, refer to Figure 21:
1.
Turn the rotary switch to OFF and remove the test
leads from the terminals.
2.
Remove the battery door by using a standard-blade
screwdriver to turn the battery door screws one-
quarter turn counterclockwise.
3.
Replace the battery and the battery door. Secure the
door by turning the screws one-quarter turn clockwise.
59

