Operation
High Range Piston Assembly
5
5-9
Next, assemble the Piston & Cylinder as follows.
2.
All O-Rings should be lubricated with DuPont Krytox 240 AA Grease (45-339)
before installation. All excess lubricant should be wiped off, leaving only a slight
film.
3.
Install the O-Ring (54-700-15) into the cylinder container (2465-730-3).
4.
Slide the piston through the Cylinder retainer (2465-730-4).
5.
Insert the piston into the cylinder taking care to assure the cylinder is upright. The
cylinder has been etched with the word “top” to designate the proper orientation.
6.
Slide the roller bearing (5-263) onto the lower portion of the piston.
7.
Install the snap ring (68-754) into the groove on the piston. Use the tool (2-776) to
facilitate this.
8.
Gently slide the P/C assembly into the Cylinder retainer.
9.
Slide the whole assembly into the gauge base.
10.
Insert the Hex Wrench (94-608) into the hole in the side of the housing.
11.
Place the Retaining Cap (2460-4-7) onto the cylinder housing.
12.
Tighten the cap securely by hand.
The gauge is now ready for operation.
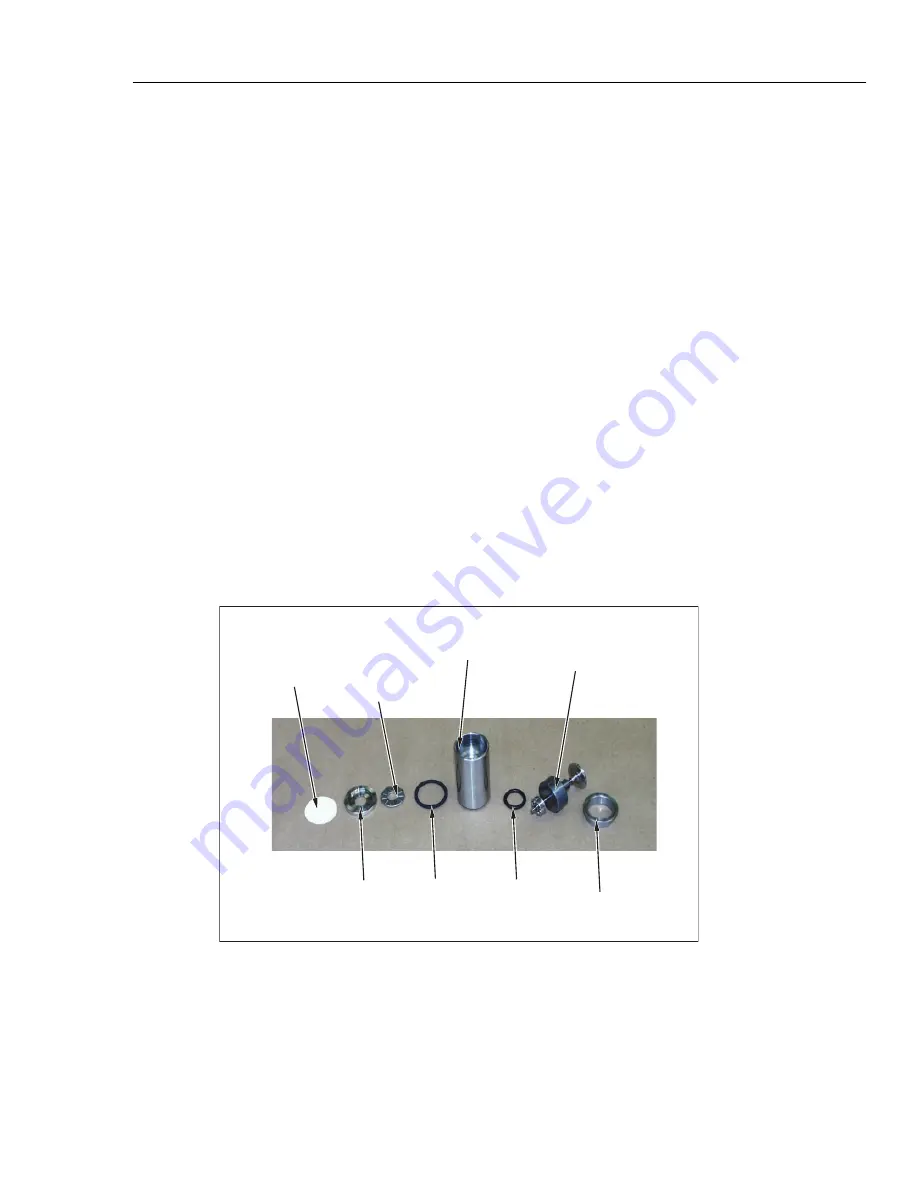
High Range Piston Assembly
Refer to Figure 5-12 and also to drawing 2465-729 in Appendix B.
FILTER
24-580
LOWER THRUST
BEARING
2460-4-25
(not required with
this P/C but may
remain in base
CYLINDER
CONTAINER
2460-6-1
PISTON/CYLINDER
ASSEMBLY
CYLINDER RETAINER
2460-6-2
O-RING
54-703-113
O-RING
54-703-119
FILTER
RETAINER
2460-4-27
glg16.eps
Figure 5-12. Parts Required for High Range Piston Operation
If the High Range Piston Assembly is to be used, the Thrust Washer and the Lower
Thrust Bearing mentioned in the Chapter 5, Low Range Piston Assembly, can be left in
the gauge.
Summary of Contents for RUSKA 2465A-754
Page 5: ...iii List of Tables Table Title Page 2 1 Symbols 2 2 ...
Page 6: ...RUSKA 2465A 754 Users Manual iv ...
Page 8: ...RUSKA 2465A 754 Users Manual vi ...
Page 12: ...RUSKA 2465A 754 Users Manual 1 4 ...
Page 26: ...RUSKA 2456A 754 Users Manual 3 4 ...
Page 54: ...RUSKA 2465A 754 Users Manual 6 14 ...
Page 64: ...RUSKA 2465A 754 Users Manual A 10 ...
Page 66: ...RUSKA 2465A 754 Users Manual A 12 ...
Page 68: ...RUSKA 2465A 754 Users Manual B 2 glg32 bmp Figure B 1 P C ASSY LR CAL D ...
Page 70: ...RUSKA 2465A 754 Users Manual B 4 glg34 bmp Figure B 3 P C ASSY W O CLEANING KIT ...
Page 72: ...RUSKA 2465A 754 Users Manual B 6 glg36 bmp Figure B 5 PC ASSY MHR W O CLEANING KIT ...
Page 74: ...RUSKA 2465A 754 Users Manual B 8 glg38 bmp Figure B 7 P C ASSY HR CAL D W O CLEANING KIT ...
Page 80: ...RUSKA 2465A 754 Users Manual B 14 glg43 bmp Figure B 12 2465A 23 ...


