background image

Rotate images and videos

Extensive annotation possibilities

Add annotations to images in the camera or in the PC software
Review IR PhotoNotes™
Input information such as locations, problem description, 
recommended actions, and other notes
Reference images can be linked together for good/bad and before
/after analysis
Annotations can be automatically included in reports
Review voice annotations captured in the field by the imager

Simplified report generation

Generate professional customized reports fast
One-click report generation for a quick result
Choice of features including before/after, IR PhotoNotes, 
annotations, supporting data and graphics
Report wizard guides the user through advanced report 
generation

Starting SmartView

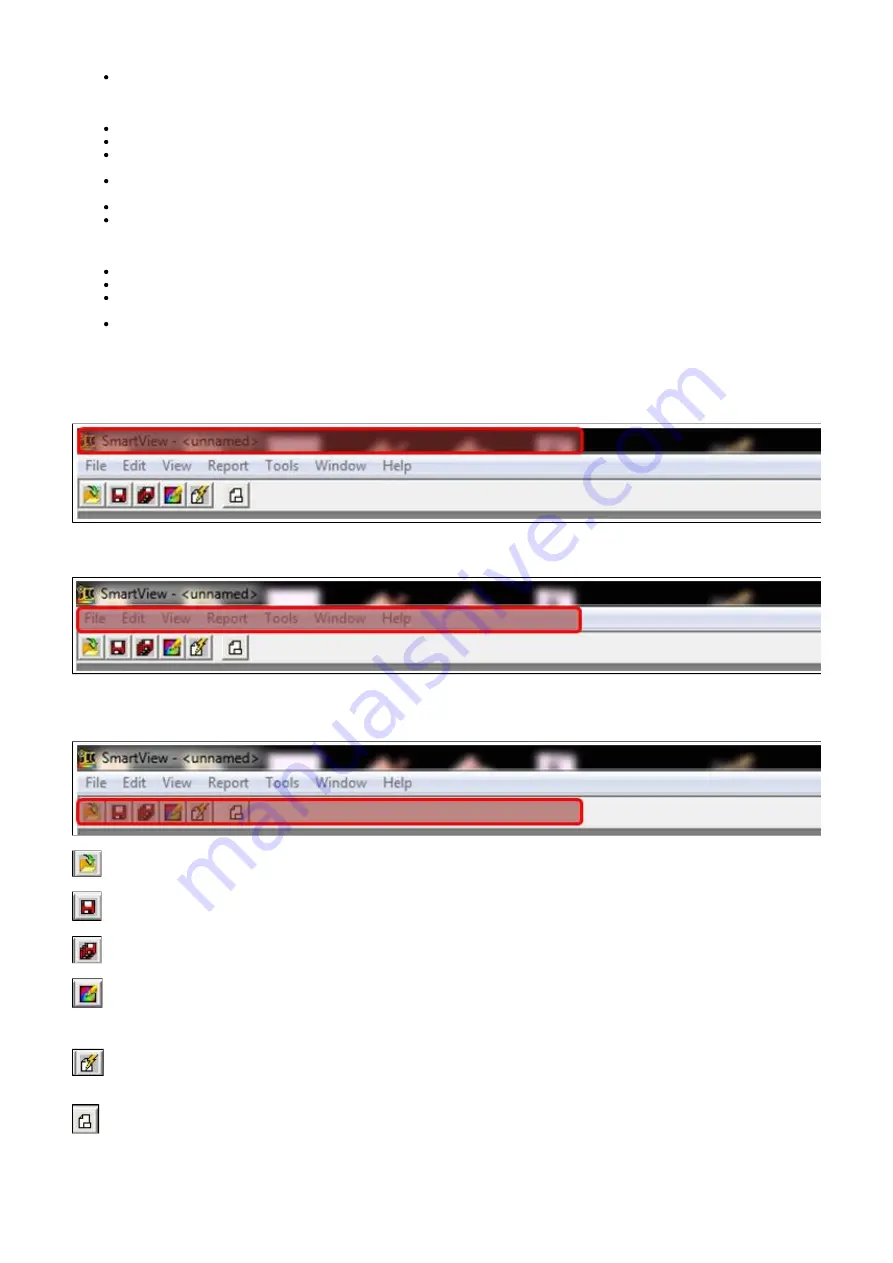
Title Bar: Located across the top of the SmartView window. Contains 
controls to minimize, maximize, and close the SmartView window 

Menu Bar: Located under the Title Bar. Contains a number of drop down 
menus used to launch various SmartView functions

Tool Bar: Located under the Menu Bar. Contains a number of controls, 
from left to right

 Open image file button: Click this to open an image

 Save active image button: Click this to save an active image

 Save all images button: Click this to save all open images

 Edit active image button: Click this to open the image editing 

window to edit the active image. (Note: You can also double-click the 
active image to open the image editing window.)

 Quick report on all images button: Click this to open report template 

and generate report for the active image

 Annotation File Editor button: Click this to open the annotation file 

editor to create or modify an annotation file

Image Icon Description

Summary of Contents for TiR32

Page 1: ...access and learning to use the Fluke TiR32 Thermal Imager Health and Safety General Information Infrared Photography Emissivity Thermographic Camera Application Uncooled infrared camera IR fusion image Fluke TiR32 and operation General operation Using Camera Setting the Level Manual File Format Changing the Temperature Units Setting Emissivity Making accurate temperature measurements SmartView Sof...

Page 2: ...its infrared radiation it means that the infrared radiation increases by rising temperatures Emissivity The of a material usually written or is the relative ability of emissivity e its surface to emit energy by radiation It is the ratio of energy radiated by a particular material to energy radiated by a black body at the same temperature A true black body would have an 1 while any real object woul...

Page 3: ...meras are also installed in some luxury cars to aid the driver the first being the 2000 Cadillac DeVille Some physiological activities particularly responses in human beings and other warm blooded animals can also be monitored with thermographic imaging Cooled infrared cameras can also be found at most major astronomy research telescopes Night vision Firefighting operations Predictive maintenance ...

Page 4: ...d cameras However their resolution and image quality might be lower than cooled detectors This is due to differences in their fabrication processes which limited because of lack of needed technology IR fusion image IR Fusion technology enables the camera to capture both the visible light image and infrared image at the same time It is very beneficial in terms of identifying and reporting suspected...

Page 5: ...from scheming early maintenance plans in order to avoiding pricey downtimes or any possible difficulty General operation The menus coupled with the three softkeys pro vide access for thermal image display saving and viewing stored and images setting features In the menu the following options can be set Backlight Date Time Emissivity File Format High Temperature Alarm Center Point on the image Hot ...

Page 6: ...Press Green button Image Capture Trigger for taking image You can change the focus by Focus Control Ring Before storing photo you can change the setting also you can change the settings on the software Press F1 to store the image Press F2 and hold it for a second to turn it off Setting the Level Manual When in manual ranging the level setting adjusts the mid point thermal span within the total tem...

Page 7: ...needs Changing the Temperature Units The Imager will display temperature in Fahrenheit or Celsius To change the temperature units 1 Press F2 until the F3 softkey label reads Settings 2 Press the softkey labeled Settings 3 Within the Settings Menu press F2 labeled until the F3 softkey Menu reads Units 4 Press F2 until is displayed over F3 Units 5 Press the softkey labeled Units 6 Press F1 for Celsi...

Page 8: ...jects are in two categories low emissivity and high emissivity High emissivity are efficient at radiating energy and emissivity factor estimated to be 95 like wood water cloth and etc Low emissivity are not efficient at radiating energy To obtain a temperature accurately we can do emissivity correction in two ways directly entering value and use value of built in value Note If imagers use fixed va...

Page 9: ... and videos for convenient viewing and analysis Displays the temperature at any given point Optimize images video by adjusting level span image parameters add markers and more Detailed analysis and total image video control A complete set of marker tools are provided Hot and Cold points user defined markers etc Use 3D IR to view images from different perspectives identify additional problems and e...

Page 10: ...tView Title Bar Located across the top of the SmartView window Contains controls to minimize maximize and close the SmartView window Menu Bar Located under the Title Bar Contains a number of drop down menus used to launch various SmartView functions Tool Bar Located under the Menu Bar Contains a number of controls from left to right Open image file button Click this to open an image Save active im...

Page 11: ...or time and language Why the image taken by the camera is mostly one color all in blue or red This problem hapens when the color range of temperature which is shown on the right side of the screen is not set properly Look the description in the Setting the level Also it can be result of a situation which the thermal camera is not collaborated with the surrounding temperature you need to wait for a...

Page 12: ......

Reviews: