background image


Original operating instructions motor type FEM 3070 

11 / 28 

ENGLI

SH


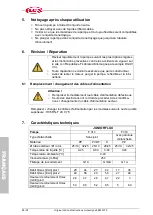
2. 

Safety 

2.1 

Intended use 

The drum pumps are used for quick and save liquid transfer or emptying of tanks, 
drums and containers. 
According to the design, they can pump liquids of all kinds, whether liquid, neutral,  
aggressive or toxic. 
Hand nozzles allow for convenient filling. 
The pumps are used as mobile devices. 

2.1.1  Foreseeable misuse 

Pump and accessory material must always be suitable for the product to be transferred 
(see resistance chart). 
Observe the operating instructions when changing the liquid. Take possible chemical 
reactions and the resulting health hazards and material damage into account. 
The drum pumps and the accessories are not intended to be used by uninstructed per-
sons or by persons with limited physical, sensory or intellectual capabilities, unless they 
are supervised by a person responsible for their safety or receive instructions from that 
person on how the device is to be used. 
Children should be supervised to ensure that they do not play with the device. 

2.2 

Symbols and signs 

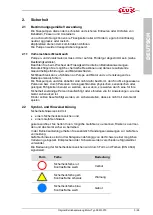
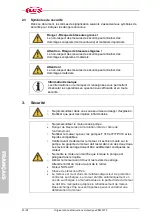
Safety instructions are marked by 

  a safety sign and 

  a danger warning 

This will help you to identify potential hazards, to avoid risks and to operate the  
device safely. 
In addition, the operating instructions contain instructions for hazard avoidance. 
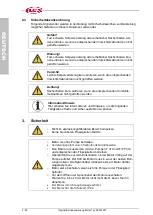
Danger warnings are classified in three categories according to the severity of a  
potential injury. Different signal words are used according to the severity. 
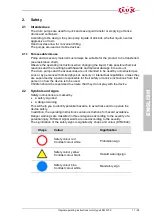
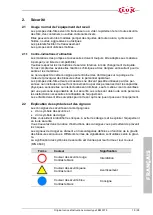
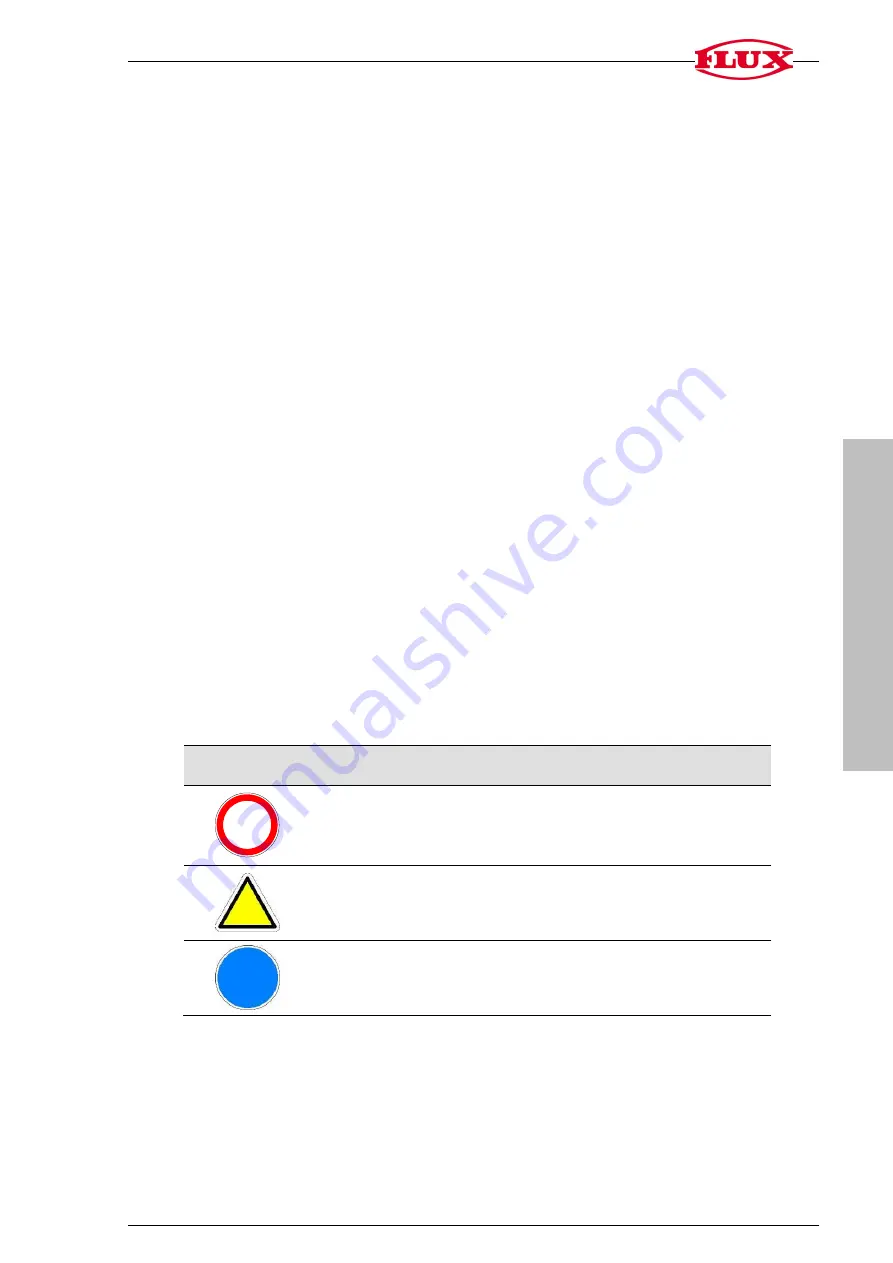
The signification of the safety signs is signalled by shape and colour (DIN 4844): 
 

Shape 

Colour 

Signification 


Safety colour red  
Contrast colour white  

Prohibition sign 


Safety colour yellow 
Contrast colour black 

Hazard warning sign 


Safety colour blue 
Contrast colour white 

Mandatory sign 


Summary of Contents for COMBIFLUX FP 314 PVDF

Page 1: ...otice d instructions originale Motor Typ F 310 F 314 für JUNIORFLUX Typ FEM 3070 für COMBIFLUX Seite 2 9 Motor Type F 310 F 314 for JUNIORFLUX Type FEM 3070 for COMBIFLUX Page 10 17 Moteur Type F 310 F 314 pour JUNIORFLUX Type FEM 3070 pour COMBIFLUX Page 18 25 ...

Page 2: ...m Nichtbeachten der Betriebsanleitung entstehen übernehmen wir keine Haftung Die Herstellergarantie erlischt bei Schäden und Betriebsstörungen die auf eigenmäch tige Umbauten und Veränderungen an dem gelieferten Gerät zurückzuführen sind 1 3 Mitgeltende Dokumente Neben dieser Betriebsanleitung stellen wir Ihnen folgende Dokumente zur Verfügung Konformitätserklärung Beständigkeitsliste auf Anforder...

Page 3: ...e Personen bzw durch Personen mit eingeschränkten physischen sensorischen oder geistigen Fähigkeiten benutzt zu werden es sei denn sie werden durch eine für ihre Sicherheit zuständige Person beaufsichtigt oder erhielten von ihr Anweisungen wie das Gerät zu benutzen ist Kinder sollten beaufsichtigt werden um sicherzustellen dass sie nicht mit dem Gerät spielen 2 2 Symbol und Hinweiserklärung Sicher...

Page 4: ...n nicht getroffen werden Information Hinweis Hier erhalten Sie Informationen und Hinweise um die folgenden Tätigkeiten effektiv und sicher ausführen zu können 3 Sicherheit Nicht im explosionsgefährdeten Bereich einsetzen Keine brennbaren Flüssigkeiten fördern Motor nie ohne Pumpe betreiben Verletzungsgefahr durch freilaufende Antriebswelle Den Motor nur zusammen mit den Pumpen F 310 und F FP 314 u...

Page 5: ...lassen Pumpe nicht der Witterung aussetzen Pumpe nicht über aggressiven Dämpfen aufbewahren Trockenlauf vermeiden Pumpe nach jeder Benutzung reinigen Pumpe nur für bestimmungsgemäßen Gebrauch einsetzen Die Gebrauchslage der Pumpe ist senkrecht Pumpe nur bis zum Druckstutzen in die Flüssigkeit tauchen Pumpe so aufstellen dass sie nicht in den Behälter fallen kann Pumpe bis max 45 C PP bzw 60 C PVDF...

Page 6: ...bfüllarmatur sicher mit der Pumpe verbinden 4 1 Inbetriebnahme JUNIORFLUX Vor dem Einstecken des Netzsteckers 2 Stufen Schalter auf 0 Mitte stellen Netzstecker einstecken Die Pumpe in die Flüssigkeit eintauchen Motor einschalten Stufe I reduzierte Drehzahl oder Stufe II 4 2 Inbetriebnahme COMBIFLUX Den Motor auf die Pumpe aufsetzen und verriegeln Vor dem Einstecken des Netzsteckers 2 Stufen Schalt...

Page 7: ...ss der Stift in eine der beiden Bohrungen passt Die Spannhebel in Richtung Motor drücken bis beide hörbar eingerastet sind Zum Abnehmen des Motors die beiden Spannhebel vom Motor ausrasten Vor dem Öffnen der Spannhebel den Motor ausschalten Warten Sie bis sich der Motor nicht mehr dreht bevor Sie ihn abnehmen 5 Reinigung nach jeder Benutzung Die Pumpe mit einem geeigneten Reinigungsmittel durchspü...

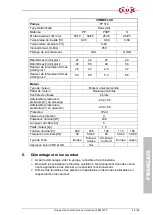
Page 8: ... Ersatz des Netzan schlusskabels dürfen nur von Elektrofachkräften durchgeführt werden Beim Ersatz Änderung der Netzanschlusskabel mindestens folgende Ausführungen verwenden Typ H05 RN F 2X 0 75 7 Technische Daten JUNIORFLUX Pumpe F 314 F 310 Dichtungsart dichtungslos mit Gleitring dichtung Werkstoff PP PVDF S PP Ø Außenrohr mm Ø Rotor mm 25 19 32 25 25 19 28 25 25 19 32 25 Flüssigkeitstemperatur ...

Page 9: ...Kollektormotor Motorlagerung Kugellager Drehzahlsteuerung 2 Stufen Zulässige Umgebungstemperatur C bei Lagerung 20 bis 60 Zulässige Umgebungstemperatur C im Betrieb 20 bis 40 Schutzart IP 24 Schutzklasse II Nenn Aufnahmeleistung W 230 Netzkabellänge m 5 Gewicht Motor kg 1 5 Nennspannung V 240 230 120 110 100 Nennfrequenz Hz 50 50 60 60 50 60 50 60 Steckertyp Europa Europa Schweiz Nordamerika Europ...

Page 10: ...d We will not accept liability for any damages or failures due to non compliance with these operating instructions This manufacturer warranty is void for any damages and failures resulting from unauthorised alterations or modifications of the product 1 3 Further applicable documents In addition to these operating instructions you are provided with the following docu ments Declaration of conformity...

Page 11: ...ted physical sensory or intellectual capabilities unless they are supervised by a person responsible for their safety or receive instructions from that person on how the device is to be used Children should be supervised to ensure that they do not play with the device 2 2 Symbols and signs Safety instructions are marked by a safety sign and a danger warning This will help you to identify potential...

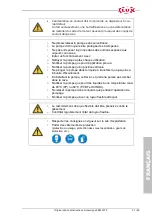
Page 12: ...te in hazardous locations Do not transfer any flammable liquids Never operate motor without pump Risk of injury due to open drive shaft Only use the motor with the pumps F 310 and F FP 314 and corresponding liquids Check before switching on if the motor fits properly to the pump The pin on the motor must be in one of the two bores The clamping levers must be audibly locked on the motor Only switch...

Page 13: ... C PP or 60 C PVDF and S liquid temperature The pump should only be left standing in the liquid as long as in operation Only use the pump with a suitable discharge hose Ensure that the hose is securely fixed to the hosetail Regularly check the hose and connections to ensure safe operation Follow internal instructions Wear protective clothing face and breathing protection protective gloves etc 4 Co...

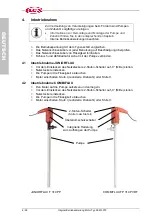
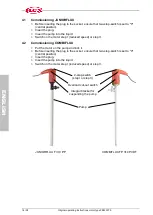
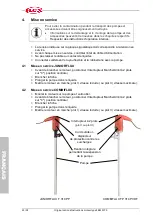
Page 14: ...n the motor step I reduced speed or step II 4 2 Commissioning COMBIFLUX Put the motor on the pump and lock it Before inserting the plug to the socket ensure that two step switch is set to 0 central position Insert the plug Insert the pump into the liquid Switch on the motor step I reduced speed or step II JUNIORFLUX F 310 PP COMBIFLUX FP 314 PVDF 2 step switch step I or step II Overload cut out sw...

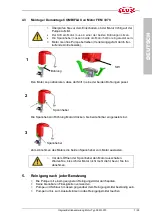
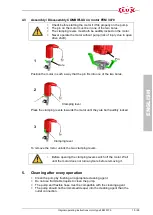
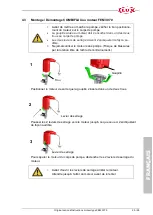
Page 15: ...fits into one of the two bores Press the clamping levers towards the motor until they are both audibly locked To remove the motor unlock the two clamping levers Before opening the clamping levers switch off the motor Wait until the motor does not turn anymore before removing it 5 Cleaning after every operation Clean the pump by flushing an appropriate cleaning agent Do not use flammable liquids to...

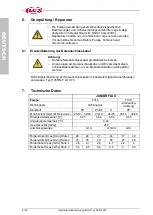
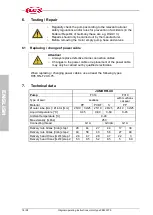
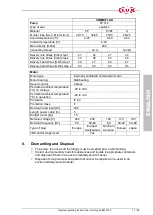
Page 16: ...er cable or replacement of the power cable may only be carried out by qualified electricians When replacing changing power cables use at least the following types H05 RN F 2X 0 75 7 Technical data JUNIORFLUX Pump F 314 F 310 Type of seal sealless with mechani cal seal Material PP PVDF S PP Ø outer tube mm Ø rotor mm 25 19 32 25 25 19 28 25 25 19 32 25 Liquid temperature C 0 45 0 60 0 60 0 45 Ambie...

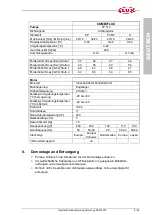
Page 17: ...ring Speed control 2 steps Permitted ambient temperature C on storage 20 to 60 Permitted ambient temperature C in operation 20 to 40 Protection IP 24 Protection class II Nominal rated input W 230 Length power cable m 5 Weight motor kg 1 5 Nominal voltage V 240 230 120 110 100 Nominal frequency Hz 50 50 60 60 50 60 50 60 Type of plug Europe Europe Switzerland Northern America Europe Japan VDE and G...

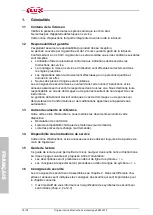
Page 18: ...esponsabilité en cas de dommages ou de pannes résultant du non respect de ces instructions La garantie du fabricant devient caduque en cas de dommages ou de pannes qui découleraient de transformations et de modifications apportées à l appareil sans autorisation 1 3 Autres documents de référence Outre cette notice d instructions nous mettons les documents suivants à votre disposition Déclaration de...

Page 19: ...des per sonnes non instruites de leur fonctionnement ou par des personnes dont les capacités physiques sensorielles ou intellectuelles sont limitées sauf si celles ci sont surveillées par une personne responsable de leur sécurité ou si elles ont obtenu de cette personne les instructions nécessaires à l utilisation de l équipement Les enfants doivent être surveillés pour être sûr qu ils ne jouent p...

Page 20: ...d explosion N utiliser que pour des liquides inflammables Ne jamais utiliser le moteur sans pompe Danger de blessures par la rotation libre de l arbre de l entraînement N utiliser le moteur qu avec les pompes F 310 et F FP 314 et les liquides compatibles Vérifier avant de démarrer le moteur s il est bien monté sur la pompe La goupille du moteur doit rester dans un des deux trous Les leviers de ser...

Page 21: ...pour l application prévue N utiliser la pompe qu en position verticale Ne plonger la pompe dans le liquide à transférer que jusqu à sa tubulure d écoulement En installant la pompe veiller à ce qu elle ne puisse pas tomber dans la cuve N utiliser la pompe que pour des liquides à une température maxi de 45 C PP ou 60 C PVDF et S INOX Ne laisser la pompe dans le liquide que pendant l opération de pom...

Page 22: ...xible et la robinetterie avec la pompe 4 1 Mise en service JUNIORFLUX Avant de brancher le moteur positionner l interrrupteur Marche Arrêt à 2 plots sur 0 position centrale Brancher la fiche Plonger la pompe dans le liquide Mettre le moteur en marche plot I vitesse réduite ou plot II vitesse maximale 4 2 Mise en service COMBIFLUX Monter le moteur sur la pompe et verrouiller Avant de brancher le mo...

Page 23: ...açon au dible Ne jamais utiliser le moteur sans pompe Risque de blessures par la rotation libre de l arbre de l entraînement Positionner le moteur de sorte que la goupille s insère dans un de deux trous Pousser les 2 leviers de serrage vers le moteur jusqu à ce que ceux ci s encliquètent de façon audible Pour séparer le moteur du corps de pompe déclencher les 2 leviers de serrage du moteur Avant d...

Page 24: ... flexible et la robi netterie 6 1 Remplacement changement des câbles d alimentation Attention Remplacer immédiatement tout câble d alimentation défectueux Seuls des électriciens ont le droit de procéder à des modifica tions changements du câble d alimentation secteur Remplacer changer les câbles d alimentation par les modèles suivants ou de qualité supérieure H05 RN F 2X 0 75 7 Caractéristiques te...

Page 25: ...illes Contrôle de vitesse 2 plots Admissible température ambiante C au stockage 20 à 60 Admissible température ambiante C en opération 20 à 60 Protection IP 24 Classe de protection II Puissance nominal W 230 Longueur du câble m 5 Poids moteur kg 1 5 Tension nominal V 240 230 120 110 100 Fréquence nominale Hz 50 50 60 60 50 60 50 60 Type de fiche Europe Europe Suisse Amérique du Nord Europe Japon A...

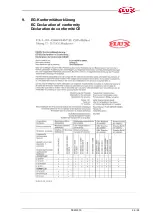
Page 26: ...FEM 3070 26 28 9 EG Konformitätserklärung EC Declaration of conformity Déclaration de conformité CE ...

Page 27: ...FEM 3070 27 28 ...

Page 28: ...FB_10 31080009_07_1218 1 DEF ...

Reviews: