background image


1

1


A

A

L

L

L

L


R

R

I

I

G

G

H

H

T

T

S

S


R

R

E

E

S

S

E

E

R

R

V

V

E

E

D

D


©  2013.  All  rights  are  reserved.  No  part  of  this  document  may  be 
reproduced without permission. 

While all efforts have been made to ensure the accuracy of all contents 
in this User’s Manual, we assume no liability for errors or omissions or 
statements  of  any  kind  in  this  User’s  Manual,  whether  such  errors  or 
omissions  or  statements  are  a  result  of  negligence,  accidents,  or  any 
other cause. The contents of this User’s Manual are subject to change 
without notice. 

Protect  our  environment! We  strive  to  produce  products  in  compliance 
with  global  environmental  standards.  Please  consult  your  local 
authorities for proper disposal. 

N

N

o

o

t

t

e

e

:

:


S

S

p

p

e

e

c

c

i

i

f

f

i

i

c

c

a

a

t

t

i

i

o

o

n

n

s

s


a

a

n

n

d

d


i

i

n

n

f

f

o

o

r

r

m

m

a

a

t

t

i

i

o

o

n

n


i

i

n

n


t

t

h

h

i

i

s

s


U

U

s

s

e

e

r

r

s

s


M

M

a

a

n

n

u

u

a

a

l

l


a

a

r

r

e

e


f

f

u

u

r

r

n

n

i

i

s

s

h

h

e

e

d

d


f

f

o

o

r

r


i

i

n

n

f

f

o

o

r

r

m

m

a

a

t

t

i

i

o

o

n

n


o

o

n

n

l

l

y

y


a

a

n

n

d

d


a

a

r

r

e

e


s

s

u

u

b

b

j

j

e

e

c

c

t

t


t

t

o

o


c

c

h

h

a

a

n

n

g

g

e

e


w

w

i

i

t

t

h

h

o

o

u

u

t

t


p

p

r

r

i

i

o

o

r

r


n

n

o

o

t

t

i

i

c

c

e

e

.

.


T

T

h

h

e

e

s

s

e

e


s

s

h

h

o

o

u

u

l

l

d

d


n

n

o

o

t

t


b

b

e

e


c

c

o

o

n

n

s

s

t

t

r

r

u

u

e

e

d

d


a

a

s

s


a

a


c

c

o

o

m

m

m

m

i

i

t

t

m

m

e

e

n

n

t

t


o

o

r

r


a

a


c

c

e

e

r

r

t

t

i

i

f

f

i

i

c

c

a

a

t

t

e

e


o

o

f

f


t

t

e

e

c

c

h

h

n

n

o

o

l

l

o

o

g

g

y

y

.

.


F

F

L

L

Y

Y


m

m

o

o

b

b

i

i

l

l

e

e


p

p

h

h

o

o

n

n

e

e

s

s


a

a

s

s

s

s

u

u

m

m

e

e

s

s


n

n

o

o


r

r

e

e

s

s

p

p

o

o

n

n

s

s

i

i

b

b

i

i

l

l

i

i

t

t

y

y


f

f

o

o

r

r


a

a

n

n

y

y


e

e

r

r

r

r

o

o

r

r

s

s


o

o

r

r


o

o

m

m

i

i

s

s

s

s

i

i

o

o

n

n

s

s


t

t

h

h

a

a

t

t


m

m

a

a

y

y


a

a

p

p

p

p

e

e

a

a

r

r


i

i

n

n


t

t

h

h

i

i

s

s


m

m

a

a

n

n

u

u

a

a

l

l

.

.


Summary of Contents for F41S

Page 1: ......

Page 2: ...r disposal N No ot te e S Sp pe ec ci if fi ic ca at ti io on ns s a an nd d i in nf fo or rm ma at ti io on n i in n t th hi is s U Us se er r s s M Ma an nu ua al l a ar re e f fu ur rn ni is sh he...

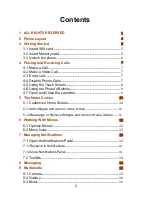
Page 3: ...g the Phone s Buttons 9 4 7 Open and Close the Launcher 9 5 The Home Screen 10 5 1 Customize Home Screen 10 5 1 1Add Widgets and icons to home screen 11 5 1 2Rearrange or Remove Widgets and Icons on H...

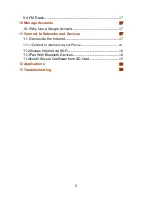
Page 4: ...7 11 Connect to Networks and Devices 17 11 1Connect to the Internet 17 11 1 1Connect to Internet via your Phone 18 11 2Access Internet via Wi Fi 18 11 3Pair With Bluetooth Devices 18 11 4Install Secur...

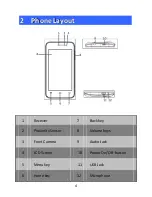
Page 5: ...2 P Ph ho on ne e L La ay yo ou ut t 1 Receiver 7 Back key 2 Proximity Sensor 8 Volume keys 3 Front Camera 9 Audio Jack 4 LCD Screen 10 Power On Off button 5 Menu key 11 USB Jack 6 Home key 12 Microph...

Page 6: ...IM card s 1 Switch off the mobile phone and remove the rear cover and battery 2 Insert the SIM card correctly in the card slot s See figure below 3 Finally insert the battery and replace the rear cove...

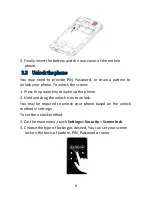
Page 7: ...ock the screen 1 Press the power key to wake up the phone 2 Hold and drag the unlock icon to unlock You may be required to unlock your phone based on the unlock method in settings To set the unlock me...

Page 8: ...e Plus symbol and then enter the international country prefix followed by the phone number Tap on the contact to dial the number Press the Volume Up Down keys on the right side to adjust the call volu...

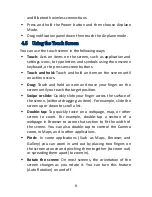
Page 9: ...n Swipe or slide Quickly slide your finger across the surface of the screen without dragging an item For example slide the screen up or down to scroll a list Double tap Tap quickly twice on a webpage...

Page 10: ...rent screen or Application Opens shortcut to Wallpaper Manage Apps System Settings Back key Opens the previous screen you were working on 4 7 Open and Close the Launcher Touch the Launcher Icon t to o...

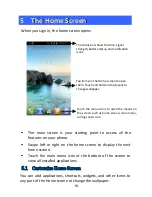
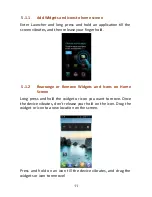
Page 11: ...ottom of the screen to view all installed applications 5 1 Customize Home Screen You can add applications shortcuts widgets and other items to any part of the Home screen or change the wallpaper Tap i...

Page 12: ...e your finger hold 5 1 2 Rearrange or Remove Widgets and Icons on Home Screen Long press and hold the widget or icon you want to move Once the device vibrates don t release your hold on the icon Drag...

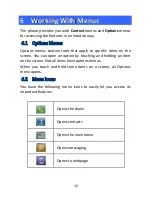
Page 13: ...n tools that apply to specific items on the screen You can open an option by touching and holding an item on the screen Not all items have options menus When you touch and hold some items on a screen...

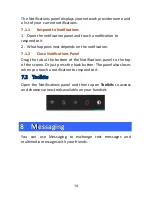
Page 14: ...Notification icons inform you of new messages and events When you receive a notification its icon appears in the status bar along with a summary that appears only briefly 7 1 Open the Notifications P...

Page 15: ...1 2 Close Notifications Panel Drag the tab at the bottom of the Notifications panel to the top of the screen Or just press the back button The panel also closes when you touch a notification to respon...

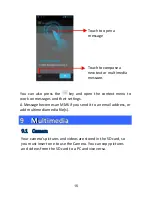
Page 16: ...email address or add multimedia media file s 9 9 M Mu ul lt ti im me ed di ia a 9 1 Camera Your camera s pictures and videos are stored in the SD card so you must insert one to use the Camera You can...

Page 17: ...video in an album to view it and even share with your friends 9 3 Music You can easily transfer your favorite music from your PC to the SD card and experience a whole world of interesting and melodio...

Page 18: ...ou can do this by tapping Settings Accounts sync Add Account 10 1 Why Use a Google Account Your Google Account lets you take full advantage of Google applications and services that you may want to use...

Page 19: ...nt and enable Data Connection to enable Internet connection 11 1 1 Connect to Internet via your Phone You can browse the Internet on your PC using your mobile phone To do this 1 Connect your mobile ph...

Page 20: ...ificate from your computer to the root of the SD card 2 Touch Settings Personal Security 3 Touch Install from SD card 4 Touch the file name of the certificate to install Only the names of certificates...

Page 21: ...y has run out Charge your battery for a few minutes then try power on again 3 The battery is installed incorrectly Check if the battery is seated correctly on the device 4 Abnormally using leads phone...

Page 22: ...f your device is set on Airplane mode Please Undo it 4 SIM card might not be inserted properly Please check and insert the SIM card properly 4 You can t make a call Possible Reasons for Malfunction So...

Page 23: ...tion Solutions 1 Incoming call alert is set as silent Please re set the incoming call alert as a sound alert 2 The ring volume is set too low Please increase the phone call volume 3 You have set up ca...

Page 24: ...rd is not installed properly Turn off your device pull out microSD card put it on again and turn on your device 2 T Flash card is damaged Please change T Flash card 3 Make sure microSD card is mounted...

Page 25: ...ninstall them to release space Note The built in applications can t be uninstalled 10 Touch screen is not responsive or responsive but not as I intended Possible Reasons for Malfunction Solutions 1 If...

Page 26: ...reless devices may be susceptible to interference which could affect performance ENHANCEMENTS AND BATTERIES Use only approved enhancements and batteries Do not connect incompatible products SWITCH OFF...

Page 27: ...ny restrictions Switch the device off near medical equipment SWITCH OFF WHEN REFUELING Do not use the device at a refueling point Do not use near fuel or chemicals PROTECT THE ENVIRONMENT Do not dispo...

Page 28: ...number Give your location Do not end the call without permission TECHNICAL SPECIFICATION NETWORK GSM 850 900 1800 1900MHz WCDMA 900 2100MHz DISPLAY SIZE 10 16cm BATTERY CAPACITY 1700mAh CHARGER SPECI...

Reviews: