background image

i

T

ABLE


OF

 C

ONTENTS

Warranty and Safety ............................................................................... 4

After Sales Service ................................................................................... 4
Safety Guidelines  ..................................................................................... 4
General ..................................................................................................... 4
Operating Environment  ............................................................................ 5
Electronic Devices .................................................................................... 5
Battery Safety ........................................................................................... 6
SOS Soft Key  ........................................................................................... 6
Care and Maintenance  ............................................................................. 7
FCC Notice ............................................................................................... 8
European RF Exposure Information ......................................................... 8
Licences ................................................................................................... 9
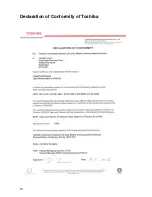
Declaration of Conformity of Toshiba  ..................................................... 10

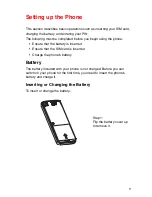
Setting up the Phone  ........................................................................... 11

Battery .................................................................................................... 11

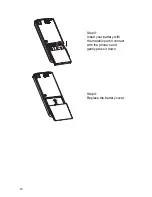
Inserting or Changing the Battery ....................................................... 11
Charging the Battery ........................................................................... 13
Charging Indicator  .............................................................................. 14

SIM Card  ................................................................................................ 15

Inserting / Removing the SIM Card  .................................................... 15

Personal Identification Numbers (PINs)  ................................................. 17
Memory slot ............................................................................................ 17

General Information  ............................................................................. 20

Parts and Functions  ............................................................................... 20

Keys .................................................................................................... 21
The 4-Way Keys  ................................................................................. 22
Quick keys  .......................................................................................... 23
Soft Keys  ............................................................................................ 24
Main menu .......................................................................................... 25
Icons ................................................................................................... 28

TS2060UKENv2

Summary of Contents for ts2060

Page 1: ...osure Information 8 Licences 9 Declaration of Conformity of Toshiba 10 Setting up the Phone 11 Battery 11 Inserting or Changing the Battery 11 Charging the Battery 13 Charging Indicator 14 SIM Card 15 Inserting Removing the SIM Card 15 Personal Identification Numbers PINs 17 Memory slot 17 General Information 20 Parts and Functions 20 Keys 21 The 4 Way Keys 22 Quick keys 23 Soft Keys 24 Main menu ...

Page 2: ...xt Entry 32 Changing Entry Mode 32 T9 Language 32 Character Table 34 Settings 35 General 35 Language 35 Time date 35 Security 36 Voice control 38 Auto keypad lock 39 Shortcuts 39 Default storage 39 Flight mode 40 Profiles 40 Default settings 40 Display 41 Wallpaper 41 Themes 41 Backlight level 41 Backlight duration 41 Greeting 42 Sounds 42 Alert type 42 Ringtones 42 Ring volume 42 Key sound 43 Shu...

Page 3: ...e Connection 53 WAP push setting 53 Tools 54 Scheduler 54 Alarm 55 Appointments 55 Tasks 56 Notes 56 Calculator 57 Calculation keys 57 Unit converter 57 Countdown 58 STK SIM Tool Kit 58 Camera 59 Camera mode 59 Video mode 60 Messages 62 Text Messages 63 Multimedia Messages 65 E mail 66 Templates 68 Cell info 68 Memory status 69 Voice mail 69 Entertainment 70 Games 70 ...

Page 4: ... 73 Advanced 74 Memory status 74 My player 75 FM Radio 75 Tracks 76 Last played 76 Playlists 77 Voice memo 77 Background MP3 78 My data 79 Managing files 79 Phone memory 79 Memory card 79 Calls 80 Call history 80 Clear history 81 Call settings 81 Index 86 FLY is a registered trade mark of Meridian Group Services Limited ...

Page 5: ...o you a personal non transferable and non exclusive right to use the Software as set out in this EULA Modifying adapting translating renting copying making available transferring or assigning all or part of the Software or any rights granted hereunder to any other persons and removing any proprietary notices labels or marks from the Software is strictly prohibited except as expressly permitted in ...

Page 6: ...ults from acts or phenomenon beyond the reasonable control of Toshiba EXCEPT AS PROVIDED IN THIS EULA A TOSHIBA TOSHIBA S AFFILIATES AND THEIR SUPPLIERS DISCLAIM ALL WARRANTIES CONDITIONS OR OTHER TERMS WHETHER EXPRESS OR IMPLIED INCLUDING BUT NOT LIMITED TO WARRANTIES CONDITIONS AND TERMS OF SATISFACTORY QUALITY MERCHANTABILITY FITNESS FOR A PARTICULAR PURPOSE AND NON INFRINGEMENT OF THIRD PARTY ...

Page 7: ... EULA shall be subject to the exclusive jurisdiction of the English Court 7 Export Laws Any use duplication or disposal of the Software involves products and or technical data that may be controlled under the export laws of applicable countries or region and may be subject to the approval of the applicable governmental authorities prior to export Any export directly or indirectly in contravention ...

Page 8: ...cessories Using incompatible items may permanently damage the phone Do not connect the phone to any other device without reading the provided documentation The other device may be incompatible When making emergency calls from your phone ensure that the phone is switched on and in service Interference may affect your phone s performance Once you move away from the source of interference the phone s...

Page 9: ...elines or regulations Switch your phone off when in an area of a potentially explosive atmosphere for example fuel storage areas spray paint facilities etc Only qualified personnel should install the device in a vehicle Faulty installation or service may be dangerous and may invalidate any warranty For more information check with the manufacturer or its representative for your vehicle Electronic D...

Page 10: ...ttery with the recommended charger supplied by Toshiba When the charger is not in use disconnect it from the power source Do not leave the battery connected to the charger and power source for longer then necessary as overcharging it will shorten its life Do not short circuit the battery Accidental short circuiting can occur when a metallic object causes a direct connection between the and termina...

Page 11: ...ne condensation can form inside the phone causing damage to the electronic circuits Do not open the phone unless absolutely necessary for example to install the battery or SIM card We recommend that you go to your dealer when problems arise with either of these items and allow their experts to handle the phone instead Do not mishandle or abuse the phone Dropping knocking or shaking it can damage t...

Page 12: ...l guidelines These guidelines were developed by the independent scientific organisation ICNIRP and include safety margins designed to assure the protection of all persons regardless of age and health The guidelines use a unit of measurement known as the Specific Absorption Rate or SAR The SAR limit for mobile devices is 2 W kg and the highest SAR value for this device when tested at the ear was 0 ...

Page 13: ...dian Pat Nos 1 331 057 2 302 595 and 2 227 904 Japan Pat No 3532780 3492981 United Kingdom Pat No 2238414B Hong Kong Standard Pat No HK1010924 Republic of Singapore Pat No 51383 66959 and 71979 European Pat Nos 0 842 463 96927260 8 1 010 057 98903671 0 1 018 069 98950708 2 Republic of Korea Pat Nos KR201211B1 and KR226206B1 People s Republic of China Pat Application Nos 98802801 8 98809472 X and 9...

Page 14: ...10 Declaration of Conformity of Toshiba ...

Page 15: ...ng the phone Ensure that the battery is inserted Ensure that the SIM card is inserted Charge the phone s battery Battery The battery included with your phone is not charged Before you can switch on your phone for the first time you need to insert the phone s battery and charge it Inserting or Changing the Battery To insert or change the battery Step 1 Flip the battery cover up to remove it ...

Page 16: ...12 Step 2 Insert your battery with the metallic part in contact with the phone s and gently press it down Step 3 Replace the battery cover ...

Page 17: ... a battery Step 1 Locate your charger connector on the left of your phone Step 2 Connect the charger to the phone Plug the charger into a power socket The charger connection screen will be displayed Charger connector Charger connector ...

Page 18: ...llowing icons When the battery is fully discharged the charging indicator is not displayed and will not appear after the phone has recharged sufficiently For safety information regarding the battery refer to Battery Safety on page 6 During charging there is a possibility that the charging indicator may not appear Please keep the phone charged for a while before you disconnect the charger Icon Desc...

Page 19: ...ta For more information refer to Contacts on page 71 You should only remove your SIM card when absolutely necessary If it is lost or damaged the information stored on it cannot be retrieved Inserting Removing the SIM Card Turn to the back of your phone to locate your battery cover To insert or remove the SIM card Steps 1 5 Step 1 Flip the battery cover up to remove it Step 2 Remove the battery ...

Page 20: ...nsert your SIM card into the SIM card holder with the card s metallic connector in contact with the phone s and the notched corner on the right To remove your SIM card simply lift it off the SIM card holder Step 5 Gently press down the SIM locker and push it to the left to lock ...

Page 21: ...PIN three times in a row your phone will become blocked You will then require your PUK number to unblock it For more information about your PIN and PUK number refer to Security on page 36 Memory slot Your phone supports a Micro SD Flash memory card of up to 512 MB The Memory card slot is located under the battery The battery cover is located on the rear of the phone To insert or remove the Memory ...

Page 22: ... to the right to unlock and lift it up Step 4 Insert your memory card into the memory card holder with the card s metallic connector in contact with the phone s and the notched corner on the right To remove your memory card simply lift it off the memory card holder ...

Page 23: ...19 Step 5 Gently press down the memory locker and push it to the left to lock ...

Page 24: ...ra Key 4 Way Navigation Key Earpiece Backward Forward MP3 Key Stop Play LCD Screen Left Soft Key Right Soft Key Power End Key Call Key Battery cover Camera Speaker Alphanumeric Keys MP3 Key Camera Backward Stop Play Forward Earpiece LCD Screen Left Soft Key Call Key Alphanumeric Keys Centre Camera Key 4 Way Navigation Key Right Soft Key Power End Key Battery cover Speaker ...

Page 25: ...t and press twice to redial the last number called To turn on off the phone reject an incoming call end a call cancel a selection return to the idle screen from any phone menu From the idle screen press and hold to enter and display the List for international codes From the idle screen press and hold to access Voice mail Press and hold to access shortcut functions For more information refer to Sho...

Page 26: ...ra mode under the video mode To decrease volume during a call Right X To scroll right or move the cursor to the right of the screen To access My data from the idle screen To select Video mode under the camera mode To increase volume during a call To scroll down or move the cursor downwards To access Phonebook SIM contacts from the idle screen To reduce the brightness level in camera preview mode D...

Page 27: ... of Position in SIM and press to display the number quickly Press to dial the number Standby Switch on off the phone Press and hold Standby Select a menu item Press Centre key or Left Softkey In the menu Exit a menu Press or Right Softkey In the menu Put a call on hold or retrieve a call on hold Press Hold or Retrieve soft keys During a call Reject end a call Press Receiving during a call Enter a ...

Page 28: ...ode are My player and Homepage Pressing the soft keys will take you directly to the functions However you can redefine the Softkey functions For more information refer to Shortcuts on page 39 Lock keypad Press and hold Standby Unlock keypad Press Right Softkey and Standby If PIN entry is required when you turn on your phone the SOS soft key will be available before you enter the PIN For more infor...

Page 29: ...the sub menu Settings Browser Tools Messages Camera Entertainment Contacts My player My data Calls STK Shortcuts Menu Description Settings Includes a variety of phone settings For more information refer to Settings on page 35 Browser Provides access to the Internet For more information refer to Browser on page 52 Tools Provides extra features such as Scheduler Alarm Appointments Tasks and Calculat...

Page 30: ...list of phone contacts and shows memory status For more information refer to Contacts on page 71 My player Allows you to listen to music on your phone For more information refer to My player on page 75 My data Accesses all the files on your phone and allows you to manage your files For more information refer to My data on page 79 Calls Records a call history list For more information refer to Call...

Page 31: ...nectivity Browser Homepage Favourites Settings Tools Scheduler Alarm Appointments Tasks Notes Calculator Unit converter Countdown Messages Create Inbox Outbox Drafts Templates Cell info Memory Status Settings Camera View Finder Entertainment Games Composer Contacts View Contacts View groups Special numbers Quick call Advanced Memory status My player FM radio Tracks Last Played Playlists Voice memo...

Page 32: ...e icons displayed on the screen are explained below No Icon Description 1 Signal strength low to high 2 Roaming 3 Keypad lock 4 Appointments 5 Bluetooth active connecting 6 Phone set to mute Vibrate 7 Alarm set 8 SMS message indicator 1 2 3 4 5 6 7 8 9 10 ...

Page 33: ...M card and make sure your phone is switched on To make end a call Steps 1 3 1 Enter a phone number including area codes if necessary using the keypad keys 2 Press to dial the number 3 Press to terminate the call Alternatively you can select a contact from Contacts and press to dial the number To make a call from Contacts Steps 1 3 1 Press Contacts View Contacts Alternatively press T from the idle ...

Page 34: ...s 2 Press to request the phone number from the contacts 3 Press To dial a number from the Call history lists Steps 1 4 1 Press from the idle screen 2 Press W X to scroll to the desired call list 3 Press S T to scroll to the desired number 4 Press Receiving Rejecting a Call When there is an incoming call the phone rings vibrates depending on your Profile and the screen displays the name if recorded...

Page 35: ...tions Conference to connect the two calls 2 Press Options Private to disconnect the two calls To make a second call Steps 1 2 1 During an active call or during a call on hold enter a phone number by pressing the keypad keys 2 Press Receiving a Third Call If you have a third call coming in while you have one call on hold and another active answering the third call will end the active call and repla...

Page 36: ...etween the following modes T9 Language Your phone supports T9 predictive text input in a number of languages To select a T9 language Steps 1 3 1 Press Settings Language T9 language T9 language 2 Scroll to the desired language 3 Press Select T9 Preferred The T9 preferred setting displays the preferred T9 language when you edit SMS or MMS messages If the setting is off T9 entry will be switched off ...

Page 37: ...ears on the screen 4 Press to add the word and press to enter a space after the word Other key functions 1 Enters the word and adds a space after it 2 Right soft key Deletes the letter on the left of the cursor 3 Left soft key Opens Options menu or goes to the next possible T9 word combination 4 Press to switch between entry modes upper or lower case 5 Press once to open the symbols chart press an...

Page 38: ...er case Press once to bring up the symbol chart press and hold to select T9 language Press once to switch between different entry methods ABC Abc abc or 123 Space 0 1 abc2 ABC2 def3 DEF3 ghi4 GHI4 jkl5 JKL5 mno6 MNO6 pqrs7 PQRS7 tuv8 TUV8 wxyz9 WXYZ9 To change upper lower case press the to switch between different entry modes for example abc or ABC ...

Page 39: ...settings Language This menu allows you to select a text entry language T9 language and phone language Display language For details about T9 language refer to Text Entry on page 32 To set a phone language Steps 1 3 1 Press Settings General Language Display language 2 Scroll S T to select a desired language 3 Press Select or to confirm Time date This feature allows you to set the time and date To se...

Page 40: ...ss Change to switch between 12 hours and 24 hours To set the Date format Steps 1 2 1 Press Settings General Time date Date format 2 Press Select or to choose a format DD MM YYYY MM DD YYYY YYYY MM DD YYYY MM DD DD MM YYYY YYYY MM DD DD MM YYYY To set the Power on Power off time Steps 1 4 1 Press Settings General Time date Power on time or Power off time 2 Press Change and W Xto turn the feature on...

Page 41: ...ty PIN code request 2 Press Select to turn PIN code request on off 3 To turn on PIN code request the phone asks you to Enter PIN code Changing PIN PIN2 You will be requested to enter your PIN when the phone is switched on However this feature can be turned off which leaves your phone at risk of unauthorised use if it is stolen or lost You can only change PIN codes when they are active To activate ...

Page 42: ...ou can call up the feature later by saying Calculator Voice command Voice command allows you to record a voice tag for the options you would like to activate by voice command later To create a Voice command Steps 1 5 1 Press Settings General Voice control Voice command 2 Scroll S T to the desired feature and press Record 3 Press Yes to create Recording for the desired feature 4 You can record the ...

Page 43: ...s General Shortcuts 2 Press W X key to select 123 submenu 3 Scroll S T to a desired numeric key number and press Options Personalise 4 Scroll S T to select a desired shortcut function for the key and press Select Ok To set shortcut functions for 4 way navigation keys Steps 1 4 1 Press Settings General Shortcuts 2 Press W X key to select 4 way navigation key icon 3 Scroll S T to a desired key icon ...

Page 44: ...n a meeting where muting your phone may be necessary But for USB cable profile you can select Ringtones only from Phone memory do not support from External memory For more details please refer to Sounds on page 42 To customise a profile Steps 1 7 1 Press Settings General Profiles 2 Select a profile and press Options Personalise 3 Define an alert type Ring only Vibrate only Ring Vibrate Vibrate the...

Page 45: ...lect 4 Set the Display wallpaper to Stretch or Centre Themes To set a different colour style for your phone Steps 1 3 1 Press Settings Display Themes 2 Scroll S T to select a theme from Theme 1 Theme 2 and Theme 3 3 Press Select Backlight level To set the phone s backlight level Steps 1 3 1 Press Settings Display Backlight level 2 Scroll S T to select from Maximum High Medium and Low 3 Press Selec...

Page 46: ...Alert type Steps 1 3 1 Press Settings Sounds Alert type 2 Scroll S T to go to the desired alert type Ring only Vibrate only Ring Vibrate Vibrate then ring or None 3 Press Select Ringtones To set a ring tone for a specific event Steps 1 4 1 Press Settings Sounds Ringtones 2 Press S T key to scroll to the desired event All contacts calls All calls Alarm Appointments Messages Cell info or Group 1 10 ...

Page 47: ...ge settings Bluetooth USB features and Memory card features Call options Call Options include the following settings Auto Answer Any key answer Second reminder Call services Call divert Bar calls Fixed dialling and Closed user group Auto Answer To turn Auto Answer On Off Steps 1 2 1 Press Settings Connectivity Call options Auto Answer 2 Press Change to turn the Auto Answer On Off Any key answer To...

Page 48: ...vices Time cost Last call Total incoming Total outgoing Cost left All voice calls 2 Press Ok to return to the previous screen or Reset to clean the history record Call waiting To Activate Cancel Call waiting 1 Press Settings Connectivity Call options Call services Call waiting 2 Scroll S T to select Activate Cancel and press Select To check status press Settings Connectivity Call options Call serv...

Page 49: ... display 2 Set the Auto display to be Off or show Cost Duration Both Call divert You can select call diversion when you are unable to pick up a phone call in the following conditions Divert for all calls diverts all incoming calls to the number you assigned All un answer diverts an incoming call when it is not answered Not reachable diverts all incoming calls to the number you assigned when the ph...

Page 50: ...nly here home international calls to your home network are allowed but all other international calls are barred 4 All incoming bars all incoming calls 5 When roaming bars incoming calls when you are out of your home network range To set Bar calls Steps1 2 1 Press Settings Connectivity Call options Bar calls 2 Select a barred call type All outgoing Outgoing international Only here home All incoming...

Page 51: ...l options Closed user group Preferred group Message settings This menu includes setting options for Text message Multimedia message E mail and Voice mail For detailed Message settings refer to Messages on page 62 Network The Network menu provides the following settings Select network This feature allows you to search for the network automatically To select the network automatically Steps 1 2 1 Pre...

Page 52: ...ess Ok Select band To select a network band Steps 1 3 1 Press Settings Connectivity Network Select band 2 Scroll to the desired band 900 1800 900 1800 MHz 3 Press Select The radio button will be marked when it is activated Select line To select a phone line Steps 1 3 1 Press Settings Connectivity Network Line Select line 2 Select a line from Line 1 and Line 2 3 Press Select To protect the line pre...

Page 53: ...e a GPRS profile Steps 1 4 1 Press Settings Connectivity Connections GPRS profiles 2 Scroll S T to go to a profile and press Select 3 Enter information such as Name APN Login Password and Authentication On Off 4 Press Save To view GPRS info Steps 1 3 1 Press Settings Connectivity Connections GPRS info 2 Check GPRS info Received data and Total time of GPRS service 3 Press Ok Bluetooth Your phone fe...

Page 54: ...n the list of detected devices appears select one to connect to The Bluetooth menu options include Activate Turn the Bluetooth feature on off Search for devices Select to search for external devices that you would like to connect to your phone My devices Select to connect to devices that you prefer Preferences Select to change your Preferences settings including Phone name Visible On Off and Servi...

Page 55: ...SD memory card slot in order to increase the phone s memory Your phone supports a Micro SD card up to 512MB with guaranteed performance and quality To format your memory card Steps 1 2 1 Press Settings Connectivity Memory card Format 2 Press Ok ...

Page 56: ...ion profiles Steps 1 3 1 Press Browser Settings WAP profiles Alternatively press Settings Connectivity Browser WAP profiles 2 Scroll to a desired network service provider 3 Press Options Go to Profile settings include the following items Name Enter the name of the service provider IP address Enter the IP address Port Enter the port number Homepage Enter the address of the homepage Linger time If t...

Page 57: ...essing Browser Favourites the desired bookmark WAP push setting This feature allows you to select your preferences for messages sent from your service provider To set WAP push settings Steps 1 3 1 Press Browser Settings Push messages Alternatively press Settings Connectivity Browser Push messages 2 Select a mode from Always accept Never accept and Only from address 3 Press Select ...

Page 58: ...ew day View week To schedule a new meeting Steps 1 4 1 Press Tools Scheduler 2 Select Options New meeting 3 On the New entry screen enter the meeting details Subject Location Start date Start time End date End time Reminder At event time 5 mn before 15 mn before 1 hour before 1 day before Other No reminder and Repetition Once Daily Weekly Monthly Annually 4 Press Save To go to a specific date Step...

Page 59: ... Press Save To set an Alarm tone Steps 1 3 1 Press Tools Alarm Alarm tone 2 Select Ring tones from Phone memory or Memory card 3 Press Select Appointments This feature allows you to create an appointment and to set a reminder Note that the phone will switch on automatically if the appointment alarm is set to a specific time To create an appointment Steps 1 4 1 Press Tools Appointments 2 Select New...

Page 60: ...minder At event time 5 mn before 15 mn before 1 hour before 1 day before Other No reminder 4 Press Save Notes This feature allows you to write down some text for later reference To create Notes Steps 1 4 1 Press Tools Notes 2 Select New Notes or press Add 3 Write down information 4 Press Save Options for Notes include View View the content of the notes Edit Edit the note New entry Create a new ent...

Page 61: ...ar 7 Left soft key Options 8 Decimal point 9 Negative To perform a calculation Step 1 3 1 Press Tools Calculator 2 Enter the digits with numeric keys and other calculation keys listed above 3 Press to return to the idle screen Unit converter This function allows you to enter a unit currency exchange rate and convert from one unit currency to another To set an exchange rate Steps 1 3 1 Press Tools ...

Page 62: ... To start a Countdown Steps 1 4 1 Press Tools Countdown 2 Select Options Change 3 Press W X key to set the countdown time 4 Press Ok Options Start STK SIM Tool Kit This option is dependent on your service provider ...

Page 63: ...nclude Send Send the saved image Via multimedia msg Via Bluetooth or Via e mail Take new picture Select this option to go back to the camera s view finder screen As contact ID Set the image as the contact ID As wallpaper Set the image as the wallpaper Delete Delete the image Options for the view finder screen include Preview screen Set the size of the Preview screen to be Large screen or Small scr...

Page 64: ...rightness Press S or T to adjust the level of brightness on the camera s view finder screen Video mode To shoot a video Steps 1 4 1 Press Camera to launch the Camera Then press the right navigation key to launch video mode 2 Press Centre key to start recording a video clip and press again to stop 3 The video is saved automatically 4 Press Back to go back Options for the saved video clips include P...

Page 65: ...ed video clips in the Videos file Colour effects Select the Colour effects Off B W or Sepia Advanced Enter the Default name for the image to be saved Reset settings under Camera menu Before you start shooting a video clip you can press the 4 way navigation keys to adjust the following two functions Zoom Press and hold S or T to zoom in out The function is only available for image size 176 X 144 Br...

Page 66: ...te all Deletes all messages in the current folder 6 Details Displays message details including Date Delivery time and sender information 7 Call back Calls the person who sent you the message 8 Select multiple Deletes multiple messages selected individually or by selecting all When you navigate through the list of messages in Outbox press Options to access the following features 1 View Displays mes...

Page 67: ...ly press Options Continue 4 Or press Options Save as draft For more information on entry methods refer to Text Entry on page 32 Options for Text Message editing include 1 Continue Continue to send the messages by selecting recipients from Contacts or by entering phone number s manually 2 Add symbol Display the symbol chart for selection 3 Insert object Insert objects from Predefined sounds Predefi...

Page 68: ...text Fax X 400 Paging ERMES E mail Validity period Select the period from 1 hour 12 hours 1 day 1 week Maximum This determines the length of time the SMS message is stored at the SMS centre The radio button for the selection will be marked Delivery report This feature allows you to get a receipt when the SMS message is successfully delivered Press Select to activate inactivate the feature This fea...

Page 69: ...inue to send the messages by selecting recipients from Contacts or entering phone number s manually Insert object Insert objects from Pictures Photos Videos Sounds and Page Insert new Insert objects by creating files from Digital camera Video camera and Sound recorder Attachment Attach a Business card of a contact s information or an Appointment entry Preview message Select to preview the whole mu...

Page 70: ...ature This feature is network dependent Read report This feature allows you to get a report when the message is read Press Select to activate inactivate the feature This feature is network dependent Expiry time When the expiry time is due the message will be deleted Set the Expiry time 1 hour 3 hours 6 hours 12 hours 1 day 1 week or Maximum Retrieval Set the Retrieval mode Automatic Deferred or Au...

Page 71: ...ettings you can define the E mail server and your E mail account Server To create an E mail Server Steps 1 3 1 Press Messages Settings E mail Server 2 Scroll S or T to select a server 3 Press Options Edit The Server details include the following information Connection Define settings such as Connect using CSD only and GPRS only Incoming server Specify the name of the Server Port Authentication Gen...

Page 72: ...ndent You need to register with your service provider To access this feature press Messages Cell info From the menu you can set up the following options Auto display This feature allows cell broadcast messages to be displayed automatically in standby mode Press Select to activate inactivate the feature Broadcast Set this feature on off to read any new cell broadcast messages Message inbox Displays...

Page 73: ...ess Messages Memory status 2 Scroll S T to see the memory space of Text msgs in phone Text msgs in SIM Multimedia msgs and E mail Voice mail To set up your voice mailbox Steps 1 3 1 Press Messages Settings Voice mail 2 Enter the Voice mail number 3 Press Save ...

Page 74: ...e the game difficulty Top score See the best score record Instructions Information about how to play a game Java Games Your phone supports Java With this feature you can run Java compatible applications such as downloaded games You can create folders to manage the game that you have downloaded from the network Composer Your phone features a composer that allows you to create your own personal musi...

Page 75: ...Contacts SIM contact or PhoneBook To create a SIM Phone contact Steps 1 4 1 Press Contacts View contacts SIM contact or PhoneBook 2 Select Add contact 3 Enter details 4 Press Save Options for new SIM card entry include Name Enter the contact s name Home Enter the contact s home number Location Select where to save the entry SIM Protected SIM Position in SIM The phone will assign a number to the co...

Page 76: ...hich phone number is used to default number such as mobile Home work or Fax Send contact Send the contact s information via Bluetooth Copy contact Select to copy the contact to phone SIM Move contact Move the contact to phone SIM Add picture Assign a picture for contacts Select multiple Select to add multiple contacts individually or as a group to Move to phone SIM Copy to phone SIM Delete and Sen...

Page 77: ...ature allows you to keep a list of useful numbers such as My numbers Service numbers Voice mail and Emergency numbers To enter a special number Steps 1 5 1 Press Contacts Special numbers My numbers Service numbers Voice mail or Emergency 2 Select Empty 3 Press Options Edit 4 Enter details 5 Press Save Options for My numbers include View Edit and Delete Quick call You can edit a list of quick calls...

Page 78: ... Position Picture in contacts Turn the display of the caller s ID on off Copy to SIM Copy all the contacts to SIM card Copy to phone Copy all the contacts to phone memory Move to SIM Move all the contacts to SIM card Move to phone Move all the contacts to phone memory Delete all entries Delete all contacts Memory status This feature allows you to check your phone memory space To check Memory statu...

Page 79: ...rn FM Radio On Off Options for FM Radio include Switch On Switch Off Turn FM Radio on off LoudSpeaker Turn the loud speaker on off Volume Press W X key to decrease increase the volume Set Frequency Set the frequency by using the keypad keys Save Channel Enter Channel ID from Ch0 Ch9 Channel Name and Frequency Press and hold alphanumeric key to launch the channel ID Erase Channel Enter the Channel ...

Page 80: ...uffle repeat Add to playlist Add the selected track to the Playlist Details Show the detailed information of the selected track Name Size Time Type and Duration Delete Delete the selected track Last played You can access this feature to see a list of songs that you previously played The song list is arranged chronologically Options for the Last played tracks include Play Play the selected track Pl...

Page 81: ...he tracks in the selected playlist Delete Delete the selected playlist Rename Rename the selected playlist Help Help information about playlists Voice memo This function allows you to record a voice clip of up to 36 seconds using your phone s microphone You can send the recorded voice clip as an MMS message attachment To record a voice clip Steps 1 5 1 Press My player Voice memo 2 Press Record or ...

Page 82: ...Background MP3 Data 2 Scroll S T to select data source from Auto Memory card Phone memory and Playlists 3 Press Select to confirm To customise the phone s font colour Steps 1 3 1 Press My player Background MP3 Font colour 2 Scroll S T to select font colour from Dark green Dark cyan Dark blue Dark magenta Grey and White 3 Press Select to confirm ...

Page 83: ...ct the Phone memory 3 Scroll S T to select a folder and press Select 4 Select New Folder and enter a name for the folder 5 Press Ok Options for Folder list include New folder Create a new folder Change view Select the folder display type List view or Grid view Phone memory To check Phone memory Steps 1 4 1 Press My data 2 Scroll W X to select Phone memory 3 Scroll S T to the Memory status 4 The di...

Page 84: ... known number include Delete Delete the record from the call history Call Call the selected number Delete all Delete all the numbers from the call history list Text message Send a text message to the selected number Multimedia message Send a multimedia message to the selected number Edit Edit the entry s details For more information refer to Contacts on page 71 Options for an unknown number includ...

Page 85: ...calls Fixed dialling and Closed user group Auto Answer To turn Auto Answer on off Steps 1 2 1 Press Calls Call settings Auto Answer 2 Press Change to turn the Auto Answer On Off Any key answer To turn Any key answer on off Steps 1 2 1 Press Calls Call settings Any key answer 2 Press Change to turn the Any key answer On Off Seconds reminder To turn Seconds Reminder on off Steps 1 4 1 Press Calls Ca...

Page 86: ...Steps 1 2 1 Press Calls Call settings Call services Call waiting 2 Scroll S T to select Activate Cancel and press Select To check status press Settings Connectivity Call options Call services Call waiting Check status Caller ID To Hide ID Steps 1 2 1 Press Calls Call settings Call services Hide ID 2 Press Yes to Hide ID for all calls or Hide ID for next call To check Caller ID status press Calls C...

Page 87: ...ou assigned All un answer diverts an incoming call when it is not answered Not reachable diverts all incoming calls to the number you assigned when the phone is turned off or out of signal range When no reply diverts an incoming call when it is not answered for a period of time determined by your network Busy diverts the incoming call when the line is busy Divert all data calls active diverts the ...

Page 88: ...ls are barred All incoming bars all incoming calls When roaming bars incoming calls when you are out of your home network range To set Bar calls Steps 1 2 1 Press Calls Call settings Bar calls 2 Select a barred call type All outgoing Outgoing international Only here home All incoming When roaming and Cancel all To check Bar calls status press Calls Call settings Bar calls Check status Fixed dialli...

Page 89: ...k operator or service provider To turn Closed user group On Off press Calls Call settings Closed user group Closed user group To select a group press Calls Call settings Closed user group Select group To turn Outgo access On Off press Calls Call settings Closed user group Outgo access To turn Preferred group On Off press Calls Call settings Closed user group Preferred group ...

Page 90: ... 82 Camera 59 Camera mode 59 Cell info 68 Clear history 81 Closed user group 47 85 Composer 70 Connections 49 Connectivity 43 Contacts 71 Cost Settings 45 82 Countdown 58 D Default settings 40 Default storage 39 E E mail 66 Entertainment 70 F Fixed dialling 46 84 Flight mode 40 FM Radio 75 G Games 70 Greeting 42 H Holding a Call 30 K Key sound 43 L Language 35 Last played 76 M Main menu 25 Making ...

Page 91: ... Call 30 Ring volume 42 Ringtones 42 S Scheduler 54 Search mode 47 Second reminder 43 81 Security 36 Select band 48 Select line 48 Shortcuts 39 Shutter sound 43 SIM Card 15 Soft Keys 24 SOS Soft Key 6 Special numbers 73 STK SIM Tool Kit 58 T T9 Language 32 Tasks 56 Templates 68 Text Entry 32 Text Messages 63 The 4 Way Keys 22 Themes 41 Time date 35 Tools 54 Tracks 76 U Unit converter 57 USB featur...

Reviews: