background image

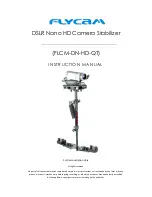
DSLR Nano HD Camera Stabilizer   


(FLCM-DN-HD-QT) 

I NSTRUCT IO N MA N UAL  

All rights reserved 

No part of this document may be reproduced, stored in a retrieval system, or transmitted by any form or by any                                                  

means,  electronic, mechanical, photocopying, recording, or otherwise, except as may be expressly permitted                                                       

by the applicable  copyright statutes or in writing by the publisher. 


For Demonstration Only 

Summary of Contents for FLCM-DN-HD-QT

Page 1: ... of this document may be reproduced stored in a retrieval system or transmitted by any form or by any means electronic mechanical photocopying recording or otherwise except as may be expressly permitted by the applicable copyright statutes or in writing by the publisher For Demonstration Only ...

Page 2: ...le operators to achieve a high level of artistic freedom in shot selection in both video and stills formats Remem ber to acquaint yourself with your Flycam DSLR Nano HD by practicing proper use Once mas tered your Flycam Nano will become an indispensable production tool for shooters from ama teur to professionals alike WHAT S IN THE BOX Please inspect the contents of your shipped package to ensure...

Page 3: ...cated at the front of the adaptor prevents camera rota tion on the head BASE PLATFORM Provided threaded stud located in the center of the base ATTACHING THE CENTRAL POST TO THE BASE PLATFORM The bottom of the interior central post has a threaded slot that matches the pin located mid base on the platform To attach the two simply thread them together and tighten to ensure a slip free connection Alig...

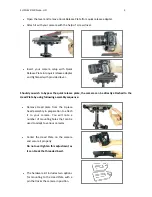
Page 4: ...d to the stalk Remove the Head Plate by unscrewing the four side knobs to mount the quick release adaptor Loosen the Allen bolt at the bottom of the Quick Release Adapter and attach it to the head plate Retighten the bolt for securing the adapter to the plate Attach the Head Plate to the FLYCAM DSLR NANO HD with appropriate fore aft position ing and tighten the side knobs as shown Further fine tun...

Page 5: ... the camera can be directly attached to the Head Plate by using following assembly sequence Remove Head plate from the 3 piece head assembly in preparation to attach it to your camera You will note a number of mounting holes that can be used to adapt to various cameras Center the Head Plate on the camera and secure it properly Do not over tighten this adjustment as it can break the threaded insert...

Page 6: ...ce the assembly in line with the center of the stabilizer stalk and tighten the side adjusters as shown Further fine tuning will probably be required If you wish to use Table clamp then please use following sequence of pictures and text Attach clamp onto the table tighten the provided knob to secure Then attach handle onto the clamp it helps achieving balance in just seconds and saves your profess...

Page 7: ...eight to one side of the central post an equal amount has to be added to the other side to maintain horizontal balance However if you are using an offset configuration such as a flip out viewfinder or off center accessories extra weights might be needed on the opposite side of the post to counter act and maintain proper balance Total weight fixed to the base platform should be equal to the weight ...

Page 8: ...clamp has been tightened Weight discs are added successfully All screws are tightened securely Battery all accessories and cables should be secured BALANCING THE HORIZONTAL AXIS When your FLYCAM DSLR Nano HD is properly assembled you can start the test and setup of the horizontal balance Horizontal balance allows the camera to remain level during operation with the Central Post in a vertical posit...

Page 9: ... the right then loosen the screws on the bottom of the Bottom Plate and then gently slide the Mid Plate to the left If it leans to the left from the opera tor s point of view then adjust the Mid Plate to the right A bit at a time until balance is achieved Secure all parts after adjustments are made It may be necessary to reconfigure front to back adjustments once correct side to side fine tuning h...

Page 10: ...f necessary use the side screws and the bottom plate screws to make required adjustments BALANCING REVIEW Proper system balance can only be achieved once your camera is set up with the appropriate ac cessories ready for shooting This means batteries lenses media cards LCD viewfinder monitor quick release plate on cam lights and all the gear you will use for your recording session Remove the top pl...

Page 11: ...l you get the one one thousand two one thousand count to the vertical position Fine tune the left right forward backward balance You will have to go back and forth be tween the two directions to get the balance just right Loosen the screw sets that allow the sled to move left and right Adjust the top plate so that it is centered and tighten down the screws like you would a tire slowly and alternat...

Page 12: ...enever possible If you are una ble to find this kind of environment then we suggest you store the unit in an airtight plastic container or bag Standing the unit upright is preferred as it alleviates stress on the system Note The FLYCAM DSLR Nano HD doesn t work under water nor is it waterproof Avoid direct exposure to rain water spray or any other harsh environment Also the bearings are not sand g...

Page 13: ... does not include by the way of example damage caused by products that we do not supply or from mishandling in transit accident misuse neglect lack of care of the product or service by anyone other than our company We are not liable for incidental or consequential damages resulting from the use of the unit or occurring due to any breach of this warranty Replacement parts of the product will be pro...

Reviews: