Safety Precautions
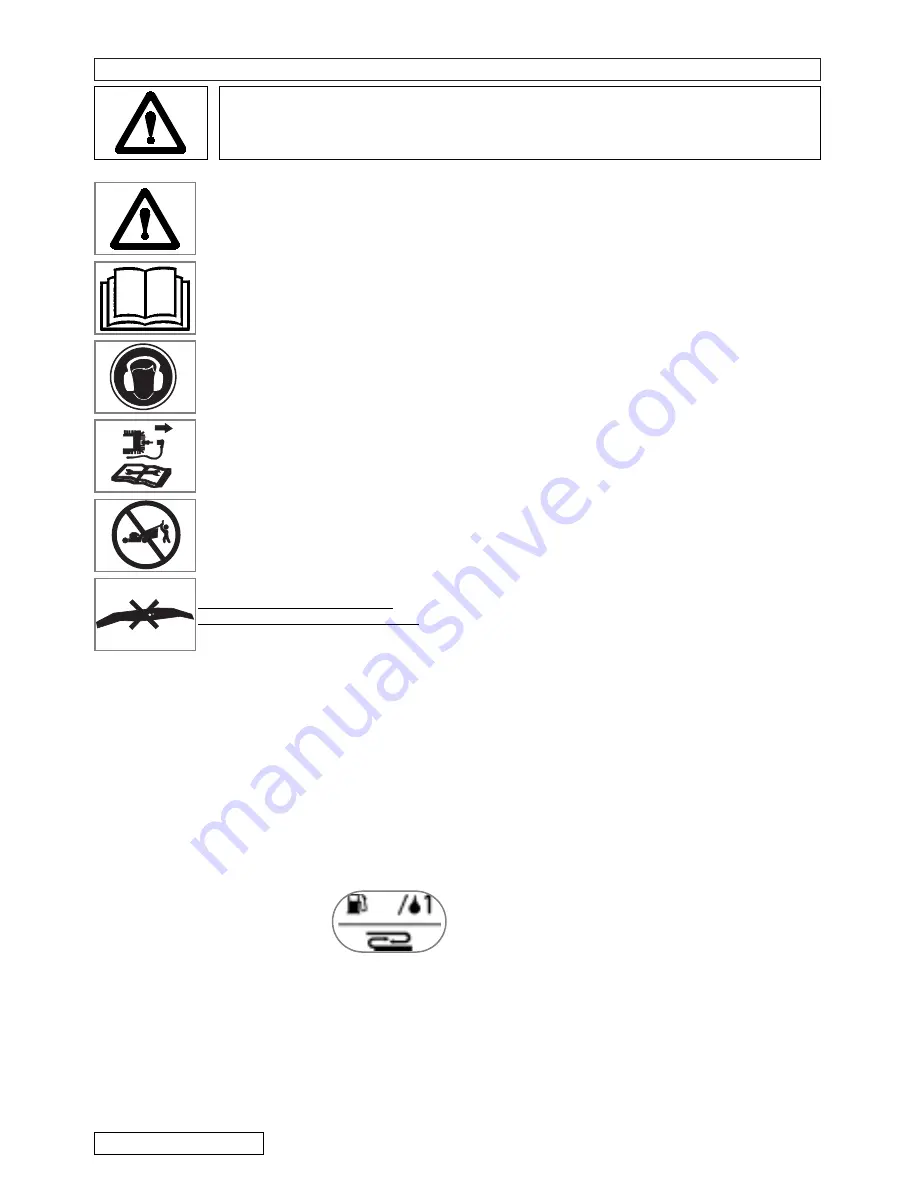
Explanation of Symbols on the Turbo Trim XL400
Warning
Read the user instructions carefully
to make sure you understand all the
controls and what they do.
The use of ear protection is
recommended.
Disconnect the spark plug before
attempting any maintenance,
cleaning or adjustment, or if you are
going to leave the trimmer
unattended for any period.
Never allow children or people
unfamiliar with these instructions to
use the trimmer. Local regulations
may restrict the age of the operator.
Never use, or attempt to fit, a
metal/bar blade with this product.
General
1. Only use the trimmer in the manner and for the
functions described in these instructions.
2. Keep bystanders away. Do not trim whilst
people, especially children or pets, are in the
trimming area.
3. Never operate the trimmer when you are tired, ill or
under the influence of alcohol, drugs or medicine.
4. The operator or user is responsible for accidents or
hazards occurring to other people or their property.
Fuel Safety
WARNING - Petrol is highly flammable
-
Store fuel in a cool place in a container
specifically designed for the purpose.
-
Only use a container that is specially designed
for mixing fuel.
-
Your trimmer has a 2-stroke
engine which runs on fuel of 1
part of oil to 25 parts of petrol.
-
Do not use standard 2-stroke
mixture as supplied by garages, neat petrol or
multi grade oil.
-
Use a good quality 2-stroke oil or a quality SAE 30 oil
mixed with fresh REGULAR grade unleaded petrol.
-
Refuel outdoors only and do not smoke while
refuelling.
-
Wipe dirt and grass clippings from the fuel tank
filler cap to avoid getting dirt into the fuel tank.
-
Add fuel
BEFORE
starting the engine. Never
remove the cap of the fuel tank or add fuel while
the engine is running or when the engine is hot.
-
If petrol is spilled, do not attempt to start the
engine but move the machine away from the
area of spillage and avoid creating any source of
ignition until petrol vapours have dissipated.
-
Never use stale fuel left from last season or fuel
which has been stored for long periods.
-
Replace all fuel tanks and container caps securely.
-
Fuel should be stored in a cool place away from
naked flames.
-
Your carburettor is pre-set. Normally no further
adjustment is required.
Preparation
1. While using your product always wear
substantial footwear and long trousers.
2. Make sure the area to be cut is clear of sticks,
stones, bones, wire and debris; they could be
thrown by the cutting line.
3. Before using always visually inspect to see that
cutting lines, disc bolts and disc assembly are
not worn or damaged. Replace worn or
damaged cutting lines together with their fixings
in sets to preserve balance.
4. Have faulty silencers replaced
Use
1. Do not operate the engine in a confined space
where exhaust fumes (carbon monoxide) can collect.
2. Use the trimmer only in daylight or good artificial light.
3. Avoid operating your trimmer in wet grass,
where feasible.
4. Take care in wet grass, you may lose your footing.
5. On slopes, be extra careful of your footing and
wear non-slip footwear.
6. Exercise extreme caution when changing
direction on slopes.
7. Trimming on banks and slopes can be dangerous.
and you should use extreme caution if using the
trimmer in this manner. When operating the trimmer
on banks or steep slopes it is important that the feet
of the operator remain firmly on level ground.
8. Do not walk backwards when trimming, you
could trip. Walk, never run.
9. Never cut grass by pulling the trimmer towards you.
10. Stop the engine before pushing the trimmer across
surfaces other than grass and when transporting
the trimmer to and from the area to be mowed.
11. Do not overspeed the engine or alter governor
settings. Excessive speed is dangerous and
shortens trimmer life.
12. Always start the trimmer carefully with feet well
away from the cutting lines.
13. Do not tilt the trimmer when starting the engine,
except if the trimmer has to be tilted for starting.
In this case, do not tilt more than absolutely
necessary and lift only the part which is away
from the operator. Always ensure that both
hands are in the operating position before
returning the appliance to the ground.
14. Never pick up or carry a trimmer while the
engine is running
15. Spark plug lead may be hot - handle with care.
16. Do not attempt any maintenance on your
trimmer when the engine is hot.
If not used properly this trimmer can be dangerous! This trimmer can cause serious injury
to the operator and others, the warnings and safety instructions must be followed to
ensure reasonable safety and efficiency in using this trimmer. The operator is responsible
for following the warning and safety instructions in this manual and on the trimmer.
25
ENGLISH - 1


