En-4
1-888-514-1663 |
WWW.OUTLANDLIVING.COM
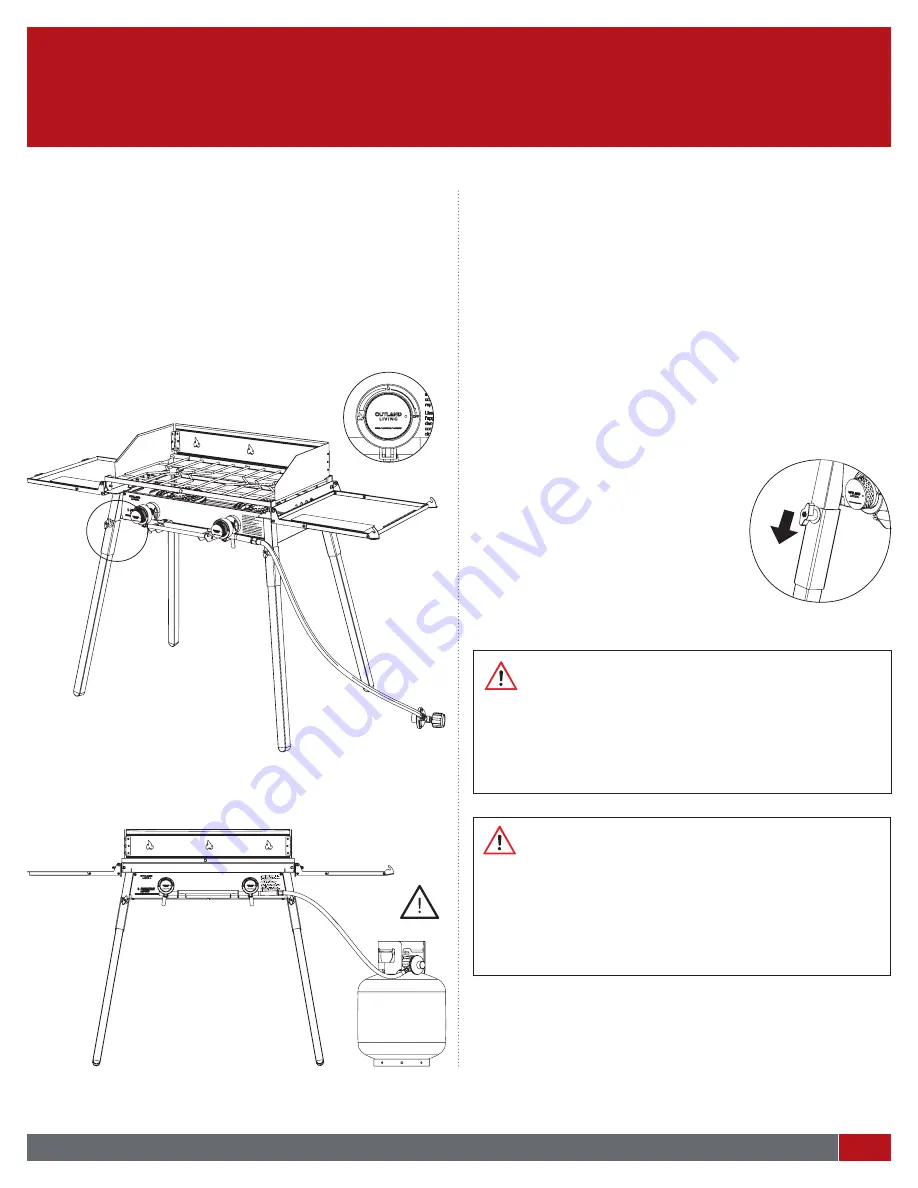
STEP 3: STANDING DEPLOYMENT
a) Place appliance on a level, stable, non-combustible surface.
b) Unlatch the lid locks.
c) Deploy left and right lid.
d) Deploy wind break.
e) Ensure the gas knobs on the appliance are set to OFF.
f) Connect LP cylinder (see section labelled “Connection”).
g) Your OUTLAND appliance is assembled and ready for use.
LP Cylinder
not included.
STEP 4 : ENSURE THE STOVE IS LEVEL AND STABLE
Most ground terrain is uneven. The stove should be level and stable
prior to operation. If the stove is not level, or does not make solid
contact with the ground on all four legs follow these tips:
LOCATION ADJUSTMENT
Reposition the standing location of the stove. Often, moving a few
inches in one direction, or another, will firmly ground and level the
stove. If not successful the first time, try a few more locations.
LEG HEIGHT ADJUSTMENT
If repositioning the stove is not successful, adjust the leg height.
Typically, one leg adjustment is all it takes.
1. Assess which leg requires height adjustment.
2. Loosen the leg locking thumbscrew.
3. Slide the leg extension down just
far enough to make contact with the
ground and level the stove.
4. Tighten the leg locking thubscrew.
Ensure it is firmly set.
5. Check the stove is level. Readjust the
leg height(s) as necessary.
OFF
SECTION 1:
ASSEMBLY (continued)
IMPORTANT:
• Ensure the gas hose is not contacting the appliance enclosure
and the LP cylinder is stabilized.
• Perform LEAK TEST PRIOR TO IGNITION. Leak test all gas
coupling connections. (see section labelled “Leak Test”).
• Use caution, the hose is a potential trip hazard.
WARNING:
Ensure the appliance is level and stable on a non-combustible
surface. DO NOT OPERATE APPLIANCE ON A SLOPE. It is
recommended to use large flat rocks to level the appliance if
the ground is very uneven.


