background image

Installation Manual RMGZ 400B / 600B-series 


20.05.2015


3.3


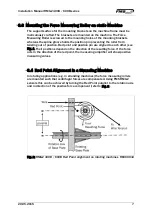
Mounting the Force Measuring Roller on static Machine  

The support surface for the mounting brackets on the machine frame must be 
meticulously crafted. The brackets are mounted on the machine. The Force 
Measuring Roller is screwed to the mounting holes of the mounting brackets 
whereas the spline groove holds the position pin preventing the roller from 
twisting out of position. Red point and position pin are aligned to each other (see 
Fig. 1).Their positions depend on the direction of the resulting force. If the force 
acts in the direction of the red point, the measuring amplifier will show positive 
measuring values. 


3.4


Red Point Alignment in a Stranding Machine 

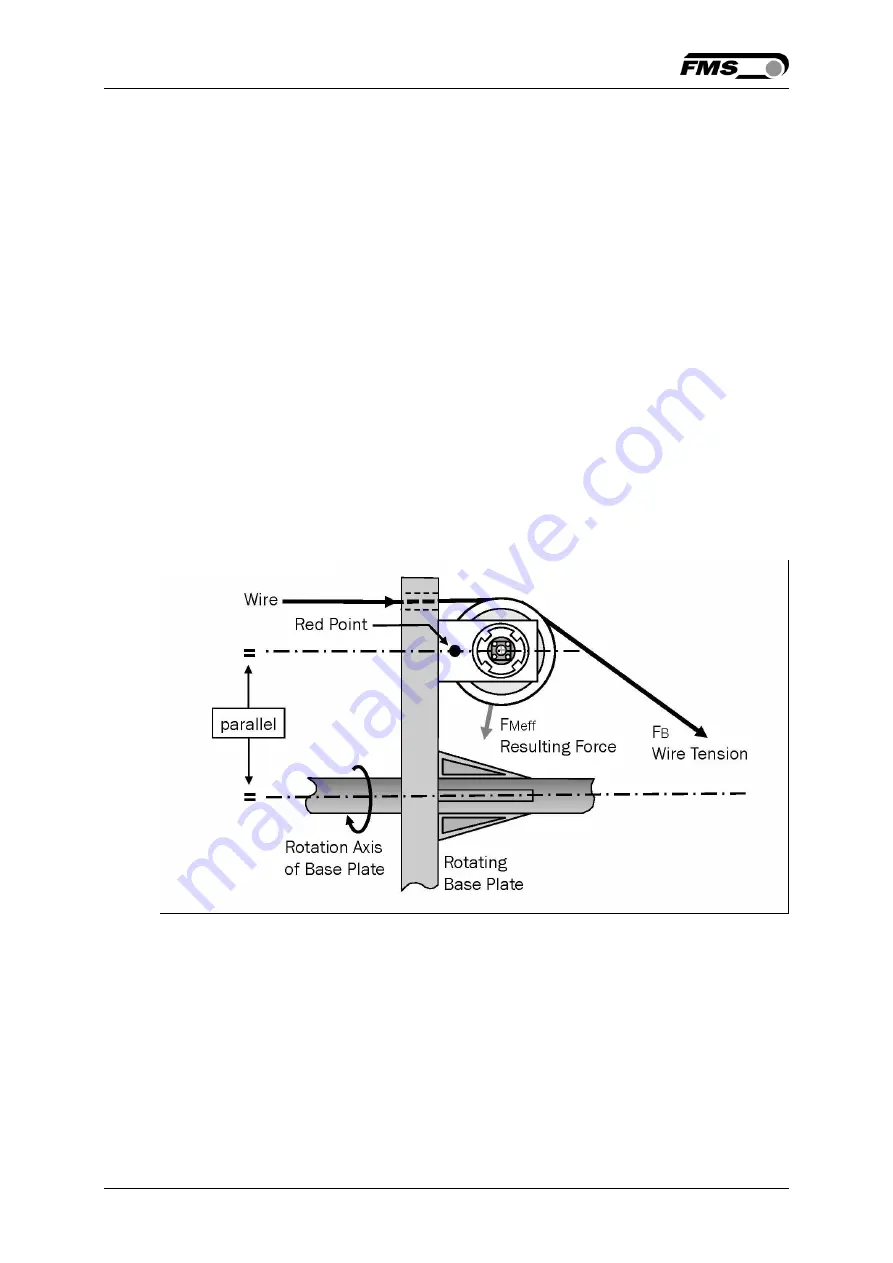
In rotating applications (e.g. in stranding machines) the force measuring rollers 
are mounted such that centrifugal forces are compensated. Using FMS RMGZ 
sensors this can be achieved by turning the Red Point parallel to the rotation axis 
and in direction of the positive force component (refer to Fig. 2). 


Fig. 2: RMGZ 400B / 600B Red Point alignment on rotating machines R800004d 


Summary of Contents for RMGZ400B

Page 1: ... 05 2015 ff This installation manual is also available in German Please contact your local FMS representative Diese Montageanleitung ist auch in Deutsch erhältlich Bitte kontaktieren Sie Ihren nächstgelegenen FMS Vertreter by FMS Force Measuring Systems AG CH 8154 Oberglatt All rights reserved ...

Page 2: ...3 Order Code 5 2 4 Scope of Delivery 5 3 Assembly 6 3 1 Assembly Conditions 6 3 2 Assembly Preparations 6 3 3 Mounting the Force Measuring Roller on static Machine 7 3 4 Red Point Alignment in a Stranding Machine 7 4 Electrical Connection 9 4 1 Signals in the Wheatstone bridge 9 4 2 Signal Assignment on Sensor Cable Connector 9 5 Design and Functionality 10 5 1 Functional Description 10 6 Technica...

Page 3: ...This symbol refers to high risk for persons to get health injury or loss life It has to be followed strictly b Risk of damage of machines Caution This symbol refers to information that if ignored could cause heavy mechanical damage This warning has to be followed absolutely c Note for proper function Note This symbol refers to an important information about proper use If not followed malfunction c...

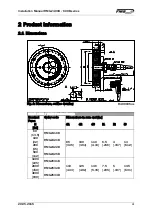
Page 4: ...400005us RMGZ 400B 600B Product Range Nominal Force Order code Dimensions in mm and in N lbf d1 d2 d3 l1 l2 l3 60 13 5 RMGZ416B 85 3 35 100 3 94 110 4 33 6 5 256 4 157 13 512 100 22 RMGZ421B 200 45 RMGZ422B 500 112 RMGZ425B 1000 225 RMGZ631B 110 4 33 125 4 92 136 5 35 7 5 295 5 197 13 5 531 2000 450 RMGZ632B 4000 900 RMGZ634B ...

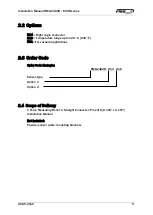
Page 5: ...erature range up to 120 C 248 F H31 For vacuum applications 2 3 Order Code Order Code Example RMGZ422B H14 H16 Sensor Type Option 1 Option 2 2 4 Scope of Delivery 1 Force Measuring Roller 1 Straight Connector Pin ø3x5 0 118 x 0 197 Installation Manual Not included Sheave sensor cable mounting brackets ...

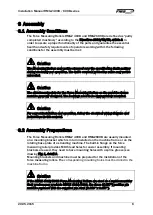
Page 6: ...propriately mounted Caution For correct installation and operation follow the electrical wiring diagram and instructions in this manual 3 2 Assembly Preparations The Force Measuring Rollers RMGZ 400B and RMGZ600B are usually mounted on a mounting bracket which is in turn installed on the machine frame or on the rotating base plate of a stranding machine The built in flange on the force measuring r...

Page 7: ... and position pin are aligned to each other see Fig 1 Their positions depend on the direction of the resulting force If the force acts in the direction of the red point the measuring amplifier will show positive measuring values 3 4 Red Point Alignment in a Stranding Machine In rotating applications e g in stranding machines the force measuring rollers are mounted such that centrifugal forces are ...

Page 8: ...allelism between rotation axis and Red Point of e g 0 3 can lead to a zero point error The adjustment of the Red Point and hence the quality of the sensor adjustment as described in chapters 3 4 can be tested after offset compensation and calibration If the reading of an unloaded Force Measuring Roller stays at zero e g 0 N regardless of the load cell position e g at 12 o clock or at 6 o clock pos...

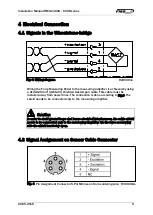
Page 9: ...ay from power lines The connection is done according to Fig 3 The shield needs to be connected only to the measuring amplifier Caution In order to avoid ground loops and hence electrical interferences the cable shield needs to be connected only to the measuring amplifier On the force measuring side the shield must stay open 4 2 Signal Assignment on Sensor Cable Connector Fig 4 Pin Assignment Conne...

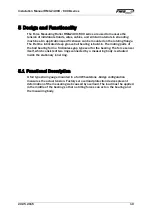
Page 10: ...n The mating parts of the ball bearing form a frictionless gap type seal for the bearing The force sensor itself which consists of two rings connected by a measuring body is situated inside the stationary inner ring 5 1 Functional Description A foil type strain gauge mounted in a full Wheatstone bridge configuration measures the actual tension Factory set overload protection devices prevent deform...

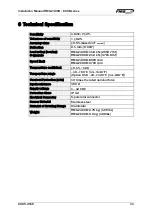
Page 11: ... 21 2 kN 4765 9 lbf Speed limit RMGZ 400B 8500 rpm RMGZ 600B 6700 rpm Temperature coefficient 0 1 10K Temperature range 10 60 C 14 140 F Option H16 10 120 C 14 248 F Overload Protection x Fn 10 times the rated nominal force Input resistance 350 Ω Supply voltage 1 12 VDC Protection Class IP 42 Electrical Connector 5 pole mini connector Sensor Material Stainless steel Material of Rotating Flange Alu...

Page 12: ...echnology com FMS Italy Via Baranzate 67 I 20026 Novate Milanese Tel 39 02 39487035 Fax 39 02 39487035 fmsit fms technology com FMS USA Inc 2155 Stonington Ave Suite 119 Hoffman Estates IL 60169 USA Tel 1 847 519 4400 Fax 1 847 519 4401 fmsusa fms technology com FMS UK Highfield Atch Lench Road Church Lench Evesham WR11 4UG Great Britain Tel 44 1386 871023 Fax 44 1386 871021 fmsuk fms technology c...

Reviews: