background image

444 9160 / 444 9180 / 442 9020

E 219 GB - Issue 1

4 4

Summary of Contents for 442 9020

Page 1: ...E 219 GB 991 9709 Edition 1 01 2007 Installation Operation Maintenance Spare Parts Servicebook 2 POST VEHICLE LIFT 444 9160 3 T 444 9180 3 T 442 9020 3 5T English ...

Page 2: ...F F B cannot be held responsible and may not be sued for any error or omission which may have crept into this publication All the updates of this manual are displayed below The latest issues or additional copies of this manual are available from F F B S A Rue du Pré Neuf 58440 Myennes FRANCE Minor changes are indicated by a thick line next to the modified text ISSUE PUBLICATION TEXT ILLUSTRATIONMO...

Page 3: ...es in transport 19 6 Foundation Plan and Power Supply Customer 20 Construction of foundation 21 Electrical connections Air plug 22 Wiring in the concrete 23 7 Assembly and Installation 24 Area layout 24 Dowelling of the columns 24 Mounting of the lifting arms 27 Electricalconnections 28 Control platform 29 Adjustment of control platform 30 Mounting of housing 31 8 Handling and Conduct during Opera...

Page 4: ... test is carried out after each fault incident Your vehicle should only be maintained and repaired by manufacturer trained specialists who possess the relevant certificate Only original spare parts should be used If other spare parts are used the CE conformity will be null and void According to the regulations about the operation of vehicle lifts lifting gear must be subjected to a safety test by ...

Page 5: ...used for its intended purpose The vehicle lift must be kept in good functioning condition and especially the safety equipment must be checked regularly to ensure that they are functioning reliably Operating maintenance and repair staff must be supplied with the necessary protective gear and it is essential that this is worn The operating instructions must be kept in a legible condition and must be...

Page 6: ...er supply or if this is not possible switch off at the mains and secure it with a padlock The key to this padlock should be kept by the person who carries out the maintenance or repair work If heavy machine parts are to be exchanged the load bearing equipment and buffer should be in good condition Any lubricating cooling or cleaning agents which might endanger the environment should be disposed of...

Page 7: ...The sign points to danger for persons fatal accidents or injuries Caution This sign points to danger for machines materials and the environment Danger general sign This sign is a reminder that the power supply to the housing must be switched off and locked so that it is secured against accidental switching on The most important aim of the safety directions is to prevent injury to people The applie...

Page 8: ...may operate the system Safety devices must not be replaced Necessary repair work may only be carried out by instructed customer service personnel Unauthorised alterations of the equipment render any liability by the manufacturer for any resulting damages invalid Work on electrical installations may only be carried out by electricians The vehicle lift must not be operated in environments liable to ...

Page 9: ...must not operate the lift The safety devices must not be changed in their position or function Repairs should only be carried out by authorised specialists The statutory accident prevention rules must be adhered to No work must be carried out on the vehicle during vertical movements The nominal load shown on the lift must not be exceed After a brief lifting of the vehicle it should be checked that...

Page 10: ... those which are probable according to experience The operator must be instructed to activate the up and down switch only if no person is standing in the danger area Before each use the protective device of the lift must be checked for its perfect functionality If a vehicle has been mounted onto the lift according to instructions there will be no danger of accidents If however the vehicle has not ...

Page 11: ... the load uptake device The lift is fitted with safety devices for example the supporting nut break safety device which will transfer the load to a free running safety nut in the case of a worn thread During this process a mechanical safety system is activated which will switch off the lift via the analogue path measuring counter and prevent a restart There is also the oscillating arm arrest which...

Page 12: ...e d 120 mm Intake height min 80 mm max 110 mm Spindle lifting nut system Electronic monitoring with analogue counter 1 year maintenance free Electronic monitoring with analogue counter 1 year maintenance free Electronic monitoring with analogue counter 1 year maintenance free Operating panel 1 key pad on steering column 1 key pad on steering column 1 additional key pad 2 sockets 230V 1 air supply ...

Page 13: ...444 9160 444 9180 442 9020 13 E 219 GB Issue 1 ...

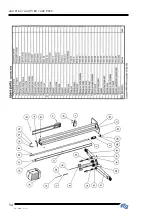
Page 14: ...444 9160 444 9180 442 9020 E 219 GB Issue 1 14 ...

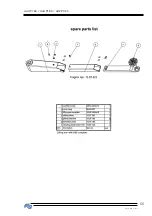
Page 15: ...444 9160 444 9180 442 9020 15 E 219 GB Issue 1 ...

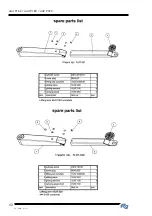
Page 16: ... 444 9180 442 9020 E 219 GB Issue 1 16 Lifting arms for type 444 9160 Long lifting arm 15 87 001 Short lifting arm 15 87 020 Lifting arms for type 444 9180 Long lifting arm 15 87 001 Short lifting arm 15 87 023 ...

Page 17: ...444 9160 444 9180 442 9020 17 E 219 GB Issue 1 Lifting arms for type 442 9020 ...

Page 18: ... accessories IMPORTANT INFORMATION for our lift end customers in case of DAMAGES IN TRANSIT Delivery Please check the goods immediately after arrival in the presence of the forwarding agent Should the goods show damages in transit the forwarding agent must no be given a blank receipt If necessary note the damage on the haulage documents Claim for damages In order to ensure a quick and unproblemati...

Page 19: ..._________________________________________________________________________ ___________________________________________________________________________________________ ___________________________________________________________________________________________ ___________________________________________________________________________________________ __________________________________________________...

Page 20: ...e frost resistant If the lift is not to be installed on solid ground an engineer engaged in statical calculations must examine each case individually The lifts are anchored with dowels If no adequatel fixed foundation with the necessary concrete texture class is available then a foundation with the minimum size of 3770x1500x250 mm of the concrete quality B25 with reinforcement must be created Surf...

Page 21: ...444 9160 444 9180 442 9020 21 E 219 GB Issue 1 ...

Page 22: ...230 V sockets for 444 9160 444 9180 2x3 kW without 230 V sockets for 442 9020 Power supply 3 Ph N PE 230 400 V 50 Hz Cable 5x2 5 2 mm Fuses customer 3x20 A slow for 444 9160 444 9180 3x25 A slow for 442 9020 Airplug A permanent connection for air supply which can be turned off must be installed in a place which is easily accessible from the lift Information The supply cables can be lead directly t...

Page 23: ...444 9160 444 9180 442 9020 23 E 219 GB Issue 1 ...

Page 24: ...adequate safety gap towards the walls or neighbouring work places min 80 cm emergency exit Danger 7 2 Dowellingofthecolumns Before the dowels are placed in position check the concrete quality of the anchor ground for the permitted standard Place columns in position and adjust to the stipulated measurements The lifts should be plumb They must not lean inwards The columns may slightly lean outwards ...

Page 25: ...ons in the information leaflet of the Institute for Building Technology about Nominal values for quality assurance for hammer drills with cutting plates from hard metal hard metal hammer drills which ar used the drilling holes for dowelling connections edition June 1977 Amendment October 1979 Compliance with the nominal drill values must be proven in the form of a test certificate 3 1 A to EN 10 2...

Page 26: ...ened so that a possible crack is bridged The drill hole depth from the OK column foundation platform is 225 mm Tap dowels in the pre drilled and cleaned holes without using force by means of a hand hammer and tighten with 200 N m Check the vertical position of the columns once again and correct if necessary Dowel M16 d Nominal drill diameter 24 mm D Depth of mini drilling into the concrete base 12...

Page 27: ...ng arm into the holder of the lift carriage Press the carrying bolt upwards and mount the safety ring 45x1 75 DIN 472 into the drill hole of the lifting arm from below Plug the locking device of the lifting arm into the carrying bolt In doing so the teeth of the locking device oft the lifting arm must slot into the lift carriage holder Lock into place the edge of the covering cap for the locking d...

Page 28: ...he feeder cable Earthing control column opposite side for Types 444 9180 442 9020 The 444 9180 and 442 9020 are equipped with a metal alloy channel to which a second operating element with one or two sockets and an air plug is attached The metal alloy channel always accompanies the delivery separately so that it does not get damaged during transport When the lift is installed the metal channel is ...

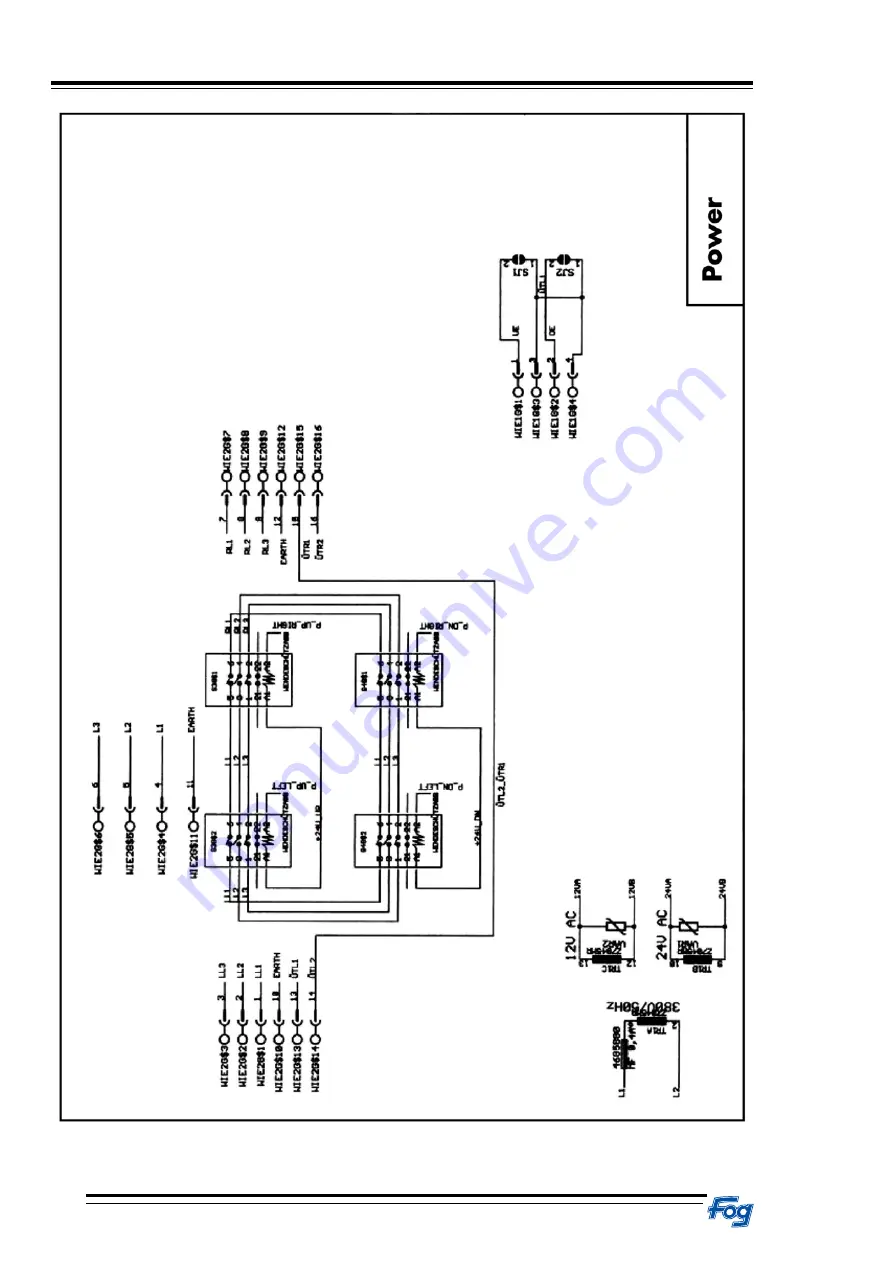
Page 29: ...ng socket Service socket Descriptions mainorright forcontrolside secondorleftforoppositeside Plan for socket panel LL1 LL2 et LL3 Î Motor connection opposite side 3 phase 400 V L1 L2 et L3 Î Electrical connection for main switch control RL1 RL2 und RL3 Î Connection to motor on control side 3 phase 400 V Earth Earth Earth Î Conductor for protection Ütl1 Ütl2 Î Connection for bimetal sensor of motor...

Page 30: ...xiliary column in this mode into the lower end position Drivecontrolcolumnintolowerendposition i Press H Taste again LED turns red i Main column can be moved in either direction with the up down key j In this mode drive the main column into the lower end position k Switch off lift with main switch l Remove service plug 3 Alignmentofbothpotentiometers a Switch lift on again LED turns orange b Posit...

Page 31: ... driving on the floor or the column base plates and can damage the drive system Before ascending to the upper end position check that the Poti R4 is not placed at the limit stop but in central position on the control platform If ascending to the upper end position takes place without checking the poti alignment the lifting carriage can drive against the end plate mechanically and the sliding eleme...

Page 32: ...the operation of the lift The picture shows the main switch in position ON Protected switch panel raise As long as the key is pressed the lift will travel upwards Protected switch panel lower As long as the key is pressed the lift will travel down Control LED As long as the LED is green the lift is ready If the LED is red the customer service needs to be informed If LED is orange the lift is in st...

Page 33: ...eight When the lift has reached the upper end position it stops automatically During the raising process neither persons nor objects must be present in the working area Avoid jerky raising actions Lowering Check the danger area During the lowering process neither persons nor objects must be present in the working area of the lift or on the lifting platform Press the key lower observe the vehicle a...

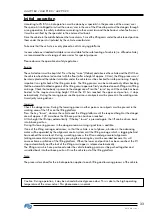
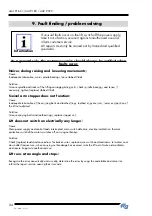
Page 34: ...does not function Cause Inadequate lubrication of the carrying bolts and toothed rings toothed rings are worn lower end position of the lift not adjusted Solution Grease carrying bolts and toothed rings replace stopper unit Lift does not switch on electrically any longer Cause Main power supply and control leads interrupted main switch defective electronic defective thermal protection switch of th...

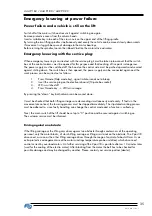
Page 35: ...rvice plug on the electronic board 10 pole box socket 3 LED is switched off 4 Press H mode key LED turns orange By pressing the down key both columns can be moved down It must be checked that both lifting carriages are descending simultaneously and evenly If faults in the movement are noticed the lowering process must be stopped immediately The stipulated working process must be adhered to since f...

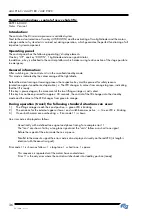
Page 36: ...ts colour from orange to green indicating that the lift is ready If the key is pressed again the movement of the two lifting carriages is acti vated If the key has not been pressed for approx 30 seconds the control of the lift changes into the stand by mode and the colour of the LED changes from green to orange During operation travel the following standard situations can occur 1 The lifting carri...

Page 37: ...hicle is wedged it is possible that the motor cannot drive free of its own accord In this case the control must be switched off and driving up must be tried again 22 The minimum speed of the main column has been too low during upward movement Hitting an o bstacle Refer to solving error 21 23 Minimum speed of the opposite column has been to low during upward movement The load is too heavy Belt tens...

Page 38: ...ntiometer defective in the feeder cable to the potentiometer Exchange the potentiometer on the opposite column check the mechanics potentiometer drive Only to be dealt with by trained service staff 60 79 Potentiometer error in the main column Wire is broken short circuit of potentiometer defective in the feeder cable to the potentiometer Exchange the potentiometer on the main column check the mech...

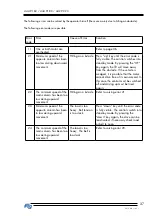
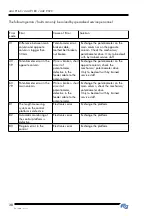
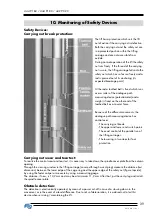
Page 39: ...ogue path measuring device has control over The carrying nut break The upper and lower end switch points The exact control of the parallel run of the lifting carriages The lowering in two steps for foot protection Carrying nut wear and tear test To realize the control wear and tear test it is necessary to take down the spindle cover plate from the column opening Through the viewing window in the l...

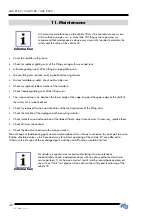
Page 40: ...dge at the shaft of the safety nut is to be checked Check or replace function and condition of the locking devices of the lifting arms Check the function of the analogue path measuring initiator Check initial tension and condition of the ribbed V belts adjust tension and if necessary replace them Check all screw connections Check the dowel connection with a torque wrench The exchange of load beari...

Page 41: ... Myennes Tél 03 86 39 50 47 Fax 03 86 39 51 00 www ffb automotive com Supplier s customer service Please enter stamp or address Company ______________________________________________________ Street _______________________________________________________ Place _______________________________________________________ Phone _______________________________________________________ ...

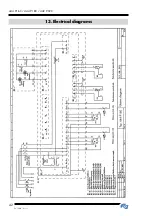
Page 42: ...444 9160 444 9180 442 9020 E 219 GB Issue 1 42 13 Electrical diagrams ...

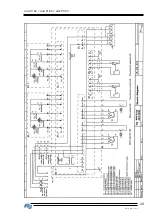
Page 43: ...444 9160 444 9180 442 9020 43 E 219 GB Issue 1 ...

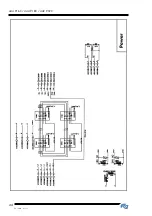
Page 44: ...444 9160 444 9180 442 9020 E 219 GB Issue 1 44 ...

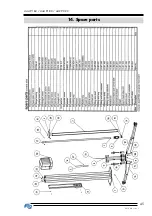
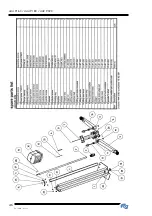
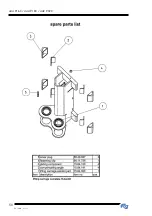
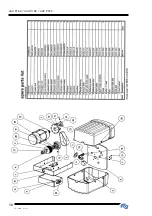
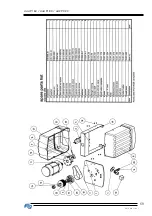
Page 45: ...444 9160 444 9180 442 9020 45 E 219 GB Issue 1 14 Spare parts ...

Page 46: ...444 9160 444 9180 442 9020 E 219 GB Issue 1 46 ...

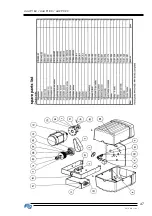
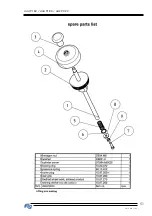
Page 47: ...444 9160 444 9180 442 9020 47 E 219 GB Issue 1 ...

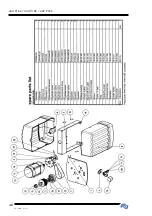
Page 48: ...444 9160 444 9180 442 9020 E 219 GB Issue 1 48 ...

Page 49: ...444 9160 444 9180 442 9020 49 E 219 GB Issue 1 ...

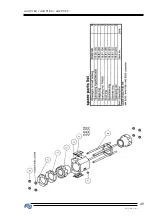
Page 50: ...444 9160 444 9180 442 9020 E 219 GB Issue 1 50 ...

Page 51: ...444 9160 444 9180 442 9020 51 E 219 GB Issue 1 ...

Page 52: ...444 9160 444 9180 442 9020 E 219 GB Issue 1 52 ...

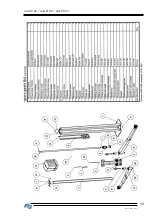
Page 53: ...444 9160 444 9180 442 9020 53 E 219 GB Issue 1 ...

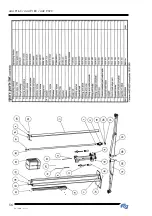
Page 54: ...444 9160 444 9180 442 9020 E 219 GB Issue 1 54 ...

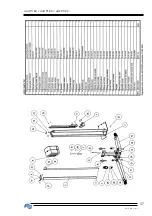
Page 55: ...444 9160 444 9180 442 9020 55 E 219 GB Issue 1 ...

Page 56: ...444 9160 444 9180 442 9020 E 219 GB Issue 1 56 ...

Page 57: ...444 9160 444 9180 442 9020 57 E 219 GB Issue 1 ...

Page 58: ...444 9160 444 9180 442 9020 E 219 GB Issue 1 58 ...

Page 59: ...444 9160 444 9180 442 9020 59 E 219 GB Issue 1 ...

Page 60: ...444 9160 444 9180 442 9020 E 219 GB Issue 1 60 ...

Page 61: ...444 9160 444 9180 442 9020 61 E 219 GB Issue 1 15 Service book for Vehicle lifts 4449160 4449180 4429020 ...

Page 62: ..._____________________________________ Fitter name _______________________________________________________________________________ After sale servicing supplier _______________________________________________________________ Start date of warranty ________________________ End date of warranty ________________________ COMPLIANCE ACCEPTANCE Reference ___________________________________ Number _______...

Page 63: ...__ Date ________________________ Signature 4 th QUARTER Name _______________________ Date ________________________ Signature After sale responsible Mr ______________________________ YEAR Maintenance Responsible Mr ___________________________ 1 st QUARTER Name _______________________ Date ________________________ Signature YEARLY VERIFICATION of safety parts made by the authorized institution Mr __...

Page 64: ...__ Date ________________________ Signature 4 th QUARTER Name _______________________ Date ________________________ Signature After sale responsible Mr ______________________________ YEAR Maintenance Responsible Mr ___________________________ 1 st QUARTER Name _______________________ Date ________________________ Signature YEARLY VERIFICATION of safety parts made by the authorized institution Mr __...

Page 65: ...__ Date ________________________ Signature 4 th QUARTER Name _______________________ Date ________________________ Signature After sale responsible Mr ______________________________ YEAR Maintenance Responsible Mr ___________________________ 1 st QUARTER Name _______________________ Date ________________________ Signature YEARLY VERIFICATION of safety parts made by the authorized institution Mr __...

Page 66: ...__ Date ________________________ Signature 4 th QUARTER Name _______________________ Date ________________________ Signature After sale responsible Mr ______________________________ YEAR Maintenance Responsible Mr ___________________________ 1 st QUARTER Name _______________________ Date ________________________ Signature YEARLY VERIFICATION of safety parts made by the authorized institution Mr __...

Page 67: ...__ Date ________________________ Signature 4 th QUARTER Name _______________________ Date ________________________ Signature After sale responsible Mr ______________________________ YEAR Maintenance Responsible Mr ___________________________ 1 st QUARTER Name _______________________ Date ________________________ Signature YEARLY VERIFICATION of safety parts made by the authorized institution Mr __...

Page 68: ...ate of undercar rubber grips 9 Presence of rubber grip retaining circlips 10 Check of arm parts sliding efficiency of thrust stop 11 State and efficiency of arm s locking device 12 Presence and state of foots protection device 13 Presence of circlip on each axis arm 14 State of control boxes 15 Correct operation of upper limit switch 16 Correct operation of lower limit switch 17 Check of up and do...

Page 69: ...erials identified by our technical department as being faulty Any parts or accessories obtained from external sources and bearing a proper brandname are included under our guarantee only to the same extent as the guarantee given by the suppliers of these items The repair modification or replacement of any parts or equipment during the guarantee period cannot result in the length of the guarantee b...

Page 70: ...444 9160 444 9180 442 9020 E 219 GB Issue 1 70 ...

Page 71: ...444 9160 444 9180 442 9020 71 E 219 GB Issue 1 ...

Page 72: ...28 00 03 Tél 02 69 63 06 30 Tél 00 687 24 95 77 Tél 00 689 45 61 37 Tél 00 41 22 732 35 43 Tél 00 213 21 36 12 00 Tél 00 212 22 99 17 92 Tél 00 216 71 516 053 518 473 Tél 00 216 71 770 200 808 788 Tél 00 237 42 61 00 Tél 00 225 21 75 19 00 Tél 00 241 72 92 56 Tél 00 221 832 94 37 Tél 00 230 212 94 37 Tél 00 261 20 22 303 03 58440 MYENNES B 1930 ZAVENTEM 28709 S S DE LOS REYES FIN 04300 TUUSULA PL7...

Reviews: