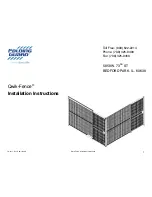
FGI-011_Rev.D 08/10/2015 Qwik-Fence Installation Instructions
Toll Free: (800) 622-2214
Phone: (708) 325-0400
Fax: (708) 325-0450
5858 W. 73
RD
ST
BEDFORD PARK, IL. 60638
Qwik-Fence
®
The following installation instructions should be used as a guide for installing Folding Guard Qwik-Fence® Partitions. Good common sense and appropriate safety precautions
must be used during installations. The product may be unstable during installation; accordingly - temporary bracing should be implemented until all hardware is tightened and
the product is properly anchored to the floor. Permanent field bracing (Not supplied) may be installed at installer’s/owner’s discretion. Installation problems arising from job site
conditions should be referred to a professional installer. Refer product assembly questions to Folding Guard®.
Self-Tapping Screw Installation Recommendations:
When installing self-tapping screws use a standard variable speed screw gun equipped with an adjustable clutch or depth locating nosepiece. Take care not to over tighten or
strip, set the drill accordingly. DO NOT USE IMPACT TYPE GUN WHEN INSTALLING SELF-TAPPING SCREWS. Securely clamp component parts in place before attaching with
self-tapping screws.
Tools Required:
5
/
16
Socket Drill Bit Attachment
3
/
8
Masonry Bit
5
/
16
Masonry Bit
5
/
16
Wrench
7
/
16
Wrench
9
/
16
Wrench
Hammer
Electric Drill (Var. Speed)
Tools Recommended:
Ladder
Carpenters Level
Chalk Line
Heavy Duty Wire cutters
Tools Recommended:
Shims (NOT SUPPLIED)
Drill Bits (Various)
Flat Screw Driver
Tape Measure
Level
Rubber Mallet
Installer Tips:
Installation is best completed with the help of one or two people.
Prior to beginning, please read through all instructions pertinent to your installation. (Doors, panels, etc…)
Panels are to be installed horizontally between posts, parallel with the ground.
Prior to beginning, if at all possible please lay out the parts where they are to be installed.
Make sure all posts are installed perpendicular to the floor; shims (NOT SUPPLIED) may be required.
Use 2” spacer block (NOT SUPPLIED) to support the panel during the installation.
Begin installation at a wall (If your plan calls for a wall connection), corner or an end of a post.
Hinge door opening is determined by header bar. Please consult your plan for location and dimensions.
Assembly hardware will be installed on the inside of most systems.
Installer should eliminate any bolts or hardware protruding into aisle ways or around door openings.
Prior to Installation:
Prior to beginning installation
please make sure that you have all
the parts required for the assembly
Make sure that the installation area
is clear of all obstructions.
Read thoroughly all the instruc-
tions pertinent to your installation.
2
Tools Required

