483
Continued on next page
Data Comm
unication
Automatically accesses the FOMA terminal
connected and reads the Access point (APN)
information registered.
It does not start if no FOMA terminal is connected.
3
Set up the access point (APN)
Adding/Editing/Removing the Access point (APN)
• To add an access point (APN)
Click “
追加
” (Add) on the “
接続先
(
APN
)
設定
” (Set
up Access point (APN)) screen.
• To edit a registered access point (APN)
Select the applicable access point (APN) from the
list and click “
編集
” (Edit) on the “
接続先
(APN)
設
定
” (Set up Access point (APN)) screen.
• To delete a registered access point (APN)
Select the applicable access point (APN) from the
list and click “
削除
” (Delete) on the “
接続先
(APN)
設定
” (Set up Access point (APN)) screen.
The access point (APN) registered in Number
(cid) 1 cannot be deleted.
Saving in File
If you want to back up the access point (APN) settings
registered on the FOMA terminal and/or save the
access point (APN) settings being edited, you can save
the access point (APN) settings by setting from the “
ファイル
” (File) menu of the toolbar.
Reading from File
If you want to edit the saved access point (APN) settings
and/or write into the FOMA terminal, you can read the
access point (APN) settings saved on the PC by setting
from the “
ファイル
” (File) menu of the toolbar.
Writing Access point (APN) information into
FOMA terminal
Clicking “FOMA
端 末 へ 設 定 を 書 き 込 む
” (Write
settings into FOMA terminal) on the “
接続先(
APN
)
設 定
” (Set up Access point (APN)) allows you to
write the displayed access point (APN) settings into
the FOMA terminal.
Dial-up creating function
Select the added/edited access point (APN) on the “
接
続先(
APN
)設定
” (Set up Access point (APN)) screen
and click “
ダイヤルアップ作成
” (Create dial-up).
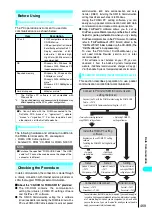
When the screen for writing into the FOMA terminal
appears, click “
は い
” (Yes). After finishing writing
into the access point (APN), the “
パケット通信用ダ
イ ヤ ル ア ッ プ の 作 成
” (Create dial-up for packet
communication) appears.
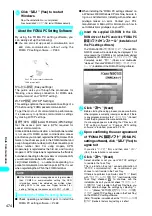
Enter any connection name you want and click “
アカウ
ント・パスワードの設定
” (Set up Account/Password).
This is not needed for mopera U or mopera.
Enter the user name and password (select an
available user for Windows 2000 or Windows XP)
and click “OK”.
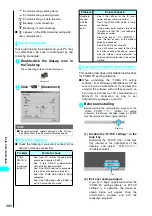
If your provider has given you instructions for
setting IP and DNS information, click “
詳細情報の設
定
” (Enter detail information) on the “
パケット通信
用 ダ イ ヤ ル ア ッ プ の 作 成
” (Create dial-up for
packet communication), register necessary
information and click “OK”.
After entering the settings, click “FOMA
端末へ設定
を 書 き 込 む
” (Write the settings to the FOMA
terminal), confirm overwriting and start writing.
Setting up Dial-up Network
This section describes how to set up a dial-up
connection for packet communication without
using the FOMA PC setting software.
About AT commands
●
AT commands are commands for modem
control. The FOMA terminal complies AT
commands and supports some enhanced
commands and its own AT commands.
●
Entering an AT command allows you to confirm
(display) the detail settings and the contents of
the settings for the “Data communication” and
FOMA terminal.
●
It is unnecessary to set up the dial-up network
for 64K data communication. Go on to “Setting
up Dial-up” (P.487).
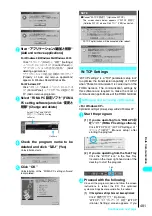
Checking the COM port
●
To set up the access point (APN), you need to
specify the COM port number assigned to
“FOMA N901iS” (Modem) built in after installing
the N901iS Communication setting file. This
section describes how to confirm the COM port
number. The COM port confirmed here will be
used in the access point (APN) set up (P.485).
Access points <APN/cid>
●
Normal telephone numbers are not used for
access points for packet communication unlike
64K data communication. Set up APN (P.485)
instead of a telephone number for connection.
●
The APN setting is just like registering a
Phonebook for packet communication from a
PC. Assign registration numbers (cid) 1 through
10 to register, which are used part of the access
point number.
*1
●
APN is administered by “cid (administration
numbers 1 through 10)”. Connected to the access
point with the cid number if the access point
number is set to “
*
99
***
<cid number>
#
”.
●
“mopera.ne.jp” (mopera) is specified in cid 1 and
“mopera.net” (mopera U) in cid 3 by default.
Specifying “
*
99
***
1
#
” as the access point
number for the mopera connection or “
*
99
**
*
3
#
” for the mopera U connection enables you
to use mopera or mopera U easily.
*2
●
The APN setting registers the access point to the
FOMA terminal just like registering other parties’
information (telephone number, etc.) on a mobile
Summary of Contents for N901iS
Page 78: ......
Page 96: ......
Page 140: ......
Page 190: ......
Page 322: ......
Page 416: ......
Page 468: ......
Page 563: ...561 Appendix Memo ...
Page 564: ...562 Appendix Memo ...
Page 565: ... Quick Search Index Quick Manual ...

