G
U
IDE
LI
N
ES
10
11
www.FoodSaver.com
Customer Service:
1 (877) 777-8042
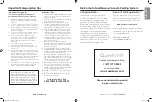
For Successful Vacuum Sealing
Guidelines
Vacuum Sealing and Food Safety
The vacuum sealing process extends the life of foods by removing most of the air from the sealed
container, thereby reducing oxidation, which affects nutritional value, flavor and overall quality.
Removing air can also inhibit growth of microorganisms, which can cause problems under certain
conditions:
Mold – Easily identified by its fuzzy characteristic. Mold cannot grow in a low oxygen environment,
therefore vacuum sealing can slow the growth of mold.
Yeast – Results in fermentation, which can be identified by smell and taste. Yeast needs water,
sugar and a moderate temperature to grow. It causes also survive with or without air. Slowing
the growth of yeast requires refrigeration, while freezing stops it completely.
Bacteria – Results in an unpleasant odor, discoloration and/or soft or slimy texture. Under the
right conditions, anaerobic bacteria such as
Clostridium Botulinum
(the organism that causes
Botulism) can grow without air and sometimes cannot be detected by smell or taste. Although it
is extremely rare, it can be very dangerous.
To preserve foods safely, it is critical that you maintain low temperatures. You can significantly reduce
the growth of microorganisms at temperatures of 40°F (4°C) or below. Freezing at 0°F (-17°C) does
not kill microorganisms, but stops them from growing. For long-term storage, always freeze perishable
foods that have been vacuum sealed, and keep refrigerated after thawing.
It is important to note that vacuum sealing is NOT a substitute for canning and it cannot reverse
the deterio ration of foods. It can only slow down the changes in quality. It is difficult to predict how
long foods will retain their top-quality flavor, appearance or texture because it depends on age and
condition of the food on the day it was vacuum sealed.
IMPORTANT: Vacuum sealing is NOT a substitute for refrigeration or freezing.
Any perishable foods
that require refrigeration must still be refrigerated or frozen after vacuum sealing.
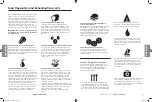
Preparation Guidelines for Hard Cheeses:
To keep cheese fresh, vacuum seal it after each
use. Make your FoodSaver
®
Bag extra long,
allowing one inch of bag material for each time
you plan to open and reseal in addition to the
3-inch room you normally leave between contents
and seal. Simply cut sealed edge and remove
cheese. When you’re ready to reseal the cheese,
just drop it in bag and reseal.
IMPORTANT: Due to the risk of anaerobic bacteria,
Soft cheeses should never be vacuum sealed.
Preparation Guidelines for Vegetables:
Vegetables need to be blanched before vacuum
sealing. This process stops the enzyme action that
could lead to loss of flavor, color and texture.
To blanch vegetables, place them in boiling water
or in the microwave until they are cooked, but still
crisp. Blanching times range from 1 to 2 minutes
for leafy greens and peas; 3 to 4 minutes for snap
peas, sliced zucchini or broccoli; 5 minutes for
carrots; and 7 to 11 minutes for corn on the cob.
After blanching, immerse vegetables in cold water to
stop the cooking process. Finally, dry vegetables on
a towel before vacuum sealing.
Note: All vegetables (including broccoli, brussels
sprouts, cabbage, cauliflower, kale, turnips)
naturally emit gases during storage. Therefore, after
blanching, they must be stored in freezer only.
Thawing and Reheating Vacuum-
Sealed Foods
Always thaw foods in either refrigerator or
microwave — do not thaw perishable foods
at room temperature.
To reheat foods in a microwave in a FoodSaver
®
Bag, always cut corner of the bag before placing
it on a microwave-safe dish. However, to avoid hot
spots, do not reheat bone-in meat or greasy foods
in microwave within a FoodSaver
®
Bag. You can also
reheat foods in FoodSaver
®
Bags by placing them in
water at a low simmer below 170°F (75°C).
Preparation Guidelines for Meat and Fish:
For best results, pre-freeze meat and fish for 1-2
hours before vacuum sealing in a FoodSaver
®
Bag.
This helps retain the juice and shape, and guarantees
a better seal.
If it’s not possible to pre-freeze, place a folded paper
towel between meat or fish and top of bag, but below
seal area. Leave paper towel in bag to absorb excess
moisture and juices during vacuum sealing process.
Note: Beef may appear darker after vacuum sealing
due to the removal of oxygen. This is not an
indication of spoilage.
Food Preparation and Reheating Tips
G
U
IDE
LIN
ES
FM2000 Series_21EM1.indd 13-14
FM2000 Series_21EM1.indd 13-14
6/23/21 09:49
6/23/21 09:49


