9
3.
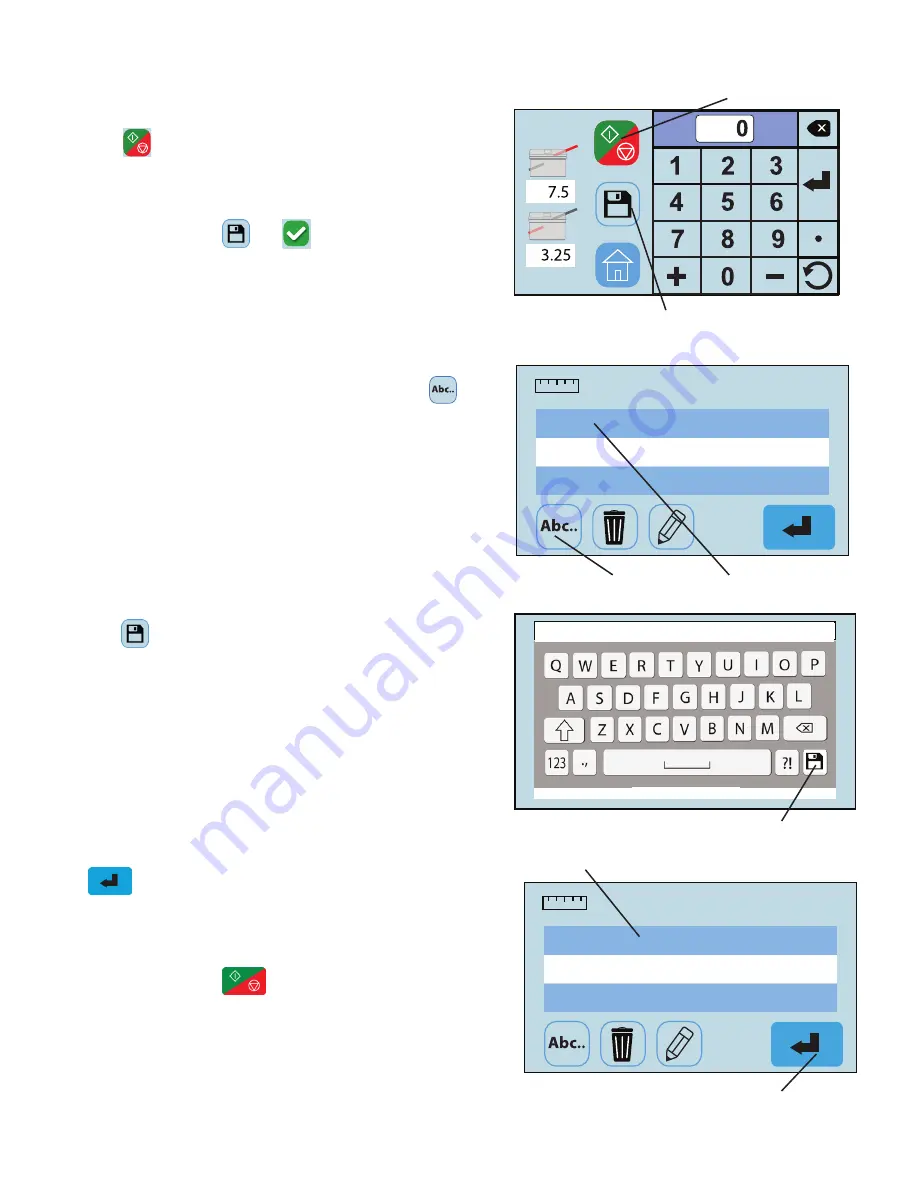
With one form loaded in the feeder press the “Start/Stop”
icon (Fig. 13) to check that the fold settings are
correct. To adjust the settings repeat steps 1 - 3.
When the folds and stacker wheels are set correctly,
press the save icon and to name and save the
custom fold.
4.
Select the job number the fold will be saved as by
toughing the screen (Fig. 14). Press the letter icon
to bring up the keypad to name the custom fold.
5.
Key in the name of the job (Fig. 15) and press the save
icon in the bottom right corner.
6.
Select the custom job and press the blue enter icon
to confirm the fold stops (Fig. 16).
When the fold stops are set, the folder will return to the
Home Screen with the custom job selected.
Press the start icon to begin folding.
Start/Stop icon
Save icon
1.
2.
3.
1.
2.
3.
Invoice
Flyer
Brochure
1.
2.
3.
1.
2.
3.
Invoice
Flyer
Brochure
Custom Job list
Letter icon
Fig. 13
Fig. 14
CUSTOM FOLDS SETUP, cont.
Job name
Save icon
Brochure
Fig. 15
1.
2.
3.
1.
2.
3.
Invoice
Flyer
Brochure
1.
2.
3.
1.
2.
3.
Invoice
Flyer
Brochure
Enter Icon
Invoice
Custom Job list
Fig. 16
1.
2.
3.


