background image


Page   13


1.

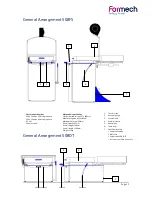
Touch screen. 

One touch screen for the full process with the ability to store programs in the memory. 


3. 

Clamp Frame

. This holds the plastic material in position during the forming and release processes. 


4. 

Material Clamps

. These clamps fix the Clamp Frame firmly down.  After placing the plastic under the 

clamp frame the material clamps are adjusted by tightening or loosening the orange nutlets.  The levers are 
pulled up until they are fully over-centre.  Adjustment may only be carried out while not under pressure.  The 
rear of the  
clamp frame is completely self adjusting. 

5

. Heater Box

.  This carries the heating elements and is drawn forward by pulling the centrally mounted 

handle. 

6. 

Table Lever

.  When pulled towards you the table will rise to the upper limit. A further application of 

pressure will lock the table in this position.  During forming the table complete with mould is lifted into the 
hot plastic and locked in place to ensure a good vacuum seal.  At the end of the cycle the table is returned 
to the lower position by pushing the handle back and away. 

 
7. 

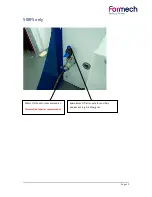
Air pressure outlet

.  

The air pressure outlet lets you power other equipment that require air pressure and 

this is created by the exhaust from the vacuum pump. Do not connect compressed air to this outlet.


(508DT only) 

 
7. 

Specification Plate

. This states the model type, electrical supply needed to power the machine & other 

essential data. 

7. 

Power connection

. You will need to use 2.5mm cable to connect it to a single phase 20amp socket


(508FS only). 

See Safety section at the beginning of this manual.  Note the safety labelling. 

7. 

Mains fuse

.  This fuse protects the machine and should only be replaced by another of same type and 

rating. 

7. 

Power Switch ON/OFF

. This is the main switch. When in the OFF position power is cut to all functions.  

Before commencing any repair work always remove the mains lead from the Power Inlet Receptacle. 

Electrical   specifications   

240V,   13   amps,   50Hz   single   phase   

220V,   13   amps,   60Hz   single   phase   
3.2   kW   
13   amp   supply   

Mechanical   specification   

Standard   material   size   457   x   508mm   
Max   forming   area   432   x   482mm   
Max   depth   of   draw   185mm   

Overall   width   597mm   
Overall   height   560mm   
Overall   length   700mm   

Weight   100kg   

1-­‐


Touch   screen   

2-­‐


Vacuum   gauge   

3-­‐


Clamp   frame   

4-­‐


Material   clamp   

5-­‐


Heater   box   

6-­‐


Table   lever   

7-­‐


Specification   plate      
+   Power   inlet   receptacle      
+   Main   fuse      
+   Power   switch   ON/OFF      
+   Air   output   

DO   NOT   SUPPLY   COMPRESSED   AIR   TO   
THE   AIR   OUTPUT   

Summary of Contents for 508DT

Page 1: ...Page 1 Formech International Limited Installation Operating and Service Manual MODEL Formech 508DT Manual Vacuum Forming Machine...

Page 2: ...roduction and initial assembly 4 Optional extras 6 General Arrangement 508FS 7 General Arrangement 508DT 8 Operating procedures 10 F A Q 22 Warranty 22 Service Repair 23 REPLACING SEALS 23 Schematics...

Page 3: ...area you are working in is properly ventilated and that you are aware of the potential hazards from the plastics you are forming It is the responsibility of the owner or designated responsible person...

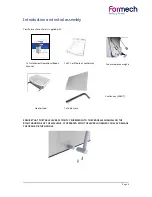
Page 4: ...ons Repair Manual 1x EC Certificate of conformity Heater shed 1x Table mesh ENSURE THAT THE TABLE LEVER IS TIGHTLY SCREWED INTO THE CRANK MECHANISM ON THE RIGHT HANDSIDE OF THE MACHINE IF OPERATED WIT...

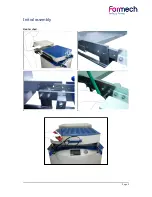
Page 5: ...Page 5 Initial assembly Heater shed 1 2 3 4...

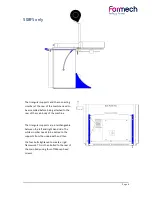
Page 6: ...o the rear of the main body of the machine The triangular supports are interchangeable between the left and right hand side The white crossbar needs to be bolted to the supports from the underneath an...

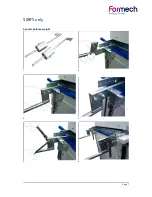
Page 7: ...Page 7 508FS only Counter balance weight 1 2 3 4 5 6...

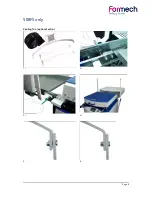
Page 8: ...Page 8 508FS only Cooling fan optional extra 1 2 3 4 5 6...

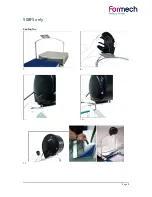
Page 9: ...Page 9 508FS only Cooling fan 7 8 9 10 11...

Page 10: ...Page 10 508FS only 10mm OD hose for compressed air This machine requires compressed air Spare 8mm OD air supply for ancillary equipment eg Air blow gun...

Page 11: ...replaced depending on the usage of the machine Therefore this kit contains the essential consumables seals and pump filter to ensure a good performance of your machine year on year 2 Formech has avail...

Page 12: ...wer connection Main fuse Power switch ON OFF Air input ancillary air output Electrical specifications 240V 13 amps 50Hz single phase 220V 13 amps 60Hz single phase 3 5 kW 20 amp supply Mechanical spec...

Page 13: ...outlet lets you power other equipment that require air pressure and this is created by the exhaust from the vacuum pump Do not connect compressed air to this outlet 508DT only 7 Specification Plate T...

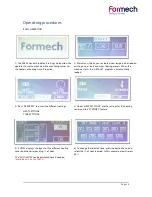
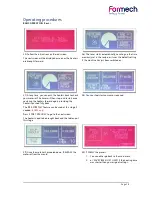
Page 14: ...en the machine starts the DEFAULT program is automatically loaded 3 Press NEW EDIT to access the different settings HEAT SETTINGS TIME SETTINGS 4 Under HEAT SETTINGS are the settings for the heating z...

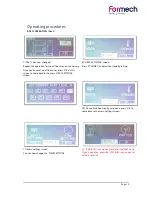
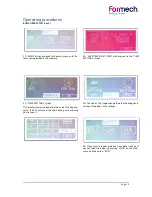
Page 15: ...reen to come back to the main HEAT SETTINGS screen 8 HEAT SETTINGS screen Press STANDBY to adjust the standby setting 10 Once all the heat settings are done press OK to come back to the main settings...

Page 16: ...Page 16 Operating procedures BASIC OPERATION Cont 18 Once you have been through all the different settings press SAVE to memorise these settings as a recipe...

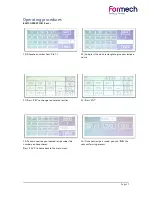
Page 17: ...d press the white rectangle to give your recipe a name 21 Press KEY to change to numerical entries 22 Press ENT 23 You can now see your named recipe under the number you have chosen Press SAVE to come...

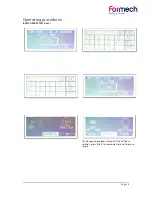
Page 18: ...k your material The timer will then stop and restart once you bring the heaters forward again providing the heater is pushed fully back The PRE STRETCH feature can be used at this stage if needed 508F...

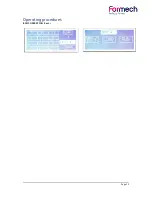
Page 19: ...TTINGS screen 33 TIME SETTINGS screen If the material was ready before the end of the heating cycle the PLC will record the new heating time allowing you to save it 34 You can at this stage change the...

Page 20: ...Page 20 Operating procedures BASIC OPERATION Cont...

Page 21: ...hot Insufficient vacuum Excess of material Use reducing windows Poor mould design Why can t I achieve good definition on the finished part Material too cold Mould too cold Insufficient vacuum Insuffi...

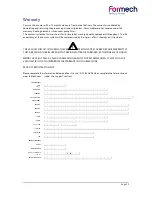
Page 22: ...INCLUDING THE VACUUM PUMP WILL NOT BE COVERED BY OUR WARRANTY IF THEY ARE FOUND TO BE BLOCKED WITH FOREIGN MATTER OR CORRODED BY THE INGRESS OF LIQUID NOTE THE USE OF TALC AS A MOULD RELEASING AGENT...

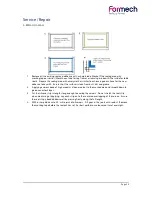
Page 23: ...and grease 2 Apply a generous bead of high modulus silicone sealant to the masked area and smooth down to give a consistent layer 3 Cut the silicone strip in lengths long enough to overlap the corner...

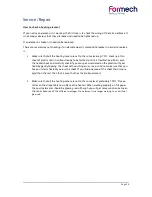
Page 24: ...flexible like rubber push the heaters back and carefully check if you can spot a cold area on the plastic with your hand by gently tapping the sheet with your fingers or use a stick to make sure that...

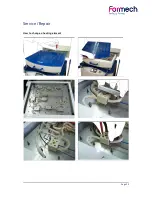
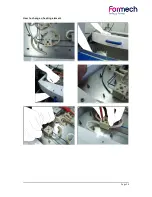
Page 25: ...Page 25 Service Repair How to change a heating element...

Page 26: ...Page 26 How to change a heating element...

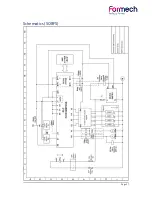
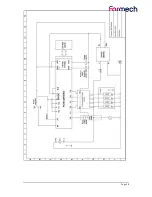
Page 27: ...Page 27 Schematics 5O8FS Schematics 5O8DT...

Page 28: ...Page 28...

Page 29: ...ender this declaration null and void Machine Description Vacuum Forming Machine Machine Function Thermoforming of Plastic Sheet Model Type 508DT 508FS Serial Number Date of Manufacture Is in conformit...

Page 30: ...Page 30 Revised date 23 11 2012...

Reviews: