background image

3

Thank you for purchasing a 

FORNO

 product. Please read the entire instruction manual before operating 

your new appliance for the first time. Whether you are an occasional user or an expert , it will be beneficial 

to familiarize yourself with the safety practices, features, operation and care recommendations of your 

appliance. 

Both the model and serial number are listed inside the product. For warranty purposes, you will also need 

the serial number, the date of purchase & a copy of your proof of purchase. 

Record this information below for future reference.

Use these number in any correspondance or 

service calls concerning your product. 

If  you  received  a  damaged  product, 

immediately contact 

FORNO.


Save  time  and  money.  Before  you  call  for 

service, check the Troubleshooting Guide. It 

lists the causes of minor operating problems 

that you can correct yourself. 

SERVICE IN CANADA & UNITED STATES 

Keep the instruction manual handy to answer your questions. You can also find all the information 

you need online at www.fornoappliances.com.  

 If you don't understand something or you need more assistance, please visit our website or call 

our Customer service: 1 866-231-8893 opt.2 ext.214 

Or email : mysupport@forno.ca 

If there is a problem, please contact FORNO customer service. All warranty work needs to be 

authorized by FORNO customer service. All of our authorized service providers are carefully 

selected and rigorously trained by us.


Summary of Contents for FFSGS6125-30

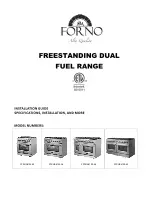
Page 1: ...FFSGS6125 60 FFSGS6125 48 FFSGS6125 36 FFSGS6125 30...

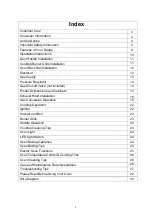
Page 2: ...ctrical Gas Supply Pressure Regulator Gas Shut off Valve not included Gas Conversion Operation Cooktop Operation Ignition Simmer and Boil Burner Grills Griddle Operation Cooktop Cleaning Tips Oven Lig...

Page 3: ...concerning your product If you received a damaged product immediately contact FORNO Save time and money Before you call for service check the Troubleshooting Guide It lists the causes of minor operati...

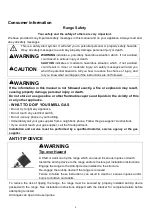
Page 4: ...mediately call your gas supplier from a neighbor s phone Follow the gas supplier sinstructions If you cannot reach your gas supplier call the fire department Installation and service must be performed...

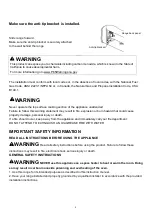
Page 5: ...by a qualified installer in accordance with the provided installation instructions Anti tip bracket Range back panel WARNING This product can expose you to chemicals including carbon monoxide which i...

Page 6: ...to the unit or the floor Failure to follow this advice may result in damage or personal injury 8 Be sure all packing materials are removed from the range before operating to prevent ignition of these...

Page 7: ...ical or foam type fire extinguisher If there is a fire in the oven during self clean turn the oven off and wait for the fire to go out Do not force the door open Introduction of fresh air at self clea...

Page 8: ...ion of flammable materials and spillage cookware handles should be turned toward the center of the range without extending over nearby burners Do not use a wok with a round metal support ring The ring...

Page 9: ...on all models Appearance may vary 1 Oven Vents 2 Cooktop Burner Grills 3 Griddle on some models 4 LED Light Switch 5 Control Panel 6 Oven Lights Switch 7 Broil Oven Control Knob 8 Temperature Control...

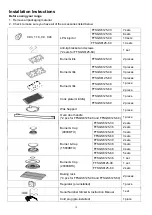
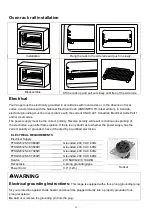
Page 10: ...umber Sticker Instruction Manual 1 set Oven door handle 2 pcs for FFSGS6125 48 and FFSGS6125 60 FFSGS6125 60 5 sets FFSGS6125 36 FFSGS6125 48 FFSGS6125 60 Burner Cap 20000BTU FFSGS6125 60 3 sets 1 set...

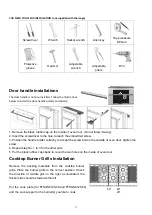
Page 11: ...hole to reach the embedded screw 3 Position the handle holder correctly to accept the screw bolt on the outside of oven door tighten the screw 4 Repeat step No 1 to 3 for the other side 5 Put the bla...

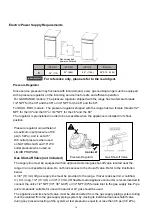
Page 12: ...in continuous sparking of the electrodes even after flame ignition If there is any doubt as to whether the power supply has the correct polarity or grounded have it checked by a qualified electrician...

Page 13: ...3 Connect the NEUTRAL receptacle terminal to the incoming NEUTRAL WHITE electrical supply wire 4 Connect the GROUND receptacle terminal to the incoming GROUND GREEN electrical supply wire This applia...

Page 14: ...inlet to the gas supply line Pipe joint compounds suitable for use with natural or LP gas should be used The appliance and its shut off valve must be disconnected from the gas supply piping system dur...

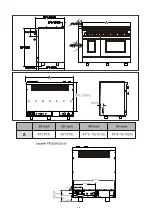
Page 15: ...nge may be installed directly adjacent to existing countertop height cabinets 36 or 91 5 cm from the floor To achieve the best look the cooktop should be level with the cabinet countertop This can be...

Page 16: ...16...

Page 17: ......

Page 18: ...sure both rows of burner ports are relighting each time 5 Check for gas leaks at all gas connections using a gas 6 Check oven bake and convection bake function Gas Conversion Operation This cooking ra...

Page 19: ...he gas regulator is located at the bottom back left corner of the range a Unscrew the cap from the regulator Do not remove the spring from the regulator b Unscrew the insert from the cap and turn it o...

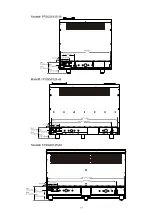
Page 20: ...IMPORTANT Keep the injectors removed from the range for future use 20 Model FFSGS6125 30 Model FFSGS6125 36 Model FFSGS6125 48 Model FFSGS6125 60...

Page 21: ...to prevent damage The oven door s can be removed to lighten the load or to fit the unit through a doorway Only remove if necessary Do not remove the griddle or any other component Door removal should...

Page 22: ...he gas supply piping system at test pressure equal to or less than 0 5 psi 3 5kPa DO NOT Forget Before Getting Started Remove the exterior and interior packing Clean the range thoroughly with hot wate...

Page 23: ...king jobs such as boiling water and cooking pasts flame intensity When you adjust the flame intensity watch the flame when you turn the knob Any flame engulf the cookware is wasted The flame should st...

Page 24: ...ks before preheating the oven 3 Reduce the oven temperature 57 2 F 14 C when cooking in heat proof glass or glass ceramic dishes WARNING This range is designed for closed door cooking only Always cook...

Page 25: ...ake Function provides a more uniform heat result than a conventional oven seal quickly Pre heating is not necessary This setting is ideal for batch baking or a complete meal It is highly recommended f...

Page 26: ...ater Towel dry Burner pan Remove surface debris before cleaning to help speed up the cleaning process and decrease the chance of scratching the surface during cleaning Using mild abrasive cleaners or...

Page 27: ...ner Oven Lights Do Not Work The light bulb is defective Unscrew the light cover inside the oven replace the light with a 25 watt halogen bulb Oven Racks Are Hard To Slide Do not spray with a cooking s...

Page 28: ...ure is back to normal Condensation Or Fogging On The Inside of the Door Glass Condensation or fogging on the inside of the oven door glass is normal during the preheating of the oven and will evaporat...

Page 29: ...le withcare For better Broil efficiency pre heat to MAX for 8 Minutes and turn the knob to broil Cooking tips 1 Pizza Place rack on bottom level at 375F for 16 minutes then broil 2 to 3 minutes on top...

Page 30: ...Wire Diagram 30...

Page 31: ...31...

Page 32: ...32...

Page 33: ...33...

Page 34: ...2022 06...

Reviews: