background image

Connecting to the FortiGate Unit

The FortiGate unit requires some basic configuration to add it to your 
network. These basic steps include assigning IP addresses, DNS 
settings, and the default gateway. Until these steps are completed 
traffic will not flow through the device.
The FortiGate unit can be configured using the GUI or the CLI.
This section will step you through both methods of connecting to the 
unit. Use whichever method you are most comfortable with.

To Connect to the GUI:
1. 

Connect the FortiGate unit MGMT1 port to a management computer 
using the provided Ethernet cable.

2. 

Configure the management computer to be on the same subnet as 
the internal interface of the FortiGate unit:

a. 

Browse to the 

Network and Sharing Center > Change Adapter 

Settings > Local Area Connection Properties > Internet Protocol 
Version 4 (TCP/IPv4) Properties

.

b. 

Change the IP address of the management computer to 
192.168.1.2 and the netmask to 255.255.255.0.

3. 

To access the FortiGate unit GUI, start a browser of your choice 
and browse to https://192.168.1.99 (remember to include the “s” in 
https://).

4. 

Type 

admin

 in the 

Name

 field, leave the 

Password

 field blank, and 

select 

Login

.

You can now proceed with configuring your FortiGate unit.

To Connect to the CLI:

You can configure all FortiGate configuration options from the CLI 
using 

config

 commands. The CLI also includes 

get

show

diagnose

and 

execute

 commands for performing various configuration and 

monitoring tasks.

1. 

Connect the FortiGate unit console port to the management 
computer using the provided console cable.

2. 

Start a terminal emulation program on the management computer. 
Use the following settings:

•  Baud Rate:  9600
•  Data bits: 

8

•  Parity:  

None

•  Stop bits: 

1

•  Flow Control: None

3. 

Press 

Enter

 on your keyboard to connect to the CLI.

4. 

Type 

admin

 in the 

Name

 field, leave the 

Password

 field blank, and 

press 

Enter

.

You can now proceed with configuring your FortiGate unit.

FSM Modules

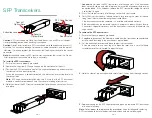
Power down the system prior to inserting or removing a FSM module.

To insert the FSM module:

1. 

Insert the module into the FSM slot on the unit with the Fortinet and/
or “THIS SIDE UP” labels facing upwards.

2. 

Close the latch.

Page 6

Page 7

Summary of Contents for FortiGate 3040B

Page 1: ...FortiGate 3040B QuickStart Guide...

Page 2: ...rrants that the identified product will perform according to certain expressly identified performance metrics and in such event only the specific performance metrics expressly identified in such bindi...

Page 3: ...lidated security solutions provide an integrated set of core security and network services in a single easy to manage high performance appliance that is capable of supporting a wide range of deploymen...

Page 4: ...Gate unit conforms to requirements and that the unit is level then tighten the rack mount screws with an applicable screwdriver 7 Using the provided power cables plug the cables into the rear of the u...

Page 5: ...ick into place it may not be aligned correctly or may be upside down If this happens remove the SFP transceiver realign it or rotate it and slide it in again 5 Press the transceiver firmly into the ca...

Page 6: ...GUI start a browser of your choice and browse to https 192 168 1 99 remember to include the s in https 4 Type admin in the Name field leave the Password field blank and select Login You can now proce...

Page 7: ...Port is connected at 100Mbps Off Port is connected at 10Mbps 7 Ports 1 18 Link Green Port is online Off Port is offline 7 Ports 1 18 Activity Flashing Green Port is transmitting and receiving data Off...

Page 8: ...in a residential area is likely to cause harmful interference in which case the user will be required to correct the interference at his own expense WARNING Any changes or modifications to this produc...

Page 9: ...stem Administration Guide This guide describes initial configuration of your FortiGate unit centralized management tightening security best practices and configuration examples Fundamentals Guide This...

Page 10: ...superior in all material respects to the defective Hardware The Hardware Warranty Period for the repaired or replacement Hardware shall be for the greater of the remaining Hardware Warranty Period or...

Page 11: ...e Program or its derivative works These actions are prohibited by law if you do not accept this License Therefore by modifying or distributing the Program or any work based on the Page 16 Program you...

Page 12: ...tribute 7 You may place library facilities that are a work based on the Library side by side in a single library together with other library facilities not covered by this License and distribute such...

Page 13: ......

Page 14: ......

Reviews: