Deployment
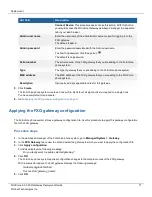
You have completed this procedure.
6.
Go to
Verifying the FXO gateway association on page 18
Verifying the FXO gateway association
Use this procedure to verify that the association of the FXO gateway with the FortiVoice phone system is successful.
Procedure steps
1.
In the web-based manager of the FortiVoice phone system, go to
Trunk > Gateway
.
2.
Locate the trunk entry for the FXO gateway.
3.
Verify that the
Status
column shows
In service
.
You have completed this procedure.
4.
Go to
Adding an FXO gateway trunk to an inbound dial plan on page 18
Adding an FXO gateway trunk to an inbound dial plan
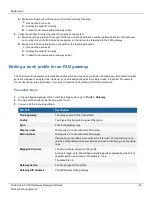
Use this procedure to add an FXO gateway trunk to an inbound dial plan. This plan defines the call flow for incoming
calls to the FortiVoice phone system.
Procedure steps
1.
In the web-based manager of the FortiVoice phone system, go to
Call Routing > Inbound
.
2.
In the
Inbound
tab, click
New
.
3.
In the
Name
field, enter a unique name for this inbound dial plan.
4.
In the
From Trunk
section, select the trunk profile in the
Available
list and click
->
to move your selection to the
Selected
list.
5.
In the
Call Handling
section, update the settings to address your requirements for inbound call routing.
6.
Click
Create
.
You have completed this procedure.
7.
Go to
Adding an FXO gateway trunk to an outbound dial plan on page 18
Adding an FXO gateway trunk to an outbound dial plan
Use this procedure to add an FXO gateway trunk to an outbound dial plan. This plan defines the call flow for outbound
calls from the FortiVoice phone system.
FortiVoice 6.0.5 FXO Gateway Deployment Guide
18
Fortinet Technologies Inc.


